4
Only use as changing unit if completely assembled!
IMPORTANT -
CAREFULLY! -
KEEP FOR FUTURE REFERENCE
PLEASE READ
THIS CHANGING UNIT COMPLIES WITH THE EUROPEAN NORMS:
DIN EN 12221-1
EN 71/3
Please note:
Use only original accessories and spare parts from the producer or from the providers.
The changing mat must be fastened with proper double sided adhesive tape or with self-adhesive Velcro.
Assembly instructions:
Maintenance:
What else you should know:
WARNING!
Do not leave your child unattended.
Safety requirements:
Please check regularly that the screws are well tightened. The screws should not be loose, as children could squeeze certain parts of their body or catch
items of clothing (e.g. laces, necklaces, bands, dolls etc.). These might present the hazard of strangulation. Please set up the changing unit so that the
changing board is leaning directly against the wall. Tilting can be prevented by tightly anchoring the changing board in the wall. Use only appropriate
screws and wall plugs for changing units that are meant to be fixed to the wall. Check the wall to determine whether the wall plug is suitable for it.
Please revert to our safety frame ‘Gabriel’ to have an optimum protection border.
Take into consideration the risks of open fires and other strong heat sources like electric heaters, gas stoves etc. in the close proximity of the changing
unit.
Do not use the changing unit if single parts are broken, torn or missing. Synthetic bags or other synthetic elements/wrappings should be immediately
removed or kept out of the reach of children!
Keep the assembly plan and the hex key for future disassembly or assembly.
Please use only the enclosed hex key and a screwdriver for the assembly.
Do not use the changing unit if single parts are broken, torn or missing. Should your changing unit be featured with castors, they have to be
locked before using.
To avoid damaging the product, do not use an electric screwdriver for tightening
the screws!
Please take into consideration that the parts should be assembled on an even, flat surface. Make sure that the article is not inclined.
In order to protect the article and the floor, we recommend using the packaging of the article as underlay during the assembly.
If necessary, clean the changing unit with a damp cloth and dry the surface afterwards.
In producing our furniture and toys we only use materials, oils, varnishes and glazes that do not pose a health hazard and are appropriate for children's
furniture. As a result of the production process, new furniture can sometimes retain a specific odor. To counter this harmless inconvenience we
recommend repeated venting.
For service cases:
If, despite constant supervision of the production process, a flaw should turn up, please mark the respective part clearly in this assembly plan. Print the
Customer Service contact form from our website, www.pinolino.de. Shortly describe the flaw or the problem. Send the complete assembly plan, a copy of
the receipt and the Customer Service contact form, which you have filled in, with the specification of the serial number (it can be found on the packaging,
on the assembly instructions and on the article), to our address below.
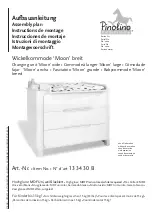
Dear clients,
We are glad that you have chosen this premium product. We, the Pinolino staff, have manufactured this item with greatest care. The materials that were
used are eco-friendly and comply with the strict European safety standards.
To spare you unnecessary effort, carefully read the assembly instructions first. Check whether you have all the parts and study the illustrations carefully
before you start the assembly. Improper handling or assembly and especially construction alterations will void all warranty claims.
Содержание 13 34 30 B
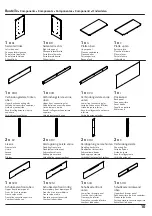
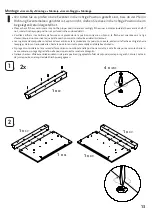
Страница 14: ...14 3 4 1 x KVU 1 x WBE 1 x KVU 1 x C 5 1 x KDV 1 x KDV 20 x WBE 6 x VFZ 6 40...
Страница 16: ...16 8 1 x I 1 x KVO 1 x KHO...
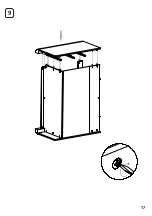
Страница 17: ...17 9...
Страница 18: ...18 11 10 1 x G 8 x WBE 1 x G...
Страница 19: ...19 13 12 20 x WBE 1 x SVO 1 x SVM 1 x SVU 2 x WBE 1 x SHO...
Страница 21: ...21 16 1 x SHU 1 x SB 1 x KUS 1 x SL 1 x SR 6 x VS 4 40 2x 17 1 x SVM 1 x SVU...
Страница 23: ...23 19 20 3 x WBE 2 x VFZ 6 40 1 x KOR 1 x KOL 1 x GTV 1 x GTH...
Страница 24: ...24 21 22 1 x KOH 3 VFZ 6 40 1 x WI x und and et y e en 4 VFZ 6 60 1 x WI x und and et y e en...
Страница 25: ...25 23 1 x N4 und and et y e en 1 x WK und and et y e en 1 x VS 3 5 14 24...
Страница 27: ...27 C D...

