ZX SERIES USER MANUAL
83
CHAPTER VI - SOFTWARE OPERATION
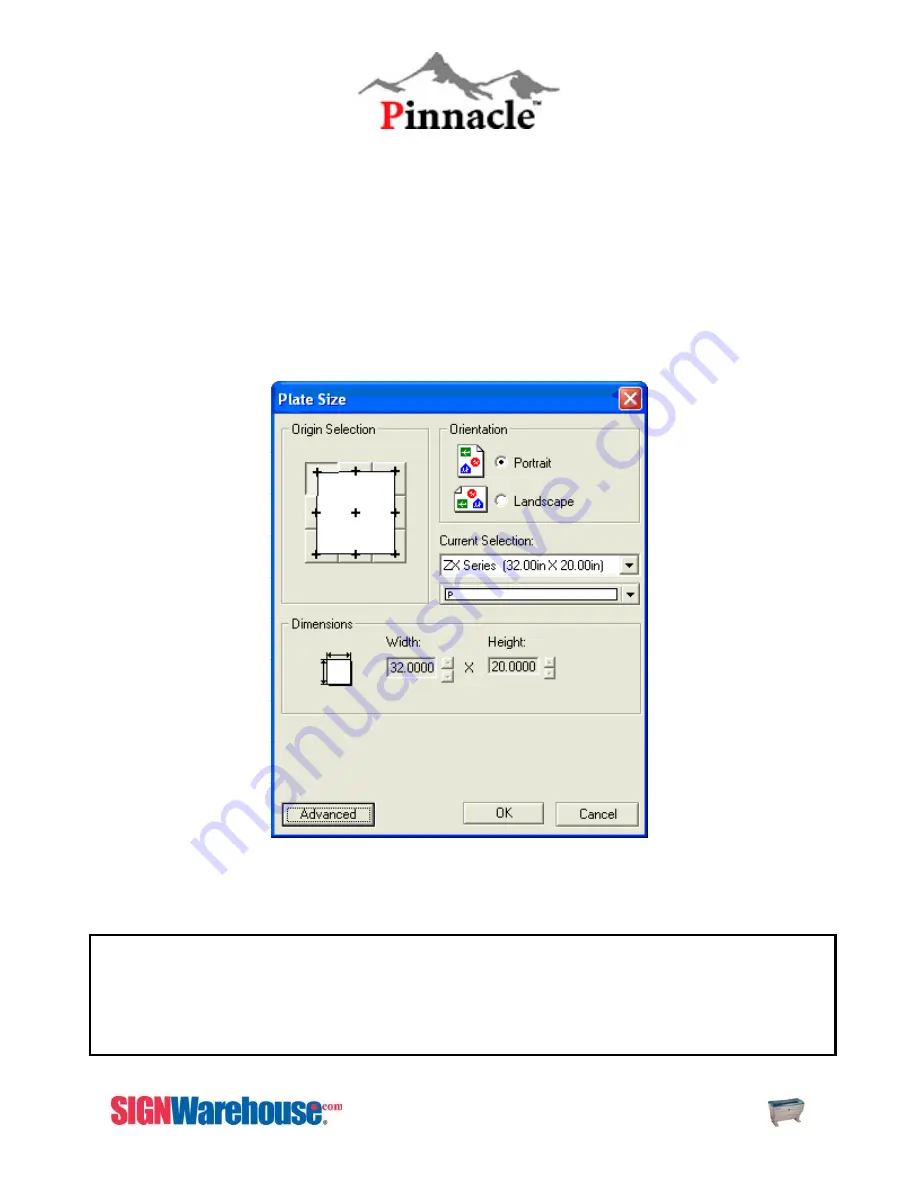
EngraveLab 6 Software SetupPage Setup
Laser Express (EngraveLab) page size settings
:
Step1
: Layout > Plate Size > Advanced > Create and Add new plate size.
Step2
: In the name portion, type in ‘ZX-Series.’ Type 32.00 in the Width box and 20.00 in the Height box. Click
Add New Plate. Change Current Selection to ZX Series.
Step3
: Make sure to select the upper-left hand corner in the origin selection (as shown below).
Step4:
Ensure the
Landscape
option is checked.
Step5
: Click OK to complete the
page size
setting. Now your blank size should reflect the same size as the ZX-
Series table.
Note :
In some instances, the laser’s LCD panel shows a message of “Graph was clipped” or the
laser engraver is engraving at some strange location in an unpredictable way. The result engraved
artwork is scrapped.
This is caused by your software’s page size being wrong or having images sit on edge of paper.
Confirm that the page size is right and image is inside plate area. Resend image to laser.
Содержание LaserPro ZX Series
Страница 1: ......
Страница 21: ...ZX Series USER MANUAL 20 Fig 3 10 Remove mirror 1 Fig 3 11 Red Pointer Access Panel Red Pointer Access Panel...
Страница 22: ...ZX Series USER MANUAL 21 Fig 3 12 Red Pointer Access Red Pointer Access...
Страница 32: ...ZX Series USER MANUAL 31...
Страница 39: ...ZX Series USER MANUAL 38...
Страница 82: ...ZX SERIES USER MANUAL 81 Firmware FPGA Back Fig 5 37 Machine Information Page 2...
Страница 86: ...ZX SERIES USER MANUAL 85...


