background image

 
43. Undersized or overloaded service wiring. 
Remedy: Call your electrical contractor. 
 

44. Power surge. 
Remedy: Call your electrical contractor. 
 
45. Power short in unit. 
Remedy: Locate short circuit and correct. 

 
46. Pellets in hopper are giving off an odor. 
Remedy: Change the brand of pellets you are using, some species of wood have unpleasant 
odors. 
 
47. Mounting bolts on the blower are loose. 

Remedy: Tighten the mounting bolts. 


48. Remote thermostat is not level. 
Remedy: Level the thermostat using a water bulb. 
 
49. Ash pan door or other heat exchanger cover plate not on tight. 

Remedy: Tighten all nuts and check all gaskets. 
 
50. Thermostat wires are shorting out. 
Remedy: Remove thermostat from the base, if burner continues to run, go back to tie in at 
primary control yellow leads, disconnect and separate, if burner stops, then  
you have a short in the remote wires. Trace and correct or replace. Look for tacks or nails 

through wires. 
 
51. A bearing is failing on the blower motor. 
Remedy: Replace the blower. 
 

52. Fan limit control is stuck. 
Remedy: Make sure that the white button is in the auto position, tap the fan limit control 
lightly. If this does not shut of the blower then replace the fan limit control. 
 
53. Bad pellets. 

Remedy: Are you using approved pellets that meet the manufacturer's specifications? Use 
of non approved pellets will impair the functioning of your stove and may void your 
warranty. 
 
54. That's the nature of the Honeywell T87F thermostat. 

Remedy: Adjust thermostat to your comfort level not a numbered dial. 
 
55. Normal draft inducer hum anytime the unit is plugged in. 
Remedy: Install duro-dyne duct isolator. 
 
56. Blower blades are dirty and full of lint and/or hair. 

Remedy: Clean the blades. 
 
57. Draft inducer blades are dirty and full of lint and/or hair. 
Remedy: Clean the blades. 


58. Furnace venting improperly installed. 

Remedy: Check installation manual to verify correct install on unit. 


25

Содержание GBU070

Страница 1: ... performance and safe operations please follow the detailed information provided with each furnace We require that a licensed bonded heating contractor install the unit and that a permit be obtained for the unit installation PINNACLE STOVE SALES INC 1089 HIGHWAY 97 NORTH QUESNEL BC V2J 2Y3 TEL 250 992 5050 FAX 250 992 5850 GBU070 PELLET CORN FURNACE ...

Страница 2: ...VERTICAL CHIMNEYS pg 8 DUCTING PRIMARY FURNACE pg 9 ELECTRICAL REQUIREMENTS pg 10 THERMOSTAT INSTALLATION pg 10 TURNING OFF THE UNIT pg 11 MAINTENANCE pg 11 BURNING CORN pg 12 WIRING DIAGRAM pg 13 START UP INSTRUCTIONS PELLET pg 14 START UP INSTRUCTIONS CORN pg 15 PRIMARY CONTROL SEQUENCE OF OPERATION OII 350S pg 16 TROUBLE SHOOTING pg 17 26 PARTS LIST pg 27 WARRANTY pg 28 1 ...

Страница 3: ...TH 24 DEPTH 33 WEIGHT 385 lbs VOLTS 110 V FLUE SIZE 4 Pellet Vent BREACH Rear HOPPER CAPACITY 80 lbs BTU INPUT 70 000 BTU HR OVERALL UNIT EFFICIENCY 80 WARM AIR OUTLET SIZE 12 X 12 BLOWER hp 1250 CFM COLD AIR RETURN FILTER SIZE 15 X 24 2 ...

Страница 4: ...a 200 F limit where if the temperature for whatever reason may climb to 200 F this control cuts power to burner but keeps the blower running to cool the heat exchanger NOTE IF YOU ARE REPLACING THE FAN LIMIT CONTROL MAKE SURE THE BRASS CONNECTOR IN THE MIDDLE IS SNIPPED OR REMOVED IF IT IS NOT IT WILL RUN CONTINUOUSLY FIREPOT The fire pot is where combustion occurs Pellets are delivered into the f...

Страница 5: ...ays have a smoke or ionization detector installed in your home 14 Disclaimer notice No guarantee is made regarding the heating capacity of this unit The actual area that this unit will heat depends on factors such as conditions of the building heat loss type of construction the amount of insulation type of air movement and the location of the furnace 15 The manufacturer accepts no responsibility f...

Страница 6: ...n a cold furnace Never add pellets by hand to a smouldering fire or a hot fire pot DANGEROUS smoking could result 22 After lighting make sure the main fire door and ash door are closed and sealed tight 23 Set combustion air damper at not less than 50 Damper settings will vary widely depending on draft characteristics of your chimney system The unit should emit no visible smoke from the exhaust if ...

Страница 7: ...CLEARANCE TO COMBUSTIBLES 6 ...

Страница 8: ...ation of the Class L connector into the masonry chimney is sound and secured with high temperature cement Seal all joints with high temperature silicone Class L connector should maintain a pitch on rise from the furnace to the chimney of at least per foot AN APPROVED 4 LINER MUST BE USED IN MASONRY CHIMNEYS Your new furnace is so efficient an unlined chimney could remain cold and cause a downward ...

Страница 9: ... least three 3 feet above the highest point when they pass through the roof of the building and at least two 2 feet higher than any portion of any building within ten 10 feet HIGH BUILDING OR SECTION OF BUILDING COMBUSTION AIR Furnaces must have air oxygen for proper performance The incomplete combustion that takes place when a furnace is air starved causes carbon monoxide CO to be formed in quant...

Страница 10: ...ted by the furnace to the areas outside the space containing the furnace the return air must also be handled by a duct sealed to the furnace casing and terminating outside the space containing the furnace Where there is no complete return duct system the return connection must be run full size to a point outside the furnace room Air duct systems should be installed in accordance with standards for...

Страница 11: ...e protector must be used to have electrical items warranted THERMOSTAT INSTALLATION THERMOSTAT IS SUPPLIED WITH UNIT 1 Install the thermostat in a central location A low voltage 2 wire thermostat should be used and installed according to manufacturers directions supplied with the thermostat 2 Run the thermostat wire 18 2 wire 3 For best operation mount the thermostat on a draft free inside wall if...

Страница 12: ...r any residue build up Clean and dispose of them when completely cooled 3 Remove the two heat exchanger access panels twice per burning season and check the heat exchanger for ash Vacuum if necessary Replace gasket material if any tearing or deterioration occurs 4 Annually check the blowers for lint deposits from carpeting dryer lint furniture coverings pet hair etc 5 Inspect the flue pipe or vent...

Страница 13: ...start Place 1 of coarse oyster shell in the bottom of the pot before using Use a non volatile approved fire starter to light the pellets 6 Corn has more BTU s than wood pellets about 1 000 BTU s per pound more Thus the furnace may have to be metered down to prevent over firing 7 IT MAY SERIOUSLY DAMAGE YOUR POT If you have a spare pot you can let the used pot sit in the air for 2 3 days the clinke...

Страница 14: ...ZARD OR DAMAGE TO LOW VOLTAGE CONTROLS ON ALL GBU070 TRAGER MODELS THE BRASS JUMPER MUST BE REMOVED BD 01 19 02 REV 2 GBU070 FURNACE WIRING 2 WIRE LOW VOLTAGE THERMOSTAT YELLOW YELLOW CUP MOTOR AUGER MOTOR DRAFT FAN MANUAL RESET WHITE ORANGE WHITE BLACK ORANGE BLOWER 1 4 HP DIRECT DRIVE SAFETY DISC RED WHITE YELLOW RED ORANGE WHITE GREEN BLUE BLACK YELLOW L1 L2 GND 110 VOLTS A C RED BLUE YELLOW PU...

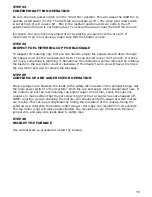
Страница 15: ...pot and see if the draft inducer is forcing air into the fire pot Turn the power switch back to off 6 Load the hopper with pellets 7 Place approximately 2 full cups of pellets in the bottom of the fire pot Apply non volatile lighting material such as gel alcohol or other pellet appliance approved lighter Light fire NOTE NEVER use charcoal lighter or kerosene to light the pellets 8 Let burn for 5 m...

Страница 16: ...k to off 20 Check the hopper to insure that nothing is obstructing the feed cup Load the hopper with corn 21 Place a 1 of oyster shell and approximately 2 full cups of pellets in the bottom of the fire pot Apply non volatile lighting material such as gel alcohol or other pellet appliance approved lighter Light fire NOTE NEVER use charcoal lighter or kerosene to light the pellets 22 Let fire burn f...

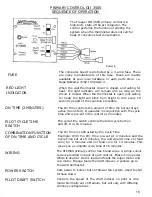
Страница 17: ... 0II350S primary control has 6 lead wires A wiring colour code is provided on back of each control Black is line power White is neutral Red is load and feeds the auger motor and cup motor Orange feeds the draft inducer 2 yellows go to the wall thermostat The On Time is subtracted by the Cycle Time Example With the On Time pre set at 2 minutes and the Cycle Time set at 16 minutes the unit would com...

Страница 18: ...t with the Honeywell trade line label It will have a white button Pull the switch to the on position Should the blower fail to come one the first step is to check the power source If the power source is OK you will need to make sure that all wire leads are properly connected If the blower still fails to run replacement will be necessary STEP 2 CONFIRM POWER TO CONTROL BOARD Turn Main power switch ...

Страница 19: ... removed by rotating the blade on the cup motor counter clockwise If this doesn t work you will have to remove the cup motor and cup to remove the blockage STEP 5 CONFIRM CUP AND AUGER MOTOR OPERATION Place a jumper wire between the leads to the safety disc located on the exhaust flange Set the main power switch to feed system Both the cup and auger motor should start now If the motors run but the...

Страница 20: ... a barometric damper Pellet Vent Install a barometric damper PROBLEM Smoking SOLUTION Make sure that the chimney is not direct vented on a windy side of the house Also check gaskets to insure proper sealing Adjust damper opening might be too far closed Is heat exchanger clean Is chimney clean PROBLEM Auger squeaks SOLUTION Adjust pillow block bearing by loosening screws on each side Let auger run ...

Страница 21: ... fuse or circuit breaker CHECK CAUSES 2 3 7 8 16 17 27 43 44 or 45 3 Unit will not lock in on start up CHECK CAUSES 2 5 10 11 15 20 21 25 or 34 4 Fire has gone out during turned down pilot time CHECK CAUSES 1 2 5 10 11 14 15 20 21 23 24 28 39 40 or 42 PERFORMANCE DEFICIENCIES 5 Unit burns with a dirty lazy flame CHECK CAUSES 5 29 36 40 59 or 60 6 Furnace burns too many pellets CHECK CAUSES 5 14 21...

Страница 22: ... 20 21 29 35 36 37 40 46 49 or 58 18 Dust in the room and on the furniture CHECK CAUSES 4 6 35 41 49 or 59 19 Large amounts of unburned pellets in ash pan CHECK CAUSES 5 20 21 29 36 37 40 53 or 57 20 Large amount of soft ash and hard clinkers in firepot CHECK CAUSES 53 21 Furnace smokes out vent running on pilot or full burn CHECK CAUSES 5 13 14 20 21 28 29 34 37 39 40 or 53 22 The Furnace makes t...

Страница 23: ...you are sure that it is not reacting to temperature then you can test its defectiveness by bypassing from one terminal to another If burner activates after bypassing then replace safety disc 11 Safety disc is set wrong Remedy Reset the safety disc according to manufacturers recommended settings 12 Fan limit control settings are off Remedy The first peg is the fan off setting at which temperature t...

Страница 24: ... line or replace the entire line 20 Draft rheostat on primary control set too low Remedy Switch draft setting to next highest setting 21 Draft rheostat on primary control set too high Remedy Switch draft setting to next lowest setting 22 Defective blower motor Remedy Depress white button on fan limit control to check blower activation If not activated pullout white button and connect power directl...

Страница 25: ...to be heated Remedy Replace with a smaller unit or provide more air distribution to other rooms 34 Not enough pellets placed in firepot on start up to bring the furnace up to lock in temperature on the safety disc Remedy Stop operation let the unit cool never place pellets by hand into a hot firepot and re light with more 2 3 cups pellets in the firepot 35 Door or glass seal worn or broken Remedy ...

Страница 26: ...e wires Trace and correct or replace Look for tacks or nails through wires 51 A bearing is failing on the blower motor Remedy Replace the blower 52 Fan limit control is stuck Remedy Make sure that the white button is in the auto position tap the fan limit control lightly If this does not shut of the blower then replace the fan limit control 53 Bad pellets Remedy Are you using approved pellets that...

Страница 27: ...m air filter is dirty Remedy Remove from furnace and wash 60 Inadequate return air Too small restricted or is pulling unconditioned air Remedy Consult qualified HVAC ducting contractor for proper installation 26 ...

Страница 28: ... inducer F000103A 5 lovejoy coupling F000507P 12 Auger shaft assembly F070910P 6 Spider F000505P 13A Fire pot complete F070954A corn 7 lovejoy coupling F000507P 13B Cast pot liner F062700P corn 13C Pellet pot F070903S pellet Durham or Dayton brand auger motors use 3 8 coupler Merkle Korff brand auger motor uses coupler Corn pots are 2 piece units consisting of a stainless steel holder with a remov...

Страница 29: ...hip in covered components and that the other terms and conditions of this warranty have been complied with the manufacturer s sole duty and liability under this warranty shall be limited to the manufacturer s replacement or repair at manufacturer s option of the defective unit or part The purchaser shall assume all costs of shipping to and from the manufacturer Removal reinstallation and diagnosti...

Отзывы: