Soyez vigilant
lors de
la manipulation
du produit,
afin d’éviter
d’endommager le
fini ou
le produit.
Fermer l’entrée
d’eau principale.
colonne.
Tout
simplement passer
le flexible
d’alimentation par
le trou
et ensuite
fixer la
tête avec
les 4
écrous et
rondelles
flexible de
la tête
de douche
au connecteur
respectif sur
le brut.
centre de
la valve
thermostatique jusqu’au
sol et
vérifiez si
la hauteur
vous
l’endroit avec
un crayon
gras, faites
un trou
à la
perceuse et
fixez les
supports. (Note
: Il
est possible
de devoir
utiliser d’autres
fixations
supports du bas n’entrave pas à l’installation des flexibles.
Raccordez la
colonne aux
entrées d’eau
avec les
flexibles de
la
colonne. Surtout,
ne pas
changer les
flexibles car
ceci annule
Ouvrez l’eau
et vérifiez
que l’eau
circule bien
dans la
colonne de
douche
et vérifiez
qu’il n’y
a pas
de fuite
en ouvrant
chacune des
fonctions l’une
après l’autre, avant de la fixer au mur.
***Si requis,
appliquez quelques
petit points
de fixation
douche pour la fixer la en place.***
tordre excessivement
les boyaux
flexibles
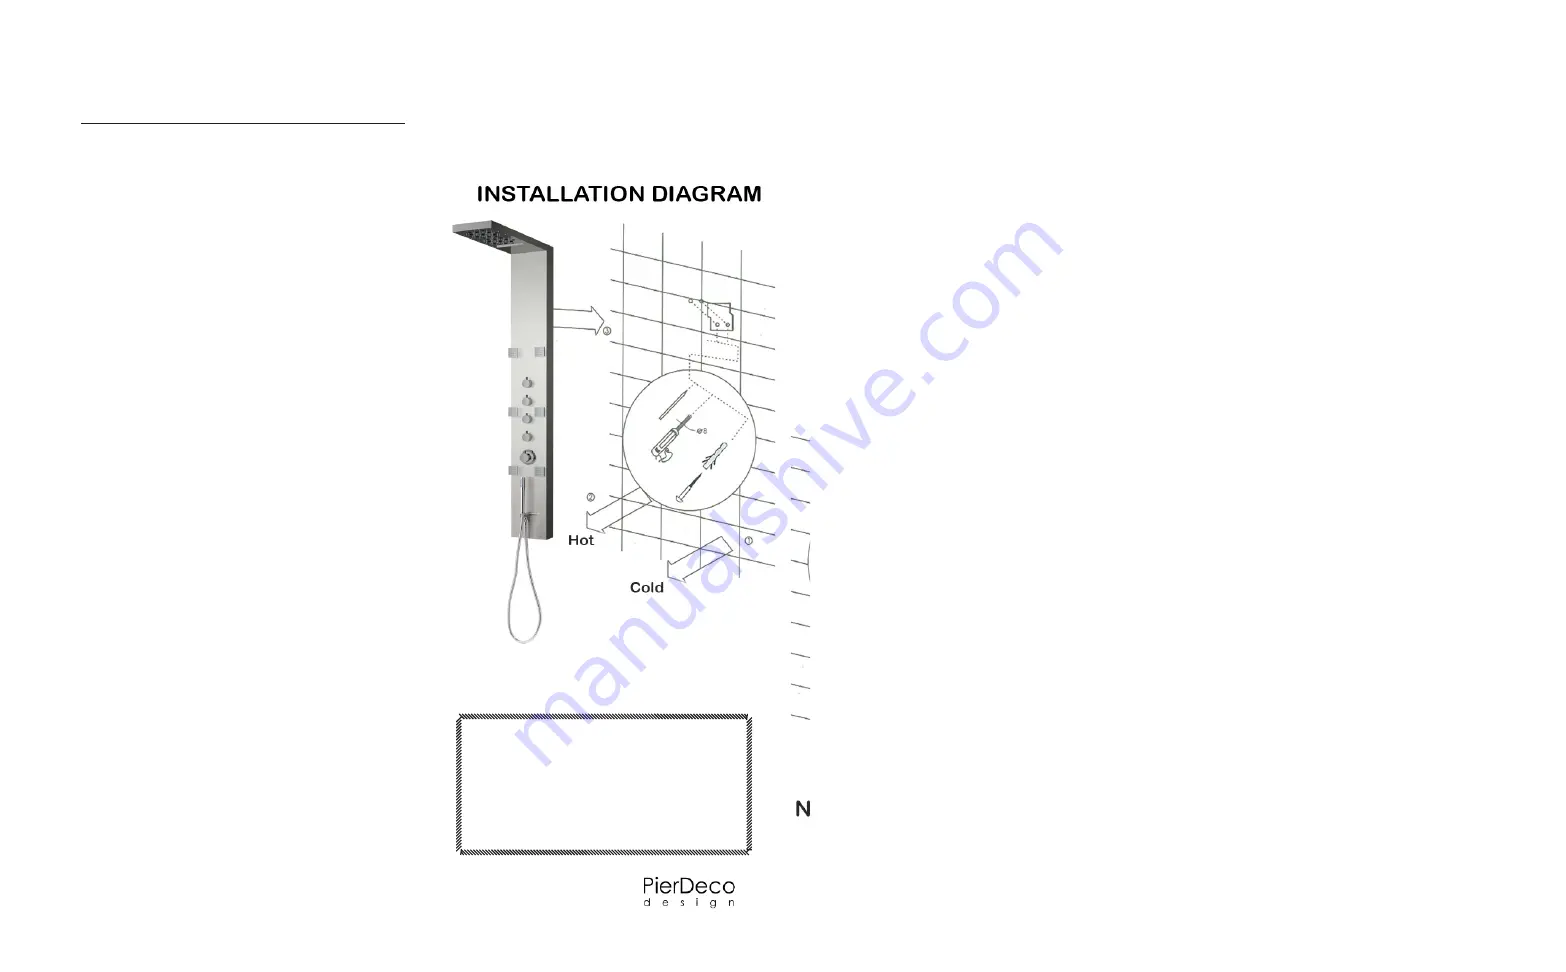
INSTALLATION
1.
During the installation manipulate the tools and shower column with
great care to avoid damages and scratches. Shut off the water at the
main before starting the installation.
2.
Step 1 is to connect the shower head to the body of the
column. Simply pass the water supply through the hole and
then fix the head by means of 4 nuts and bolts supplied in
your assembly kit. Connect the shower head water supply
to the respective connector on the rough inside the column.
3.
We recommend to install the column at 33” (83.8 cm) from the lever
handle (thermostatic valve) to the floor. Determine if the height is
suitable and appropriate for yourself and the other users.
4.
Install the water lines at 30” (76.2 cm) from the floor and leave a
gap of 4“ (10.2 cm) between the hot and cold water line. Use 1/2“
diameter pipe with 90° 1/2“ male adaptor (adaptors not included).
5.
On the back of the shower column, where the water supply line
comes out of the wall, it is important to seal the space between the
ceramic and the pipe with silicone to prevent water seepage into the
wall.
6.
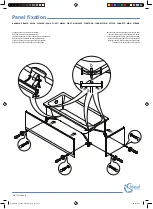
Install each wall bracket at the desired height. Use a pencil and a
leveller before drilling each hole, then install the two brackets. (your
wall structure may require additional anchors and screws.) Please
make sure the bottom brackets don’t interfere with the supply lines.
7.
Connect the hot and cold flexible stainless steel hoses to the water
adaptors previously installed on your water supply line and slide
the shower column in place. Do not replace the flexibles for it will
automatically void your warranty.
8.
Turn on the main water supply line and check carefully for leaks
*****Apply a few thin spots of lear silicone on each side
of the shower column to secure it in place.*****
Note :
Be careful not to squeeze the two stainless
steel flexible hoses during the repositioning so
as not to damage them or restrict the water flow.
Page 4
Содержание AQUAMASSAGE PD-890
Страница 1: ...Owner s manual PD 890...
Страница 8: ...10f16 Inspect par Inspected by Date...


