background image

Picote Solutions Oy Ltd


www.picoteinstitute.com


MINI CLEANER


MINI MILLER 8/16 | MINI C 8/16


MINI CLEANER


MINI MILLER 8/16 | MINI C 8/16


MINI COATING PUMP


OPERATION, SAFETY & INSTALLATION MANUAL


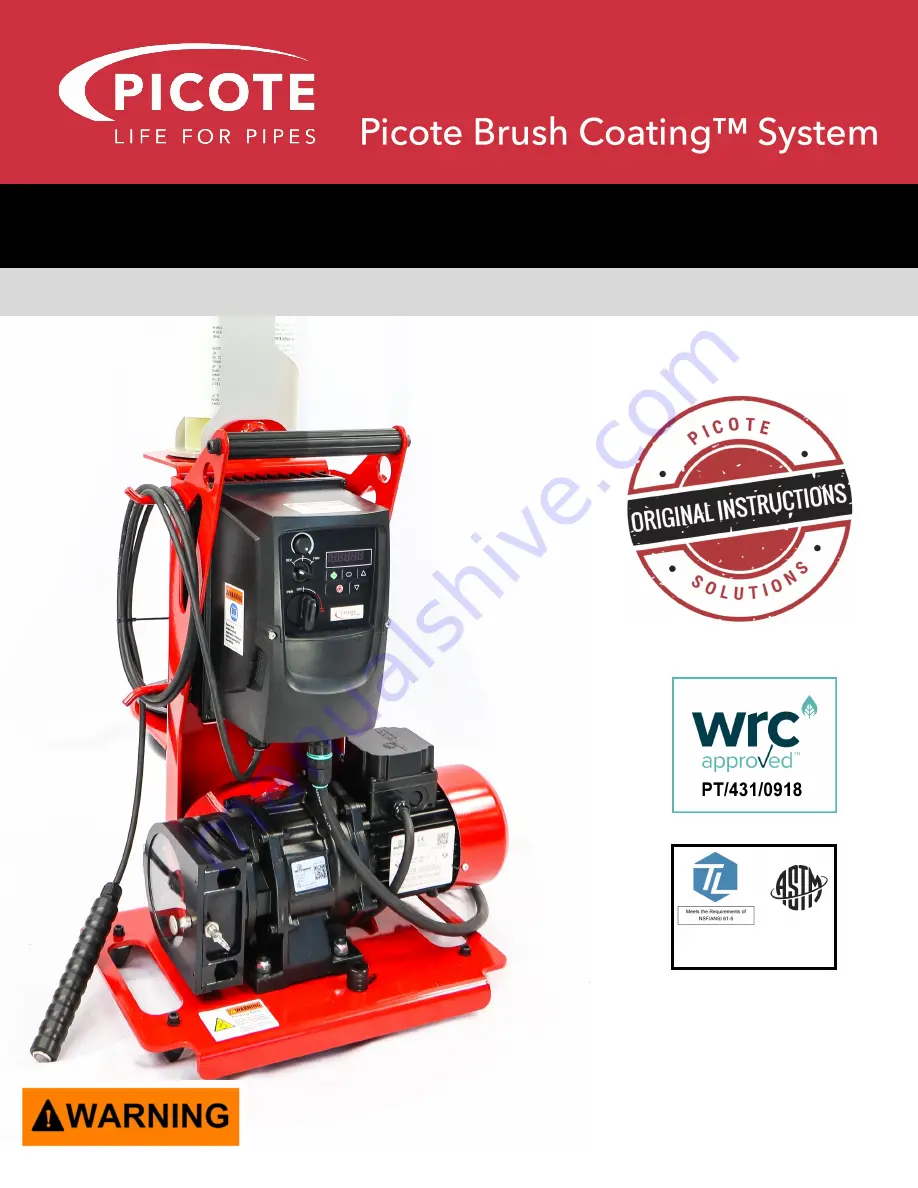
This operations manual is for the Picote Brush Coating 

™ 

System using the Mini Coating Pump and covers the 


equipment as well as the application process including the DC1000E 100% Solids Epoxy and Fast Cure Resins.


These instructions are for your personal safety. Always ensure that you have 

read and understood these instructions before using the Picote Brush Coating 

™ 

System. 


DC1000E Resin Certifications


Содержание 2220100001

Страница 1: ...L This operations manual is for the Picote Brush Coating System using the Mini Coating Pump and covers the equipment as well as the application process including the DC1000E 100 Solids Epoxy and Fast Cure Resins These instructions are for your personal safety Always ensure that you have read and understood these instructions before using the Picote Brush Coating System DC1000E Resin Certifications...

Страница 2: ...mera 24 Preparing the Resin 28 Operating the Coating System 32 Cleaning up the Coating System 37 Curing Additional Coats 42 Picote Epoxy Resin Information 43 Maintenance 44 Troubleshooting Flowchart 46 Troubleshooting Fault Codes List 47 Warranty Policy Procedure 48 Training Certification 49 To watch practical demonstration videos take a course or to download an electronic copy of these Instructio...

Страница 3: ...t and cut resistant gloves to help prevent any hand injuries Any open injuries or skin irritations should always be covered to avoid contact with sewage chemicals or dust Suitable respirator to prevent any dust or fumes being inhaled or consumed which could cause occupational asthma or dermatitis Safety Symbols Safety symbols are used throughout this manual to draw attention to potential hazards D...

Страница 4: ...y be hot and could burn your skin 8 If the working environment is extremely hot and humid or badly polluted by conductive dust use a GFCI enabled power outlet to ensure the safety of the operator 9 Make sure that the job location is well ventilated before grinding or drilling Always use a vacuum extraction system in the pipe to remove dust The operator must wear a dust mask when using dry grinding...

Страница 5: ... periods of time over 2 3 months it should be checked and tested according to the maintenance programme before use DISPOSAL Mini Coating Pump pump electric wires and power supply can be disposed in Europe at Waste Electrical and Electronic Equipment WEEE collection points The Mini Coating Pump frame can be recycled in metal waste collection points Pump Housing Delivery and Supply Hoses can be disp...

Страница 6: ...st January 2018 Katja Lindy Wilkinson C E O Picote Solutions Oy Ltd Pienteollisuustie 24 06450 Porvoo Finland Picote Brush Coating System TM has been granted with WRc Approved Certificate for non potable and waste water application for pipe diameters DN32 11 4 to DN300 12 Certificate Number PT 431 0918 SAVE ALL WARNINGS AND INSTRUCTIONS FOR FUTURE REFERENCE CE DECLARATION OF CONFORMITY Approvals C...

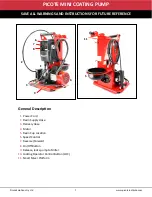
Страница 7: ...FERENCE PICOTE MINI COATING PUMP 7 Power Cord Resin Supply Hose Delivery Hose Motor Resin Cup Location Speed Control Reverse Forward On Off Button Release locks pump to Miller Locking Operator Control Button LOC Smart Mixer Platform 1 2 3 4 5 6 7 8 9 10 11 General Description 1 2 3 4 5 6 7 8 9 10 11 1 ...

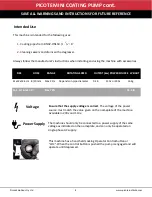
Страница 8: ...ect The voltage of the power source must match the value given on the nameplate of the machine Available in 230v and 110v The machine should only be connected to a power supply of the same voltage as indicated on the nameplate and can only be operated on single phase AC supply This machine has a hand held Locking Operator Control button or LOC When the control button is pushed the pump is engaged ...

Страница 9: ...l Frame Flexible Shaft Motor Bevel Gear not shown Emergency Stop Bottom red Power Switch Speed Control Foot Pedal Operator Presence Control Hand Guard Strain Relief inside Hand Guard not seen in photo 1 2 3 4 5 6 7 8 9 Intended Use This machine is intended for the following uses Coating pipes from DN32 DN150 1 1 4 6 Cleaning and unblocking pipes drains and sewers by grinding Descaling pipes Reinst...

Страница 10: ...ply EMERGENCY STOP There is an Emergency Stop Button on the machine The power supply to the motor is cut off when the Emergency Stop Button is pushed Always make sure the Emergency stop Button is pressed and completely unplug the machine when the machine accessories e g Cutter or Grinding Mini Coating Pumps have been pre set by the manufacturer Picote Solutions accepts no liability for failures or...

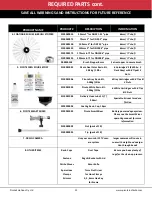
Страница 11: ...17 354000817UK 3540000817US Mini Miller 230v 16m range Mini Miller 110v 16m range Mini Miller 110v 50ft range 8mm Shaft 3 HOSES SHAFT 2220100004 Resin Supply Hose Supplied in 25m 82ft lengths Colour Red 2220100011 Pre cut Resin Supply Hose Supplied in pre cut lengths Colour Red 2220100003 Resin Delivery Hose Supplied in 25m 82ft lengths Colour Black 1312030085017 Mini Miller spare shaft 8mm with t...

Страница 12: ...th 8 Tips 3 Nuts 2110001006 Picote Grey Resin Kit 5 58kg 12lbs 6 Grey Cartridges with 8 Tips 3 Nuts 2110001005 Picote White Resin Kit 5 58kg 12lbs 6 White Cartridges with 8 Tips 3 Nuts 2110001003 Delivery Hose Lube 1 QT 946ml Special Lubricant to reduce friction 2220200004 Coating Resin Cup 10pcs 6 PICOTE SMART MIXER 2130001001 Picote Smart Mixer Battery powered epoxy mixer Please see the Smart Mi...

Страница 13: ...ng panels WARNING STEP 1 Clean the host pipe very well Use Original a or Cyclone b grinding chains with carbides for cast iron pipes and flush with water For PVC pipes use the special PVC chains c Use a wire brush d to remove final dust and other remaining particles OPTIONAL STEP For pipe with excessive build up of fats oils or grease FOG a degreaser may be necessary This can be pumped into the pi...

Страница 14: ...ce and to allow for the resin to have the best possible bond to the pipe wall The pipe MUST be dry before continuing with the coating setup Use the Picote Heater to expedite the process Once the original pipe is completely clean move on to the Coating System Assembly SAVE ALL WARNINGS AND INSTRUCTIONS FOR FUTURE REFERENCE PREPARING THE ORIGINAL PIPE FOR CLEANING cont ...

Страница 15: ... Hex Keys Silicone Grease Hose Connectors Towels SAVE ALL WARNINGS AND INSTRUCTIONS FOR FUTURE REFERENCE COATING SYSTEM ASSEMBLY THE PUMP BEFORE BEGINNING ASSEMBLY DANGER Risk of serious injury from rotating parts Have plenty of disposable nitrile gloves and towels available Wearing a double layer of disposable gloves is useful when applying lubricant Be sure that all machines have the required po...

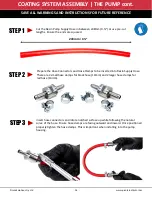
Страница 16: ...se There are 2 small hose clamps for black hose 10mm and 2 larger hose clamps for red hose 13mm Insert hose connectors and rotate notched surface up while following the natural curve of the hose Ensure hose clamps are facing outward and inward Once positioned properly tighten the hose clamps This is important when installing into the pump housing 248mm 9 SAVE ALL WARNINGS AND INSTRUCTIONS FOR FUTU...

Страница 17: ...ose into housing and slowly rotate the pump rotor clockwise manually while feeding the hose into place Tip Silicone grease will make the process easier Slide second connector into the top key way Note light pressure will be needed to pull the top connector into the key way SAVE ALL WARNINGS AND INSTRUCTIONS FOR FUTURE REFERENCE COATING SYSTEM ASSEMBLY THE PUMP cont ...

Страница 18: ...icone grease to the underside of the hose at the bottom of the housing This allows the hose to always return to the centre after the rollers pass over it STEP 9 Close housing door to secure connectors The Pump door should remain closed at all times during the coating process SAVE ALL WARNINGS AND INSTRUCTIONS FOR FUTURE REFERENCE COATING SYSTEM ASSEMBLY THE PUMP cont 17 ...

Страница 19: ...onnector on pump using a small hose clamp SAVE ALL WARNINGS AND INSTRUCTIONS FOR FUTURE REFERENCE COATING SYSTEM ASSEMBLY THE PUMP cont STEP 10 Once the pump hose has been installed turn on the pump and check that it is working correctly by firstly covering the top hose fitting with your finger If working correctly you should feel the hose sucking onto your finger Next place your finger over the b...

Страница 20: ...e com STEP 13 Take the 45 degree end and place in the resin cup at the back of the pump Run the hose through the retaining holes on the back of the pump SAVE ALL WARNINGS AND INSTRUCTIONS FOR FUTURE REFERENCE COATING SYSTEM ASSEMBLY THE PUMP cont ...

Страница 21: ...brush stoppers and hose connectors available Use an angle grinder or portable band saw to cut Miller shaft if necessary Have a roll of PVC tape available DANGER Risk of serious injury from rotating parts SAVE ALL WARNINGS AND INSTRUCTIONS FOR FUTURE REFERENCE COATING SYSTEM ASSEMBLY BRUSHES Required Tools Parts BEFORE BEGINNING ASSEMBLY ...

Страница 22: ... Cleaner Mini Miller Host Pipe Diameter Front Coating Brush Diameter Straight Front Coating Brush Diameter Multiple Bends Rear Coating Brush Distance Between Brushes DN32 1 1 4 50mm 2 N A N A N A DN40 1 1 2 50mm 2 50mm 2 50mm 2 40mm 1 1 2 DN50 2 75mm 3 100mm 4 50mm 2 50mm 2 DN70 3 100mm 4 125mm 5 75mm 3 75mm 3 DN100 4 125mm 5 175mm 7 100mm 4 100mm 4 DN150 6 175mm 7 220mm 9 150mm 6 150mm 6 SAVE ALL...

Страница 23: ... space between the brushes with no need for casing over the shaft This will allow for flexibility around bends The larger of the two brushes will be the brush at the tip of the shaft and is used for finishing the resin The closest brush helps to spread the resin and stabilize the brush set during coating SAVE ALL WARNINGS AND INSTRUCTIONS FOR FUTURE REFERENCE COATING SYSTEM ASSEMBLY BRUSHES cont ON...

Страница 24: ...Oy Ltd 24 www picoteinstitute com Required Tools Parts DELIVERY HOSE PVC TAPE CAMERA NUT DRIVER SCISSORS 11mm CLAMP SAVE ALL WARNINGS AND INSTRUCTIONS FOR FUTURE REFERENCE COATING SYSTEM ASSEMBLY DELIVERY HOSE CAMERA 24 ...

Страница 25: ...nd piece of tape securing the delivery hose to the shaft Attach the camera head 100 200mm 4 8 behind the sleeve bearing Watch your camera screen to ensure that you have full view of the brush When you are pulling the delivery hose from the roll always pull from the centre This will keep the hose from getting tangled and messy SAVE ALL WARNINGS AND INSTRUCTIONS FOR FUTURE REFERENCE COATING SYSTEM A...

Страница 26: ...the end of the camera spring This will ensure the camera spring and connectors inside stay clean during the process Once the camera is secure insert the brushes in to the pipe opening Push in about 500mm 18 and tape camera delivery hose and miller cable together SAVE ALL WARNINGS AND INSTRUCTIONS FOR FUTURE REFERENCE COATING SYSTEM ASSEMBLY DELIVERY HOSE CAMERA 26 ...

Страница 27: ...e opening as possible cut off the delivery hose square cut and attach to the bottom connector on the pump Secure with a hose clamp ONCE THE DELIVERY HOSE CAMERA ARE SET UP YOU CAN NOW BEGIN PREPARING THE RESIN SAVE ALL WARNINGS AND INSTRUCTIONS FOR FUTURE REFERENCE COATING SYSTEM ASSEMBLY DELIVERY HOSE CAMERA ...

Страница 28: ...oves towels chemical spill kit and acetone readily available Be sure to prepare all cartridges before pumping any resin This will allow you to have more efficient workflow Save a few cartridge caps to reseal unused material TIP Resins have limited work time Higher temperatures will decrease the work time If resin is over 29 C or 85 F upon installation it is recommended to chill the resin slightly ...

Страница 29: ...Bar A minimum of 3 coats need for abrasion resistance STEP 1 Before you begin preparing the resin for application verify the following A The Mini Miller and Pump are ON B The Speed of the Mini Miller is set to 950 to 1100 rpm speed dial 2 3 C The Speed of the Pump is set to full speed D The Pump is set to rotate clockwise SAVE ALL WARNINGS AND INSTRUCTIONS FOR FUTURE REFERENCE PREPARING THE RESIN ...

Страница 30: ...akage and possible mixing of resin Choose the desired colour of resin for the first application Choose a colour that gives the most contrast to the original pipe colour If you are coating a light pipe use the dark grey first or in dark pipe use the white resin to start with Remove the nut 1 and cartridge cap 2 and set aside for later A B C Cut the mixer tip back two notches This will improve the f...

Страница 31: ...n the Smart Mixer to the 4th setting and dose dial to it s maximum setting STEP 5 Feather the trigger to allow the pistons to seat properly and evenly on the back of the cartridge Once resin flows into the tip slowly dose a small amount of resin no more than 30g 1 oz into a cup or cartridge bag and dispose of This ensures the resin is mixed properly SAVE ALL WARNINGS AND INSTRUCTIONS FOR FUTURE RE...

Страница 32: ...e of the resin while coating Make sure you have a crew large enough to cover the cable maintenance of Smart Mixer and the coating application Have ice available for temperatures over 27 o C 80 o F or heat if the temperature is below 15o C 59o F SAVE ALL WARNINGS AND INSTRUCTIONS FOR FUTURE REFERENCE OPERATING THE COATING SYSTEM MINI COATING PUMP DUAL COLOUR 100 SOLIDS EPOXY RESIN SMART MIXER NITRI...

Страница 33: ... to navigate or if the line set is difficult to push through the pipe a special lubricant can be used to reduce friction The Picote Delivery Hose Lube should added to a spray bottle to be easily applied to the outside of the line set Lightly coat the line set as it is being pushed into the pipe Please note The lubricant is highly specialised and designed to be absorbed into the coating resin witho...

Страница 34: ...flowing stop the pump and turn the variable speed dial down to the appropriate speed for the pipe diameter Normally the Mini Miller is between 950 1100 rpm speed dial 2 3 STEP 4 Start the coating from the far end Pump out resin and brush it on Pay close attention to the flow of resin and lay a consistent bead of resin into the pipe Also watch the bead of the resin around the edge of the brush Pull...

Страница 35: ...e pipe and stationary when being pushed into the pipe STEP 6 Average coat thickness is 0 7 to 0 8mm 0 03 Carefully inspect that the resin covers the pipe everywhere Be especially careful around bends STEP 7 To speed up drying time twenty 20 minutes after the first coat is complete apply heat using the Picote Heater to the pipe before starting the next coat Please have a look at page 42 for more in...

Страница 36: ...irst to make sure that the layers bond well Dual Colour Method Apply over existing colour with new colour Verify that resin has been applied everywhere The Dual Colour Method allows for clear visual verification during application that resin has been evenly distributed everywhere SAVE ALL WARNINGS AND INSTRUCTIONS FOR FUTURE REFERENCE OPERATING THE COATING SYSTEM cont 35 ...

Страница 37: ...NUT DRIVER HEX KEYS NUT DRIVER 5mm DRILL BIT SPILL KIT BEFORE BEGINNING CLEANING PROCESS Have plenty of gloves towels rags acetone and a spill kit available in case of spills or accidents Have buckets ready for cleaning the brushes and camera Have a roll of PVC or duct tape and a large waste bin nearby SAVE ALL WARNINGS AND INSTRUCTIONS FOR FUTURE REFERENCE CLEANING UP THE COATING SYSTEM ...

Страница 38: ...e resin stops dripping put the brushes in a bucket of acetone Cover the opening and run brushes for a short time to rinse off resin Brushes and cable should now be clean enough to reuse later Wipe the camera head and the Miller shaft clean with an acetone soaked rag Cut away tape then recoil the cleaned camera and miller cables into their holders SAVE ALL WARNINGS AND INSTRUCTIONS FOR FUTURE REFER...

Страница 39: ...Mixer Recap for later if there is unused material in the cartridge STEP 5 Wipe down the delivery hose so as not to make a mess and remove the pump hose from the housing STEP 6 Carefully remove the suction hose from the cup and wipe down the end Watch for drips and tape the end closed if necessary SAVE ALL WARNINGS AND INSTRUCTIONS FOR FUTURE REFERENCE CLEANING UP THE COATING SYSTEM cont 38 ...

Страница 40: ...and clamps for reuse later STEP 8 Remove hose clamps and carefully cut away hoses and dispose of them STEP 9 Hose connectors can be cleaned with acetone and a small wire brush or cotton swab or they can be allowed to cure and drilled out later SAVE ALL WARNINGS AND INSTRUCTIONS FOR FUTURE REFERENCE CLEANING UP THE COATING SYSTEM cont ...

Страница 41: ...TEP 12 Collect all the contained waste including used gloves delivery hose rags etc into thick waste bags and seal properly If large amounts of mixed coating resin was left let it harden separately for example in the resin cup Dispose according to waste laws and regulation Follow instructions from coating resin MSDS NOTE Mixed resin will generate heat while curing Do not add large amounts of mixed...

Страница 42: ...asting layers This will give a visual verification to each coat that is applied If the previous coat sits longer than 12h before coated again the pipe will need to be abraided with Smart CutterTM A minimum number of 4 coats needs to be applied to the pipes that will be cleaned using high pressure water jetting Maximum water jetting pressure is 2600 psi or 180 bar A minimum number of 3 coats is req...

Страница 43: ...ature Room Temp 16 C 60 F to 29 C 85 F Shelf life 2 years from packaging when kept in accordance with storage instructions included in MSDS and Technical Data Sheet Industrial safety Ready measured product must not be in contact with skin it adheres Gas emissions No harmful VOCs released during mixing or after hardening Safety data sheet Delivered with first order SAVE ALL WARNINGS AND INSTRUCTION...

Страница 44: ...een replaced rotate manually for even coverage FASTENER SCREWS FOR THE SMART CUTTER HUB If you are unable to tighten the fastener screws properly due to worn out hex socket heads replace the fas tener screws immediately Otherwise a brush or other tool can detach from the shaft during use and fall into the pipe PUMP MILLER PARTS Keep parts clean Where possible remove resin from the Coating Pump bru...

Страница 45: ... locks I I Condition of electric components I I I I Clean resin stains P P P P Operation of Smart Mixer I I I I Condition of hose clamps I R R R Condition of hose connectors I I R R I Inspect fix or replace if needed P Perform replace if needed R Replace Service Period 3 months 6 months 12 months A B C A Pump spare parts except B Electric motors C Service Centre repair work WARRANTY PERIODS SAVE A...

Страница 46: ...Test in different power source Yes No Does the Control Box power up Does the Control Box give error code Contact your reseller or nearest Picote Service Center Check the Control Box error code list and make corrections according to instructions Yes No No Change pump rollers Did it help No Yes SAVE ALL WARNINGS AND INSTRUCTIONS FOR FUTURE REFERENCE TROUBLESHOOTING FLOWCHART MINI COATING PUMP If the...

Страница 47: ...k the ambient temperature around the drive is within the drive specification 50 C 122F Ensure sufficient cooling air is free to circulate around the drive Increase the panel ventilation if required Ensure sufficient cooling air can enter the drive and that the bottom entry and top exit vents are not blocked or obstructed U t Under temperature Trip occurs when ambient temperature is less than 10 C ...

Страница 48: ...re or unsuitable or unauthorized spare parts accessories or third party products when using the Products or 6 the use of the Products not in compliance with their respective Documentation user manuals safety and maintenance instructions and any usage restrictions contained therein or 7 accident fire power failure power surge or other hazard Otherwise the Products are sold AS IS End User is respons...

Страница 49: ...e tendering process and on site Digital certificates are awarded for all certification trainings Virtual training is also possible Contact training picotesolutions com to find out about pricing and scheduling When using the Picote Brush Coating System as an option for semi structural pipe rehabilitation you are providing a solution that can last 30 50 years When you successfully complete Picote Ce...

Страница 50: ...ase Contact Your Reseller Salesperson or Picote www picotesolutions com Finland United Kingdom USA support picotesolutions com Pienteollisuustie 24 06450 Porvoo Finland support picotesolutions com Production R D International Offices Technical Support Claims claims picotesolutions com Authorised Resellers www picotesolutions com resellers ...

Отзывы: