SCF870/20 /21 /22 /23
8-9
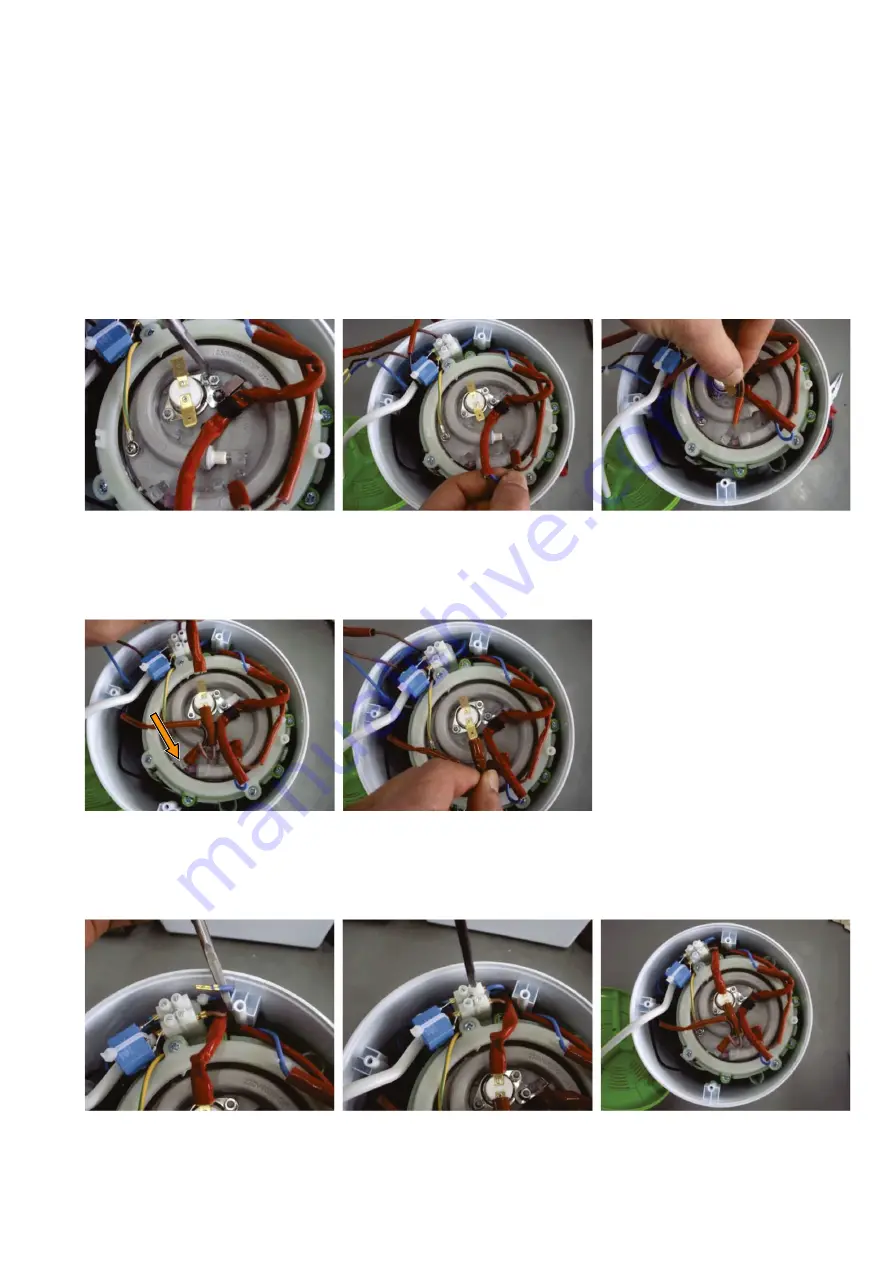
4th operation Melting fuse assembly
- Place the melting fuse under the melting fuse holder. Without moving the melting fuse, tighten the M3 nut of the melting fuse
holder with a torque between 0.55 - 0.60 Nm.
ATTENTION: The melting fuse body must be exactly under the melting fuse holder, and sleeve should fully cover the melting fuse
and its cables. Otherwise the fuse will be non functional
.
- Attach the female terminal at the end of melting fuse cable to the inner side male terminal on the heating plate.
- After attaching the terminal, check the tightness of the connection by pulling the terminal. Terminal must not detach or be loose.
ATTENTION: Female terminals can be deformed during disassembly and get loose. If these terminals are reused, there will be
risk for self detaching, electric arc occurance, and/or malfunction. Checking the tightness by pulling is a must for these terminals.
Additionally, electrical tests that are completed on the production line are not meaningful (should be repeated) after this
connections are reattached.
5th operation Attaching the heating plate cable and thermostat cables
- Attach the female terminal on the thermostat connection cable group to the outer terminal on the heating plate.
- Attach the remaining female terminals to the thermostat, and check the tightness by pulling.
(Place the cables as shown on the photos).
6th operation Attaching the cables to the terminal block.
- Place the cables inside the terminal block by matching the cable colors, and screw the tightening screws with a torque between
0.30 - 0.37 Nm.
- Check the tightness by pulling the cables out, cables must not be detached.
DISASSEMBLY- AND RE-ASSEMBLY ADVISE


