background image

3UHSDUDWLRQ

This section describes how to install the hardware and software and how to get started in a few easy steps.

&RQWHQWVRIWKHER[

Check that the box contains the following items:


The Philips USB PC Camera;


Base to support the camera on (including monitor perch);


A CD-ROM containing the Philips installation software, application software packages and electronic software manuals;


Quick Install Guide.

Contact your supplier immediately if any item is missing.

*HWWLQJVWDUWHGLQIRXUHDV\VWHSV

The best way to quick results is as follows:

1.  Unpack the box.

2.  Place the Philips 

installation

 CD-ROM in your CD-ROM player, let the Philips installation program install the driver software

and the application software, and connect the camera to the USB port (marked with the USB-logo: 

) when asked by the

installation program.

3.  Start the central camera application 

VLounge

 using its icon 

on your desktop.

4.  Have fun !

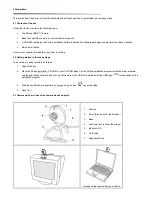
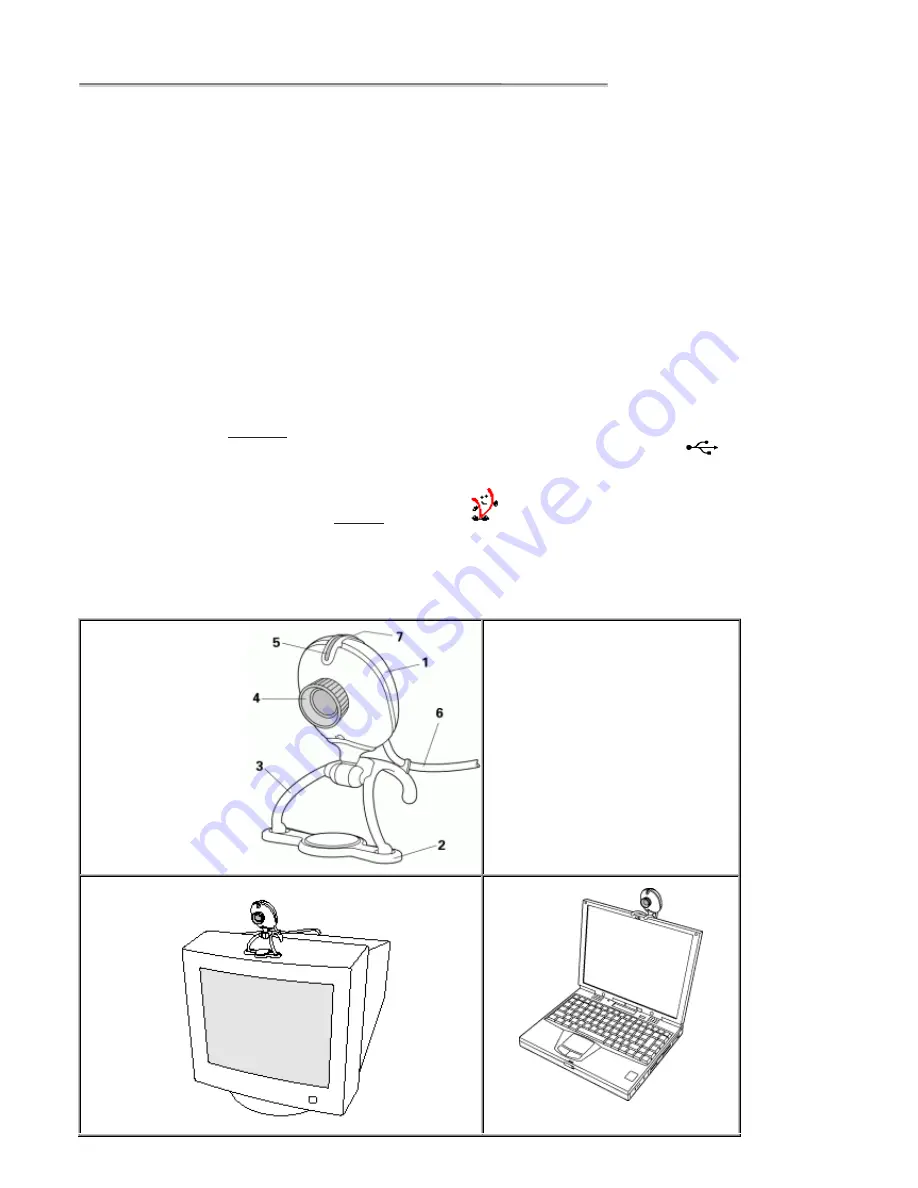
&DPHUDSDUWVDQGXVHRIWKHFDPHUDEDVHDQGSHUFK

1. Camera

2.  Perch (See below for instructions)

3. Base

4.  Lens ring (turn to focus the image)

5. Indicator 

LED

6. USB 

cable

7. Snapshot 

button

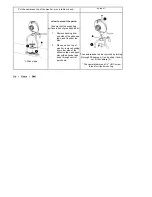
or suspend the camera from your laptop

Содержание PCVC740K99

Страница 1: ...tulations on purchasing the Philips USB PC Camera This new digital camera is the most advanced means of recording high quality movies or still pictures quickly and easily on your PC or laptop computer After installation the new camera can be used for all sorts of applications such as 9LGHR H PDLO 9LGHR FDSWXUH Create your own video presentations video mail product demonstrations training videos In...

Страница 2: ...WWLQJ VWDUWHG LQ IRXU HDV VWHSV The best way to quick results is as follows 1 Unpack the box 2 Place the Philips installation CD ROM in your CD ROM player let the Philips installation program install the driver software and the application software and connect the camera to the USB port marked with the USB logo when asked by the installation program 3 Start the central camera application VLounge u...

Страница 3: ...one side of the adhesive tape and fix under the disc 2 Place perch on top of monitor remove backing from other side of the adhesive tape and push disc with adhesive tape down through central perch hole The camera base can be removed by turning it through 90 degrees 1 and pulling it down out of the camera 2 The camera features a 1 4 UNC screw thread for tripod mounting 8S _ RPH _ 1H W ...

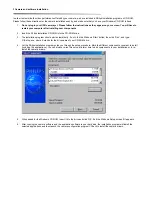
Страница 4: ... If not click the Windows Start button then click Run and type X Setup exe where X stands for the drive name of your CD ROM drive 4 Let the Philips installation program guide you through the setup procedure Mark the different components you want to install including the applications You can always re run this setup at a later time to add components to your installation or to re install the camera ...

Страница 5: ...s for maximizing the camera s performance 7 Exit VCheck You should now have Program Group called Philips ToUcam Camera in your Windows Start menu One camera settings icon on your taskbar VProperty One VLounge icon on the Windows QuickLaunch menu on your taskbar One VLounge icon on your desktop Installed applications as selected by the user during this installation procedure You are now ready to st...

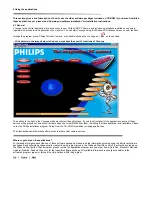
Страница 6: ...tall all of the applications some of these buttons will be greyed out and will not activate when the cursor moves over them indicating that the application is not available Please re run the Philips installation program Setup from the CD ROM to install any missing applications The other buttons and the menus offer access to other useful camera options KHUH WR JHW KHOS RQ WKH DSSOLFDWLRQV For detai...

Страница 7: ...d the recording Persons receiving your e mail do not need any special software because the video mail has a player built in and will be an executable file in EXE format More info Click Help within the application for help or go to www smithmicro com DFN WR 9 RXQJH HEFDP 6SRW LIH E 6SRW LIH RZ WR VHQG PRYLHV DQG SLFWXUHV RYHU WKH QWHUQHW 1 Your own IUHH SpotLife account will be created during insta...

Страница 8: ...et Capture File 2 Click Devices to set the video and audio source you want to use 3 Enable Preview in the Options menu to see the live camera preview then adjust your audio and video settings if necessary E g the Frame Rate setting in the Options Video Format menu which determines the frame rate the camera hardware should deliver to VRecord 4 Use the Capture menu to start or stop capturing a video...

Страница 9: ...u want to capture and click on the Capture button in the View Finder window or press the Snapshot button on top of the camera to capture the image displayed in the View Finder 5 Edit the images after capturing them Then print them save them or share them with your friends over the Internet Send them an email or create your own picture albums on the web Or use them for slide shows wall paper screen...

Страница 10: ...y movements in front of your camera without causing any damage More info Click within the application for assistance or go to www realityfusion com DFN WR 9 RXQJH 3HUVRQDO 9LGHR RXU IDYRXULWH XVHU DSSOLFDWLRQ The Philips USB PC Camera not only works with the video applications included on CD ROM with this camera but with any video application that uses DirectX or Video for Windows or the TWAIN int...

Страница 11: ...ns as required by your application 3 Click OK to start searching for the specified application on your system 4 Select your application by clicking it on the list of search results displayed in the New application window providing that any were found If not displayed please check the program name entered previously at Details step 2 5 If the specified application has been found on your system you ...

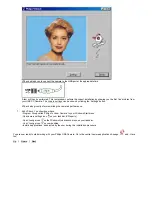
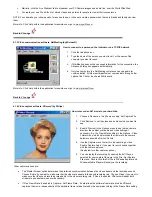
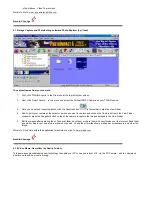
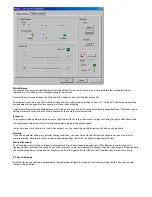
Страница 12: ... WR 9 RXQJH 7KH 3KLOLSV 3 6WXII 6LWH EXWWRQ This is the Internet link for information about PC Peripherals from Philips DFN WR 9 RXQJH 7KH HOS EXWWRQ This opens the HTML manual file in your HTML browser DFN WR 9 RXQJH 7KH 9LGHR 2Q 2II EXWWRQ DQG WKH SUHYLHZ ZLQGRZ ZLWK WKH 3KLOLSV ORJR Use the Video On button to start showing the live camera image on your screen instead of the stationary Philips l...

Страница 13: ...levant button Please pay careful attention to this text since it may contain valuable information as to why specific functions are not available at certain times DFN WR 9 RXQJH RXU QDPLF 3 DPHUD DQLPDWLRQ In this little corner of the screen your camera gives you feedback on your actions and button selections And it just loves a good workout DFN WR 9 RXQJH ...

Страница 14: ...plications themselves PDJH RQWUROV Here you will find the slider controls for brightness hue contrast saturation and sharpness Note that the Brightness control is not available when the Full auto setting is enabled The Hue control is only available when the Full auto setting is enabled or when the Auto White balance on the Camera controls tab is turned on 0RGHV The XOO XWR PRGH provides a very eas...

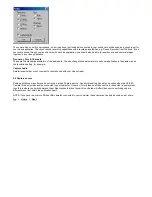
Страница 15: ...in and shutter speed In Auto exposure mode the camera automatically adjusts the gain and shutter speed In manual mode no check mark in the Auto checkbox you can control the setting for gain and shutter speed manually HIDXOWV If you like a particular setting for particular lighting conditions you can use the Save and Restore buttons to save and restore this preferred setting Should you wish to rest...

Страница 16: ...our application in the same way as the resolution setting for example DSWXUH XGLR Determines whether or not you want to record sound with your video stream DSWXUH VRXUFH Some applications may offer you an extra tab marked Capture source Usually this setting has only one option when the USB PC Camera is the only video source connected to your computer However if more than one video source is connec...

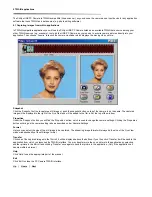
Страница 17: ...ded to the film roll at the top of the window 3URSHUWLHV Under the Snapshot button you will find the Properties button which is used to change the camera settings Clicking the Properties button will bring up the camera setting tabs as described under Camera Settings RUPDW Here you can select the size of the still image to be captured The streaming image format will always be the size of the Live V...

Страница 18: ...ROM you just removed and wait for Windows to stop reading from the CD ROM DPHUD SHUIRUPDQFH DQG V VWHP UHTXLUHPHQWV In CIF resolution this digital USB PC Camera provides a large data stream that needs to be processed in real time by the application you are using Although the camera will perform satisfactorily on a Pentium I at the lower resolutions we recommend a more powerful computer e g a Penti...

Страница 19: ...e source On systems with other devices this other device may be the selected capture source 3 If more than one USB capture device is connected to the PC check whether the correct USB capture device has been selected 4 1R 0LFURVRIW 0 PDJH DSWXUH 0LFURVRIW 0 PDJH DSWXUH LV QRW DYDLODEOH DV LPDJH FDSWXUH VRXUFH A All USB Image devices need Microsoft WDM Image Capture as the capture source Check wheth...

Страница 20: ...a tremendous amount of data is generated Hardly any computer system and or hard drive is capable of handling this kind of data stream This effect results in dropping a number of frames to be able to match the data stream to the capabilities of your computer This effect can be reduced or completely eliminated by applying the following measures 1 changing to a lower resolution such as 320x240 or low...

Страница 21: ...6 x 144 Up to 30 QSIF 160 x 120 Up to 30 DWD IRUPDW I420 RGB24 DPHUD DGMXVWPHQW SDUDPHWHUV Frame rate contrast brightness saturation sharpness colour on off mirror image backlight compensation white balance exposure control hue QWHUIDFLQJ USB cable 2 0 m 0LQLPXP V VWHP UHTXLUHPHQWV Processor Pentium II 233 MHz RAM 32 MB OS Windows 98 Windows 2000 or higher not NT4 CD ROM drive Required for install...

Страница 22: ...ting 10 to 55 C Storage 35 to 70 C 3RZHU VXSSO 127 6KRXOG RX ZLVK WR FRQQHFW WKLV FDPHUD WR D 86 KXE LQVWHDG RI RXU FRPSXWHU V URRW KXE RX ZLOO QHHG WR XVH D SRZHUHG KXE FDSDEOH RI GHOLYHULQJ WKH RSHUDWLQJ SRZHU VSHFLILHG EHORZ Power Supplied via the USB cable Power compliance General USB specifications 1 1 for power requirements Two modes for power supply 1 Suspend max 500 µA 2 Operating max 100 ...

Страница 23: ...te the receiving antenna Increase the separation between the equipment and receiver Connect the equipment to an outlet on a circuit different from that to which the receiver is connected Consult the dealer or an experienced radio TV technician for help Any unauthorized modification to this equipment could result in the revocation of the authorization to operate the equipment DUQLQJV 0DLQWHQDQFH I ...

Страница 24: ...tically and to load the appropriate drivers without restarting your computer With USB devices this usually means that you will have to perform an installation procedure only once i e the first time you connect the new hardware After this first time you will not have to restart the computer when connecting the camera to the USB port The USB driver will detect the camera as newly connected hardware ...

Страница 25: ...9LGHR VWUHDP A collection of images that combine to form motion or moving pictures also known as movies or video clips 8S _ RPH _ 1H W ...

Страница 26: ...X ZLOO QHHG D 3 UHDGHU VXFK DV FUREDW 5HDGHU IURP GREH LQ RUGHU WR YLHZ WKHVH WH WV QVWDOO GREH FUREDW 5HDGHU E VWDUWLQJ WKH 3KLOLSV QVWDOODWLRQ SURJUDP 6HWXS H H IURP WKH 3KLOLSV QVWDOODWLRQ 520 7KLV ZLOO LQVWDOO GREH FUREDW 5HDGHU IRU RX LI LW LV QRW HW SUHVHQW RQ RXU FRPSXWHU 2U JR WR WKH GREH ZHEVLWH IRU WKH ODWHVW YHUVLRQ RI FUREDW 5HDGHU 7KH GREH ZHEVLWH 8S _ RPH ...

Отзывы: