Change settings 19
projection.
Place the projector on a level surface
before calibration.
•
Projection Mode:
Adjust the projection
to the correct position based on different
installation of the projector.
•
Keystone Advanced:
Enable or disable
4-corner image correction. Select
Side
to
enable 4-corner image correction.
•
Auto Keystone:
Enable or disable auto
correction of the projection. Perform
calibration (
Gyro Horizon
) before you
enable auto keystone correction of the
projection.
•
Manual Keystone:
Manually correct the
image shape. Or access 4-corner image
correction if the function is enabled by
selecting
Keystone Advanced - Side.
•
Digital Zoom:
Scale the projection image
within the range from 60% to 100%.
Notice
If
Side
is selected under
Keystone
Advanced
,
Auto Keystone
option is
invisible and
Manual Keystone
option is
enabled for 4-corner image correction.
Language and keyboard settings
Go to
Language and input method Setting
to
access the following settings.
•
Language:
Select a language for on-screen
menus.
•
Input Method:
Select a keyboard input
method.
•
Android Keyboard Settings:
Access
various settings for Android keyboard (e.g.
intelligent word correction and suggestion).
Date and time settings
Go to
Date Setting
to access the following
settings.
•
Automatically update date and time, or
manually set date, time and time zone.
Apps management
Go to
Application Setting
to access the
following settings.
•
Check an app version, app size and cache
size.
•
Clear cache size or uninstall an app.
Restore default settings
1
Go to
System Update
then select
Restore
Factory
.
2 Follow the on-screen instructions to start or
cancel resetting.
Notice
After resetting to the default settings,
all the files and apps you installed are
completely erased. Back up your files if
you need to reset the projector.
Other system settings
Go to
Other Setting
to access the following
settings.
•
Boot Source Option:
Select or deselect an
input source to start up the projector.
•
Mouse speed:
Change the speed at which
the on-screen point moves.
System information checking
Go to
System Info
to check the following system
information: product name, system version, free
and total internal memory, free and total ROM,
and MAC address.
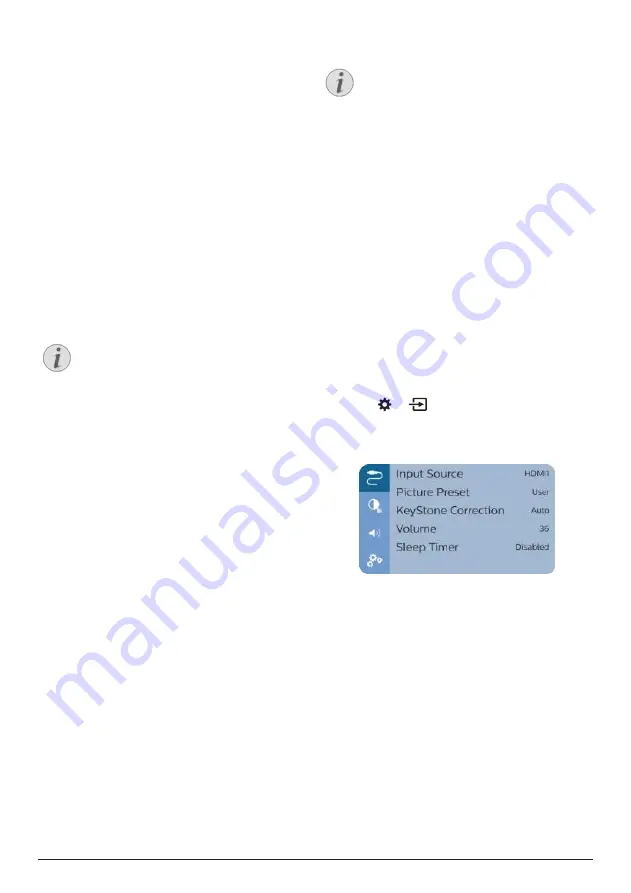
Projector system settings
1
Press
or
on the remote control to
access the projector system setting options.
2 Use the
Navigation buttons
and
OK
to select
and change settings.
Input source selection
Go to
Input Source
to access the following
settings.
•
Select and activate an input source (HDMI1,
HDMI2, VGA, AV) corresponding to an
external device which is connected to the
projector.
•
Select
Philips OS
when a USB storage
device is connected or no other external
device is connected.
Image options
You can access the image setting options, such
as:
•
Picture Adjustments:
Set the values
for brightness, contrast, saturation and
Содержание NeoPix Ultra 2
Страница 1: ...User Manual NeoPix Ultra 2 Home projector ...


