LFF6080
- 66 -
12 - PC Features
Device management
This tab shows the list of devices managed by the PC.
Adding a device connected via USB
Make sure that your multifunction machine is powered off.
The connection between the PC and the machine
requires a USB 2.0 shielded cable no more than 3 meters
long.
1
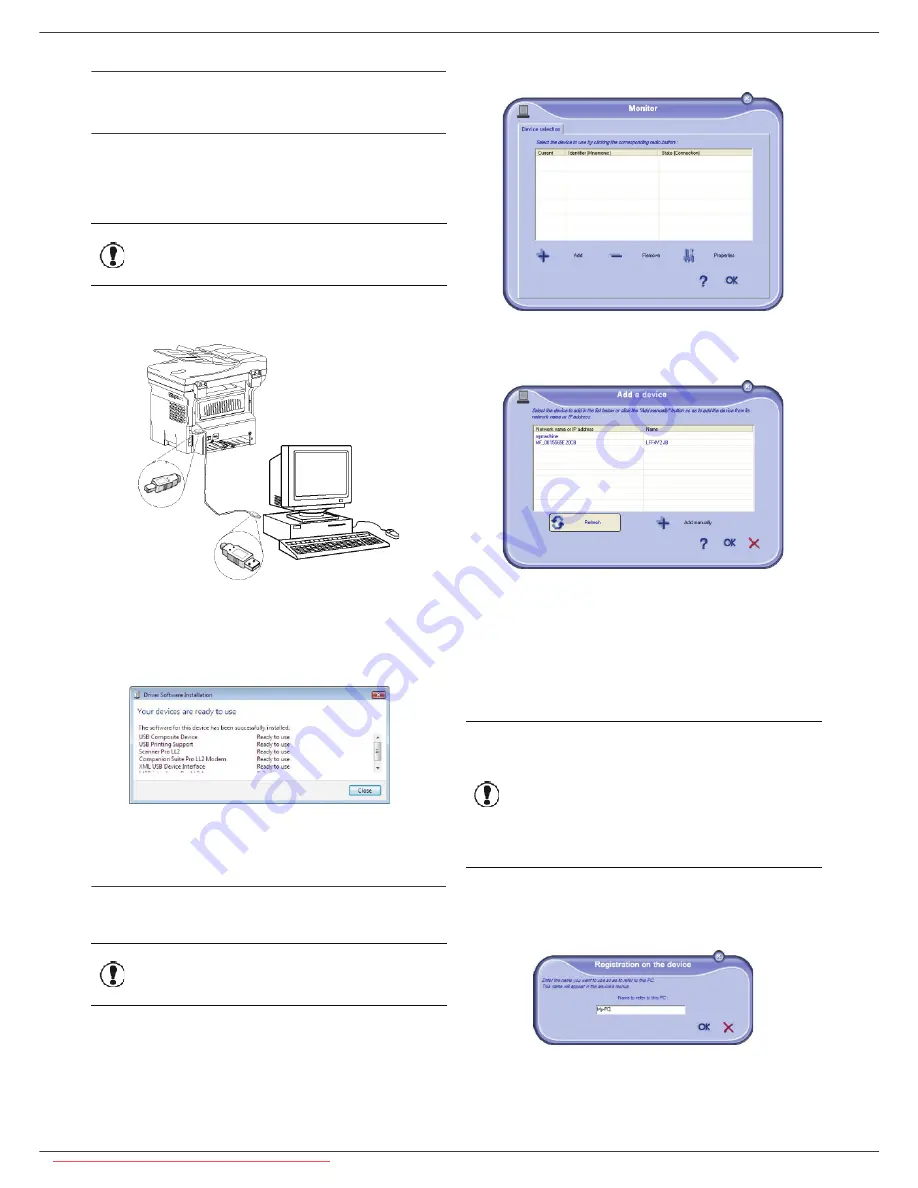
Locate your USB cable connectors and connect as
shown below on the picture.
2
Power on your multifunction machine.
The PC detects the device and the drivers are
automatically installed.
3
Once the installation is finished, a message
indicates that the drivers are installed correctly.
You can now use the multifunction machine to print or
scan your documents.
Adding a device connected to the network
You may connect your multifunction terminal to an
Ethernet or a wireless network.
1
Run the Companion Monitor application by clicking
on the icon located on your desktop or from the
menu
S
TART
> A
LL
P
ROGRAMS
> C
OMPANION
SUITE
> C
OMPANION
SUITE
PRO
LL2 > C
OMPANION
-
M
ONITOR
.
2
Click the plus sign or
A
DD
button.
3
The list of devices detected on the network
appears. Click on
R
EFRESH
to update the list.
Detected devices appear with the following
information:
4
NetBIOS name (hardware identifier) or IP address
(device’s identifier on the network).
5
Network name (user-defined). To define the name
of a device on the local network, refer to paragraph
Network features
, page 47.
6
Select your multifunction machine and click
OK
.
7
Enter a registration name for your PC and click
OK
.
The multifunction machine will use this name to
identify your PC.
Important
The Companion Suite Pro software
shall be installed to perform this
operation.
Important
The Companion Suite Pro software
shall be installed to perform this
operation.
Important
Only devices found on the same
local subnetwork as the PC are
automatically detected and
displayed. To add a device located
on another subnetwork, refer to
paragraph
Adding manually a
device connected to the network
,
page 67.
Downloaded From ManualsPrinter.com Manuals


