background image

32

Philips · Laserfax 5120 · 5125 · 5135

EN

8 Copier

Loading Documents

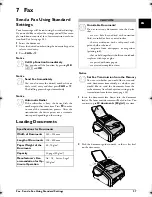
Specifications for Documents


Unsuitable Documents!

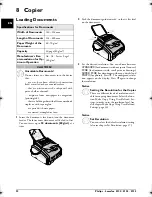
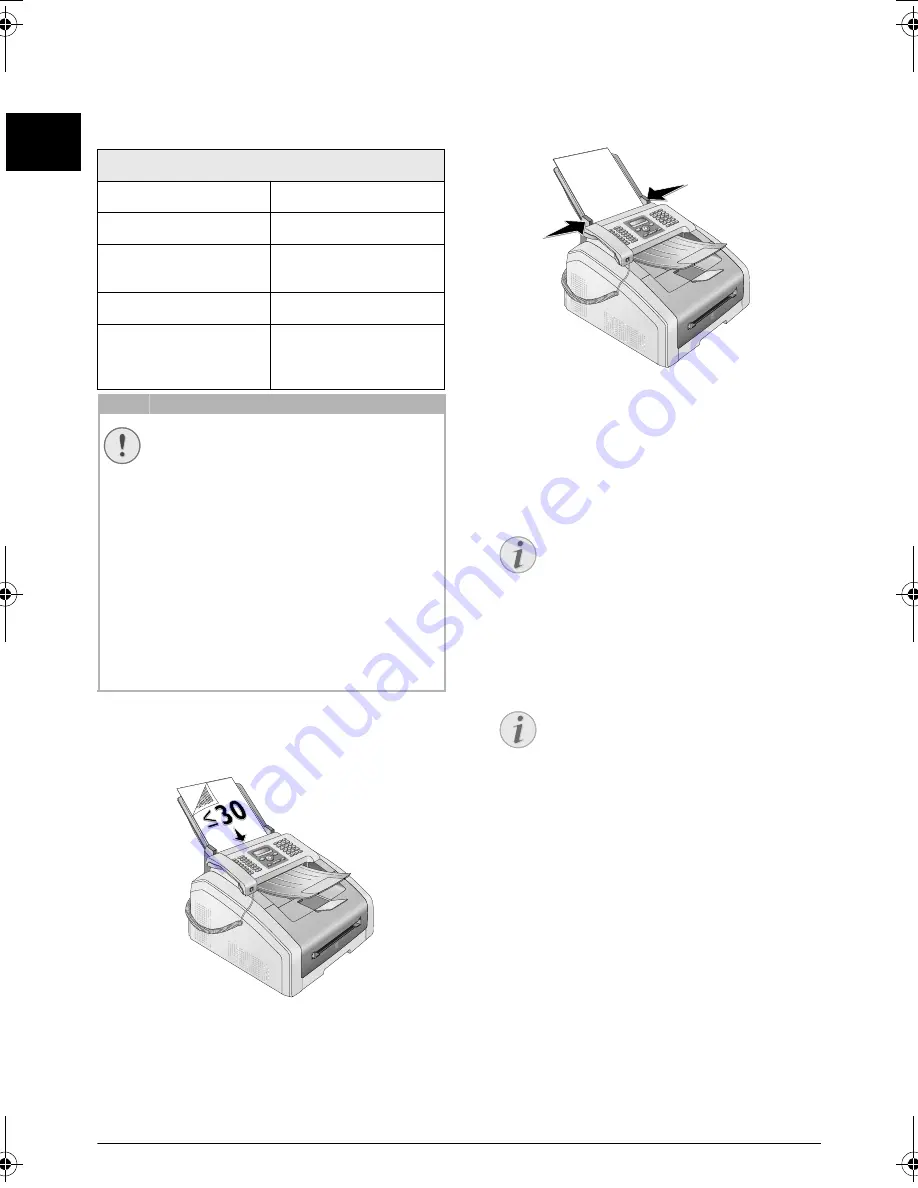
1

Insert the documents face down into the document
feeder. The lower most document will be fed in first.
You can insert up to 

30 documents (80¦g/m2)

 at a

time.

2

Push the document guide inwards, so that it lies level
on the documents.

3

Set the desired resolution. You can choose between:

STANDARD

 (for documents without special features),

FINE

 (for documents with small print or drawings),

SUPER FINE

 (for documents with many details) and

PHOTO

 (for photos). Press 

f

. The configured resolu-

tion appears on the display. Press 

f

 again to change

the resolution.

Spaltenumbruch

Specifications for Documents

Width of Documents

140¦–¦218¦mm

Length of Documents

128¦–¦600¦mm

Paper Weight of the 
Documents

60¦-¦90¦g/m²

Capacity

30 page (80¦g/m²)

Manufacturer’s Rec-
ommendation for Op-
timum Operation

A4 · A5 · Letter · Legal
(80¦g/m²

CAUTION!

Unsuitable Documents!

Do not insert any documents into the device
that ...
... are wet, have been edited with correction
fluid, are soiled or have a coated surface.
… that are written on with a soft pencil, with
paint, chalk or charcoal.
… originate from newspapers or magazines
(printing ink).
… that are held together with office or notebook
staples or with tape or glue.
… are pasted with note papers.
… are creased, crumpled or torn.

Notice

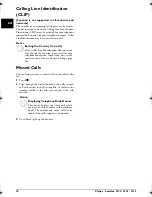
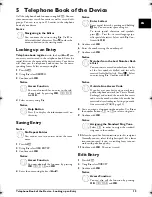
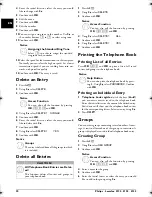
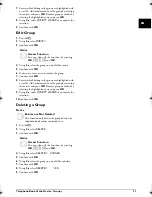
Setting the Resolution for the Copier

There are different levels of resolution avail-
able for copying documents. Select the func-
tion Make Copy Using User-Defined Set-
tings, in order to set the resolution level, (see
also chapter Make Copy Using User-Defined
Settings, page 33). 

Notice

Set Resolution

You can select the default resolution setting
(also see chapter Set Resolution, page 37).

lpf-5120-5125-5135-manual-uk-int-253117544-b.book  Seite 32  Mittwoch, 16. Dezember 2009  10:01 10

Содержание Laserfax 253117544-B

Страница 1: ...EN LPF 5120 LPF 5125 LPF 5135 User Manual ...

Страница 2: ...emplates you can quickly create for example a short fax note or an invitation Copying Several Documents onto one Page Mosaic Copy You can copy several documents onto one page to save paper The documents are adjusted automatically during the copying process Print Calendar Your device prints a weekly overview as a calendar page for you for the current week the coming week or a freely selectable week...

Страница 3: ...Outside Line 28 Sending Fax Later Timer Function 28 Manually Sending a Fax 29 Chain Dialling 29 Eavesdropping while Connection is Established 29 Sending to Multiple Recipients Broadcasting 29 Using Fax Templates 29 Fax Reception 29 Receiving Fax Manually 30 Receive Faxes Silently 30 Setting Protected Fax Reception 30 Polling Faxes 30 Jobs 30 8 Copier 32 Loading Documents 32 Make Copies Using Stand...

Страница 4: ...anging the Toner Cartridge 44 Fixing a Paper Jam 46 Fixing a Document Jam 49 Cleaning 49 Calibrating the scanner 51 Using Service Codes 52 Power Cycling 52 Problems and Possible Causes 53 Error Messages and Possible Causes 55 12 Glossary 58 13 Appendix 61 Technical Data 61 Guarantee 62 Declaration of Conformity DoC 63 Customer Information 68 ...

Страница 5: ...ials should be kept out of the hands of children Magnetic telephone handset The telephone handset of the device is magnetic Caution small metallic objects paper clips may be retained if placed near or on the telephone handset Power Supply Telephone Line Check whether the mains voltage of your device Check whether the mains voltage of your device indicated on the type label matches the mains voltag...

Страница 6: ...h care when you are removing a paper jam for instance Display Should disruptions occur follow the instructions on the display and on the error report Repairs Do not make any repairs to the device yourself Improper maintenance can result in injuries or damage to the device Only have your device repaired by an authorised service centre Do not remove the type label from your device this would void th...

Страница 7: ...r glass Toner Cartridge ƒ Toner cartridge Paper Jam Door Print Unit Paper jam door print unit Gerät offen nummeriert Connections on the Rear Side On Off Switch On Off switch Mains Cable Socket ƒ Mains cable socket Paper Jam Door Fuser Unit Paper jam door fuser unit Telephone Handset Socket Type 3 Ð socket Connection socket for the telephone LPF 5125 LPF 5135 EXT Socket Ï EXT socket Connection sock...

Страница 8: ... confirming input Start Starting Transmission of Messages Starting Action o Starting transmission of message starting action Fax FAX Start a fax transmission or fax reception Copy COPY Press twice making copies automatically Press once adjusting copies Resolution f Setting higher resolution for faxes and copying STANDARD FINE SUPER FINE PHOTO Help Print lists Function list fax journal telephone bo...

Страница 9: ...ake copies using settings from the second profile 12 Make copies using the second profile page 33 Make enlarged or compressed copies 13 Make enlarged or compressed copies page 34 Copying several documents onto one page Mosaic copy 14 Copy several documents on one page Mosaic copy page 34 Spaltenumbruch 2 Printer Set Paper Weight 201 Set paper weight page 38 Set Paper Source 202 Set paper source pa...

Страница 10: ...with OK Printing Fax Journal Call Log Printing Fax Journal You can also print the fax journal and the call log LPF 5125 LPF 5135 by pressing Using select LOGS Confirm with OK Printing the Job List Printing the Job List You can also obtain a print jobs list by pressing Using select COMMANDS Confirm with OK Print Calendar Print Calendar You can also print the calendar by pressing Using select CALEND...

Страница 11: ...e cable with plug country specific User manual with installation guide not depicted User manual with installation guide not depicted Installation CD Type 4 Installation CD LPF 5135 not depicted Verpackungsinhalt Missing Package Contents Spaltenumbruch Removing Packaging Mate rial Removing Packaging Material from the Device Removing Packaging Material from the Device Remove the existing tape used f...

Страница 12: ...ng Material from the Paper Tray 1 Pull the paper tray out of the device DANGER Escaping Toner Dust Never open a toner cartridge If toner dust is released into the air you should avoid allow ing it to contact your skin and eyes Do not inhale the released toner dust Remove the toner dust from clothing or objects with cold water hot water would only cause the toner to set Never remove loose toner dus...

Страница 13: ...ent support into the two openings in the cover The document support should snap securely into place Dokumentenhalter aufstecken Fold Out the Print Out Sup port 1 Fold the additional printer output tray forward 2 Printing on A4 Paper Pull out the additional paper stopper on the print out support Notice Loading Paper Adjust the paper tray to the paper and insert the paper see also chapter Printing M...

Страница 14: ...elephone plug into your PTT line socket Telefonkabel anschließen Connection to an ISDN system PABX Systems 1 Connecting the Mains Cable Mains Voltage at the Site of Installation 1 Insert the mains cable into the connection located on the rear side of the device Plug the power cable into the electrical outlet CAUTION Connection to an ISDN system You can not connect your devices directly to the digi...

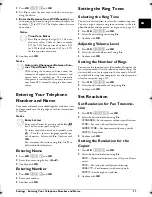
Страница 15: ...ber at the top edge of each fax transmission header 1 Enter the name using the keys A Z 2 Confirm with OK Entering Number Entering Number 1 Enter your number Cursor Navigation 7 2 Confirm with OK Entering the Date and Time 1 Enter the date two digits for each field for example 31 05 25 for May 31th 2025 2 Enter the time e g 14 00 for 2 pm 3 Confirm with OK CAUTION Setting the Country Correctly You...

Страница 16: ...5 10 6 Linux Linux Redhat 9 0 Debian 5 0 Suse 11 1 Fedora 11 Ubuntu 9 10 Connecting USB Cable 1 Close all open programs and applications before begin ning the installation process Place the installation CD in the CD ROM drive of your computer The program will start automatically 2 Connect the device to your PC with a typical USB cable The USB port of your device can be found on the rear side Notic...

Страница 17: ...ice provider call by call as a telephone book entry select this entry and manually enter the subsequent telephone number or select another saved entry Insert Dialling Pause Insert Dialling Pause It may be necessary to insert a dial pause in telephone number for example for a direct inward dialling number a sub address or in a long distance number Press ú and Rø The second part of the number is dia...

Страница 18: ...s Missed Calls You can find reference to missed calls in the redial caller list 1 Press 2 Page through the dialled numbers the calls received and calls missed in the list using indicates the numbers dialled the calls received and the calls missed 3 To call back pick up the handset Notice Setting the Country Correctly If the Caller Line Identification does not work even though the function is activ...

Страница 19: ...Press am 2 Using select MODIFY 3 Confirm with OK Notice Navigating in the Editor You can move the cursor using Use C to delete individual characters Press j to close the menu and return to the starting mode Notice Access Function You can also search for an entry in the tele phone book by pressing OK 511 and OK Notice Help Button Press to display the information saved on this entry Notice No Repeat...

Страница 20: ...ook Printing the Telephone Book Printing an Individual Entry 1 Telephone book register with the keys A Z you can access entries saved in the telephone book Enter the initial letters or the name of the desired entry Your device will show you the telephone book entries for the corresponding letters Select an entry using 2 Press COPY Spaltenumbruch Groups Groups You can create groups containing sever...

Страница 21: ...hted with a star Add other members to the group by selecting the entries and press OK Remove group members by selecting the highlighted entry and press OK 9 Using select ACCEPT GROUP to complete the selection 10 Confirm with OK Deleting a Group Entries are Not Deleted 1 Press am 2 Using select DELETE 3 Confirm with OK 4 Using select DELETE SINGLE 5 Confirm with OK 6 Using select the group you woul...

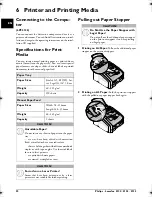
Страница 22: ...n the print out support 2 Printing on A5 Paper Fold the print out support with the pulled out paper stopper back again Paper Tray Paper Sizes Size A4 A5 B5 JIS Let ter Legal 13 14 Exec Weight 60 105 g m Capacity 250 sheets Manual Paper Feed Paper Sizes Width 98 216 mm Length 148 356 mm Weight 60 165 g m Capacity 1 sheets CAUTION Unsuitable Paper Do not insert any sheets of paper into the paper tra...

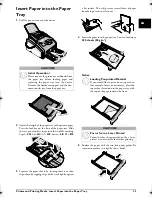
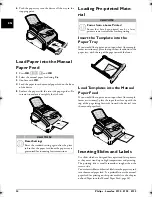
Страница 23: ...l Operation Please remove the protective cardboard from the paper tray before loading paper and replacing the paper tray into the device Remove the document support and the doc ument outlet tray from the paper tray EX B5 B5 A5 B6 A4 EX B5 B5 A 5 B6 A 4 EX B5 B5 A 5 B6 A 4 E X B 5 B 5 A 4 L e t t e r L e t t e r A 4 A 4 L e g a l L e g a l A 5 A 5 Notice Loading Pre printed Material If you would li...

Страница 24: ... the input sheet face up with the top of the page facing forwards towards the device into the manual paper feed Manuelle Zufuhr Vorlagen einlegen Inserting Slides and Labels Inserting Slides and Labels Use slides which are designed for copiers and laser printers as they must stand up to high temperatures and printing The printing side is usually somewhat rougher than the reverse side You can inser...

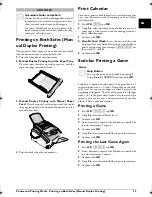
Страница 25: ...025 week 40 5 Confirm with OK Sudoku Printing a Game Sudoku Printing a Game Sudoku Sudoku is a Japanese number puzzle The game has 3 3 squares divided into 3 3 fields Depending on the diffi culty level lesser or more digits are already given at the beginning of the game The aim of the game is to fill digits from 1 to 9 in the game field is such a way that each digit appears only once in a row a co...

Страница 26: ... the Sudoku you would like to print maximum 9 copies 7 Confirm with OK 8 Using select if you would like to print the solution 9 Confirm with OK 10 Using indicate whether you would like to turn printing on or off 11 Confirm with OK Sudoku for Every Day 3 Notice Last Solution Available The solution of the last printed game is saved The solutions of earlier games are no longer available Notice Switch...

Страница 27: ...ry and then press FAX or o The dialling process begins immediately Notice Automatic Redial If the subscriber is busy the device dials the number again after some time Press j in order to cancel the transmission process After the transmission the device prints out a transmis sion report depending on the settings Specifications for Documents Width of Documents 140 218 mm Length of Documents 128 600 ...

Страница 28: ... at a later time within 24 hours Starting Transmission 1 Insert the document 2 Enter the desired number using the numeric keypad or select a saved entry 3 Confirm with OK 4 Enter the time at which the document should be trans mitted e g 14 00 for 2 pm 5 Confirm with OK 6 Select the desired resolution using STANDARD For documents without special features FINE For texts with small print or drawings ...

Страница 29: ... can quickly create for example a short fax note or an invitation 1 Press OK 45 and OK 2 Use to select the template you would like to print 3 Confirm with OK The device prints the template 4 Fill the template and send it to the desired recipient per fax Fax Reception Receiving Fax Manually Memory If you have not changed the factory settings received faxes will be printed out automatically If there...

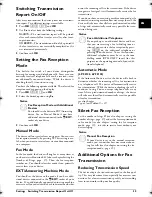
Страница 30: ...ling function you can retrieve faxes that lie ready in the dialled device Polling Faxes Directly 1 Press OK 42 and OK 2 Enter the desired number using the numeric keypad or select a saved entry 3 Press o Time Deferred Polling 1 Press OK 42 and OK 2 Enter the desired number using the numeric keypad or select a saved entry 3 Confirm with OK 4 Enter the time at which the document should be polled e g...

Страница 31: ...g a Job 1 Press OK 73 and OK 2 Using select the job that you would like to delete 3 Confirm with OK 4 Confirm the deletion with OK Printing a Job 1 Press OK 74 and OK 2 Using select the job that you would like to print out 3 Confirm with OK Printing the Job List Printing the Job List Press OK 75 and OK The device will print out a list of all pending jobs Printing the Job List Notice Navigating in ...

Страница 32: ...600 mm Paper Weight of the Documents 60 90 g m Capacity 30 page 80 g m Manufacturer s Rec ommendation for Op timum Operation A4 A5 Letter Legal 80 g m CAUTION Unsuitable Documents Do not insert any documents into the device that are wet have been edited with correction fluid are soiled or have a coated surface that are written on with a soft pencil with paint chalk or charcoal originate from newsp...

Страница 33: ...PY ECO Button Make Copies Using User Defined Settings Make Copies 1 Insert the document 2 Press COPY 3 Use to select the desired profile 4 Enter the number of times you would like to copy the document maximum of 99 copies 5 Confirm with OK 6 Using select the paper source 7 Confirm with OK 8 For Paper in the Manual Paper Feed Use to select the desired paper format 9 Confirm with OK 10 For Paper in ...

Страница 34: ...ocuments onto one Page Mosaic Copy Make Copies Copying Several Documents onto one Page Mosaic Copy You can copy several documents onto one page to save paper The documents are adjusted automatically during the copying process 1 Press OK 14 and OK 2 Use to select the desired layout Two documents on one page ƒ Four documents on one page 3 Press COPY to start the copying process or OK to configure fu...

Страница 35: ...ttings Optimized adaptation for text and photo printing 7 For darker copies and fax transmission for example documents with faint printing 3 Confirm with OK Setting the Brightness 1 Press OK 1065 and OK 2 Using select the desired level of brightness 1 Make the print lighter 4 Factory settings Optimized adaptation for text and photo printing 7 Make the print darker 3 Confirm with OK ...

Страница 36: ...s for each field for example 31 05 25 for May 31th 2025 3 Enter the time e g 14 00 for 2 pm 4 Confirm with OK Set the Time Zone UTC Coordinated Universal Time UTC is the current stand ardised universal time format used Starting from Green wich in London Zero Meridian the world is split into time zones These time zones are indicated with a deviance from UTC in hours for instance UTC 1 for Central E...

Страница 37: ...ception in the fax mode Select 0 to switch off the ring tone completely see also chapter on silent fax reception page 39 1 Press OK 042 and OK 2 Select the desired number of rings using 3 Confirm with OK Set Resolution Set Resolution for Fax Transmis sion 1 Press OK 4013 and OK 2 Select the desired resolution using STANDARD For documents without special features FINE For texts with small print or ...

Страница 38: ...ce 3 Confirm with OK Spaltenumbruch Setting the Paper Format 1 Press OK 203 and OK 2 Using select whether you would like to configure the paper format for the paper tray or whether you would like to use the manual feed 3 Confirm with OK 4 Use to select the desired paper format Follow the specifications in the technical data 5 Confirm with OK Set Fax Transmission from the Memory Set Fax Transmissio...

Страница 39: ... do not have an answering machine connected or if a connected answering machine does not accept the call the device will take over the call after a predetermined number of rings and automatically receive any possible fax trans mission being sent Fax Switch 1 Automatic Mode Type 3 mit Telefon LPF 5125 LPF 5135 Automatic Mode If the Automatic Mode is active the device will check to determine whether...

Страница 40: ...l sur plus lines below this value are deleted OFF All lines which lie more than one centimetre outside the page are printed on a second page All sur plus lines below this value are deleted 3 Confirm with OK Printing Multiple Copies Printing Multiple Copies You can apply settings to your device whereby multiple copies of fax transmissions are printed out upon reception 1 Press OK 4022 and OK 2 Ente...

Страница 41: ...time Call Log The redial caller list LPF 5125 LPF 5135 contains the last 50 numbers dialled and the last calls received The call log is not automatically printed with the fax journal Press OK 82 and OK Printing Fax Journal Printing the Job List Printing the Job List Press OK 84 and OK The device will print out a list of all pending jobs Printing the Job List Prints the List of Settings Prints the ...

Страница 42: ...t the connection type 1 Press OK 051 and OK 2 Use to set whether you operate your device on an extension 3 Confirm with OK Set the outside line access code Enter the length of the direct dial number 1 Press OK 0521 and OK 2 Enter the appropriate length for internal numbers Use C to delete individual characters Assume the longest internal number then add one digit to that If your direct dial number...

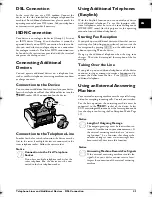
Страница 43: ...t be set to the tone dialling mode DTMF MFV tones for this purpose see the operating manual of your additional telephone Starting Fax Reception If you pick up at an additional device and hear that you are receiving a fax whistling tone or silence you can start the fax reception by pressing 5 on the additional tele phone or pressing o on the device Hang up additional telephone Hang up the additiona...

Страница 44: ...OK 934 and twice OK 2 The information on the firmware version of the device is displayed 3 Confirm with OK Spaltenumbruch Changing the Toner Car tridge Toner Level Memory Your device registers the extent of toner used for every print out and calculates the toner level of the toner car tridge on that basis The toner level is stored in each toner cartridge You can use different toner cartridges as w...

Страница 45: ...e of the cartridge DANGER Edges on the Device Cover Take care of the edges on the device cover You could injure yourself if you reach into the device from the side DANGER Escaping Toner Dust Carefully remove the toner cartridge from the device so that no toner dust spills out Take care where you place the toner car tridge escaping toner dust may soil the sur face Store opened or used toner cartrid...

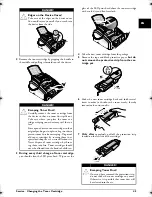
Страница 46: ...ll out the paper 3 Push the paper tray into the device all the way to the stopping point CAUTION Toner Cartridge Not Inserted Cor rectly If the device cover would not close the toner cartridge is not inserted correctly Take the toner cartridge out and insert it again cor rectly DANGER Escaping Toner Dust In case of a paper jam do not forcefully remove the paper but rather pull it gently out of the...

Страница 47: ...You could injure yourself if you reach into the device from the side DANGER Escaping Toner Dust Carefully remove the toner cartridge from the device so that no toner dust spills out Take care where you place the toner car tridge escaping toner dust may soil the sur face Never open a toner cartridge If toner dust is released into the air you should avoid allow ing it to contact your skin and eyes D...

Страница 48: ...t ically fold into starting position when the paper jam cover is closed CAUTION Toner Cartridge Not Inserted Cor rectly If the device cover would not close the toner cartridge is not inserted correctly Take the toner cartridge out and insert it again correctly DANGER HEAT Device Parts are Hot The fuser unit and and its surroundings inside the device become hot during opera tion Do not touch these ...

Страница 49: ... off using the on off switch on the back before you remove the plug from the socket CAUTION Recommissioning Plug the power cable into the electrical outlet Only after switch the device on using the on off switch on the rear DANGER Instructions for Cleaning Use a soft lint free cloth Never use liquid or easily flammable cleansers sprays abrasives polishes alcohol etc Do not allow any mois ture to r...

Страница 50: ...rubber roller of the document feeder 6 with a soft lint free cloth Rotate the feed roller You must clean the entire roller 4 Close the panel Cleaning the LED Print Head Introduction If white lines appear on the printed pages or the print qual ity is blurred you should clean the LED print head 1 Open the device by lifting the device cover forwards DANGER Instructions for Cleaning Follow the instruc...

Страница 51: ...r dust may soil the sur face Never open a toner cartridge If toner dust is released into the air you should avoid allow ing it to contact your skin and eyes Do not inhale the released toner dust Remove the toner dust from clothing or objects with cold water hot water would only cause the toner to set Never remove loose toner dust with a vacuum cleaner DANGER Instructions for Cleaning Follow the in...

Страница 52: ... are problems with printing 3 Confirm with OK 4 Using select SURE YES 5 Confirm with OK Spaltenumbruch Power Cycling Power Cycling If a problem occurs that cannot be corrected with the instructions in this user manual see also the help below follow the steps given here 1 Switch the device off using the on off switch on the rear 2 Wait at least ten seconds 3 Switch the device on using the on off sw...

Страница 53: ... the number is a fax number and whether the connected fax device is ready to receive whistling tone or silence You can eavesdrop while the connection is establish page 29 Faxes sent are of poor quality Modify the resolution Test the device by making a copy of the document If the device is in order the device of the recipient might be de fective Test the scanner by printing the functions list press...

Страница 54: ... is damaged and must be replaced Use only original consumable materials The device produces vertical lines when printing It is possible that the scanner needs calibrating see also chapter Calibrating the Scanner page 51 The device makes a noise during printing The toner cartridge is almost empty and must be replaced Use only original consumable materials Received faxes and copies are too light The...

Страница 55: ...ONER LOW The toner cartridge is almost empty and must be replaced soon Use only original consumable materials TONER EMPTY NON GENUINE TONER NOT INSTALLED TONER Problems with the toner cartridge Toner cartridge empty damaged incorrect or no toner cartridge in device Check the toner cartridge see also chapter Changing Toner Car tridge page 44 The toner cartridge is empty and must be replaced Use onl...

Страница 56: ...ber The transmission process was interrupted Repeat the transmission process Call the number and check whether the number is a fax number and whether the connected fax device is ready to receive whistling tone or silence Press FAX or o to send the message manually Ask the recipient whether the device is ready to receive Repeat the transmission process with a lower transmission speed see also chapt...

Страница 57: ...e 44 Check to see whether a paper jam has occurred see also chapter Fixing a Paper Jam page 46 Received document error The received fax message is possibly incomplete Ask the sender to check the length of the fax message It is possible the message is too long to be able to transmit in full No document to be polled In selected devices no documents lay ready which could be retrieved Perhaps the send...

Страница 58: ...onsultatif International Téléphonique et Télé graphique predecessor of ITU CE Conformité Européenne Chain Dialling see Combining Numbers Chain Dialling Before the dialling process begins you can freely combine and edit telephone book entries manually entered digits numbers from the redial list or numbers from the caller list For example if you have saved the telephone number pre fix of an inexpens...

Страница 59: ... use of additional tele phone services if these special functions are enabled for your telephone line The R key has replaced the hook flash function see Call Waiting Call toggling Handshake The handshake is the initial and final phase of a fax trans mission After establishing of the connection fax machines check the group affiliation and features such as size com pression or grey tones After the f...

Страница 60: ...ner car tridge on that basis The toner level is stored in each toner cartridge You can use different toner cartridges as well as display the respective toner level of the toner cartridge Transfer Speed CCITT ITU has published international standards for the transmission of data over telephone lines All short names begin with V so these are also referred to as V standards The most important transmi...

Страница 61: ...0 1200 dpi Speed Speed up to 20 pages minute Memory Redial caller list Redial caller list 50 Entries Telephone Book Telephone Book up to 250 entries Fax Messages Fax Messages up to 200 pages standard test letter Paper Paper Tray Capacity Capacity 250 sheets Size Size A4 A5 B5 JIS Letter Legal 13 14 Exec Custom Weight Weight 60 105 g m Spaltenumbruch Paper Manual Paper Feed Capacity Capacity 1 shee...

Страница 62: ... this guarantee This guarantee does not affect the Customer statutory rights B Exclusions From Guarantee Sagem Communications shall have no liability under the guarantee in respect of Damage defects breakdown or malfunction due to one or more of the following Failure to properly follow the installation process and instructions for use An external cause to the equipment including but not limited to...

Страница 63: ... any and all rights in those marks Reproduction Not Permitted The reproduction of certain documents e g by scanning printing copying is prohibited in many countries The list of such documents below is not intended to be com plete it only offers a general overview In case of doubt consult your legal advisor Passports personal identification Entrance and exit visa papers immigration papers Military ...

Страница 64: ...recording or otherwise without the prior written permission of Sagem Communications The information contained herein is designed only for use with this product Sagem Communications is not responsible if this infor mation is applied to other devices This user manual is a document that does not represent a contract Errors printing errors and changes are reserved Copyright È 2009 Sagem Communications...

Страница 65: ...Appendix Declaration of Conformity DoC 65 EN ...

Страница 66: ...66 Philips Laserfax 5120 5125 5135 EN ...

Страница 67: ...Appendix Declaration of Conformity DoC 67 EN ...

Страница 68: ... receive the maximum benefit from your product Introduction 3 We can assist your more quickly if you do not call us from the machine rather an external telephone Keep a printout of the settings as well as the serial number of the machine handy The serial number can be found on the type label Computer Connection Should problems with the computer connection arise have the following information to ha...

Отзывы: