background image

31

English

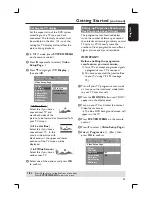
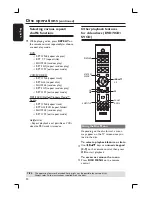
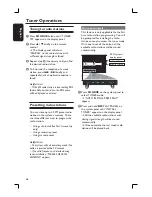
Viewing playback information

The DVD system can display the disc 
playback information (for example, title 
or chapter number, elapsed playing time, 
audio/subtitle language) and a number of 
operations can be done without 
interrupting disc playback.  

A

 During playback, press 

DISPLAY

.

 A list of available disc information 

appears on the TV screen.


DVD

VCD/SVCD

B

 Use 

ST

 keys to view the information 

and press 

OK

 to access.

C

 Use the 

numeric keypad (0-9)

 to input 

the number/time or use 

ST

 keys to 

make the selection, then press 

OK

 to 

confi rm.

 Playback will change according to the 

chosen time or to the selected title/
chapter/track.

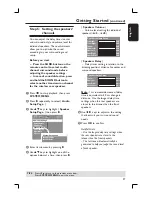
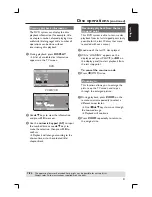
Resuming playback from the last 
stopped point

This DVD system is able to resume disc 
playback from its last stopped point (only 
possible for the last 10 discs that were 
recorded without a menu.)

A

 Load one of the last 10 discs played.

B

 While “LOADING” appears on the 

display panel, press PLAY

É

(or 

u

 on 

the display panel) to start playback from 
the last stop point.

To cancel the resume mode 

C

 Press 

Ç

(STOP) twice.

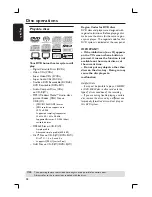
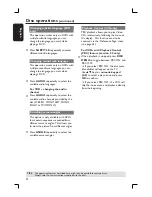
Zooming in

This function allows you to enlarge the 
picture on the TV screen and to pan 
through the enlarged picture.

A

 During playback, press 

ZOOM

 on the 

remote control repeatedly to select a 
different zoom factor.

 Use 

WXST

 keys to move through 

the zoomed image.

 Playback will continue.

B

 Press 

ZOOM

 repeatedly to return to 

the original size.

Disc operations 

(continued)

TIPS: 

The operating features described here might not be possible for certain discs.


Always refer to the instructions supplied with the discs.

Содержание HTS9800W

Страница 1: ...English DVD SACD HOME THEATER SYSTEM HTS9800W User Manual 6 Manuel D utilisation 58 Manual de Instrucciones 110 ...

Страница 2: ...arantees that your date of purchase will be on file so no additional paperwork will be required from you to obtain war ranty service Product Safety Notification By registering your product you ll receive notification directly from the manufacturer in the rare case of a product recall or safety defect Additional Benefits Registering your product guar antees that you ll receive all of the privileges...

Страница 3: ...aratus When a cart is used use caution when moving the cart apparatus combination to avoid injury from tip over 13 Unplug this apparatus during lightning storms or when unused for long periods of time 14 Refer all servicing to qualified service personnel Servicing is required when the apparatus has been damaged in any way such as power supply cord or plug is damaged liquid has been spilled or obje...

Страница 4: ...result in hazardous radiation exposure or other unsafe operation ATTENTION L utilisation des commandes ou réglages ou le non respect des procédures ciincluses peuvent se traduire par une exposition dangereuse à l irradiation ATENCIÓN El uso de mando o ajustes o la ejecucción de métodos que no sean los aquí descritos puede ocasionar peligro de exposición a radiación CONSUMERS SHOULD NOTE THAT NOT A...

Страница 5: ...merica Corp P O Box 671539 Marietta GA 30006 0026 1 800 PHILIPS 744 5477 NOTE This equipment has been tested and found to comply with the limits for a Class B digital device pursuant to Part 15 of the FCC Rules These limits are designed to provide reasonable protection against harmful interference in a residential installation This equipment generates uses and can radiate radio frequency energy an...

Страница 6: ...ng the speakers on the wall 18 Connecting to a Progressive Scan TV 19 Connecting to a HDMI compatible device 19 Connecting to an analog audio video device 20 Connecting to a digital audio device 20 Connecting to an outdoor FM antenna terminal 21 Getting Started Step 1 Turning on the DVD system 22 Turning off to standby mode 22 Step 2 Finding the correct viewing channel 22 Step 3 Setting language p...

Страница 7: ... 35 Playing a DivX disc 36 DVD System Menu Options Accessing the DVD setup menu 37 General Setup Page 38 Audio Setup Page 39 Video Setup Page 40 42 Preference Setup Page 43 45 Radio Tuning Tuner Operations 46 Tuning to radio stations 46 Presetting radio stations 46 Using auto install 46 Using automatic preset 47 Using manual preset 47 Selecting a preset radio station 47 Deleting a preset radio sta...

Страница 8: ...mail addresses are given in the guarantee booklet Refer to the type plate on the rear or bottom of the product for identification and supply ratings Accessories supplied 1 DVD system 1 AV subwoofer 1 AV wireless receiver box 2 center speakers 2 front speakers stands 2 rear speakers stands 3 x 1 pair of screws for wall mount 3 x 1 pair of brackets for wall mount 1 remote control with batteries 1 VG...

Страница 9: ...tation d DISC selects a track or press and hold this button to search backward forward TUNER tunes the radio frequency up down e SOURCE Selects the relevant active source mode DISC TUNER FM TV or AUX DI f VOLUME Adjusts the volume level g Volume Indicator A h ç EJECT Opens closes the disc tray i System display panel j Disc Slot i j a b c d e f g h Front View Side View Touch screen controls Refer t...

Страница 10: ... direction in the menu TUNER press W or X to select a preset radio station TUNER press S or T to select auto tuning f OK Confirms a selection g DISC press and hold to search backward forward or to select a track TV selects previous next channel Philips TV only TUNER tunes the radio frequency up down h Ç Exits an operation DISC stops playback or press and hold to eject a disc TUNER press and hold t...

Страница 11: ...BLE high tone sound mode and use the VOLUME control to change the tone level t AUDIO Selects an audio language DVD or an audio channel CD u ZOOM Enlarges a picture on the TV screen v TV VOL Adjusts TV volume Philips TV only w PLAYÉ DISC starts playback x Å DISC pauses playback y DISC MENU Enters or exits disc contents menu For VCD version 2 0 only In stop mode turns on off playback control PBC mod...

Страница 12: ...t the remote sensor IR on the front panel of the DVD system E Select the source you want to control by pressing the SOURCE button on the remote control F Select the desired function for example CAUTION Remove batteries if they are exhausted or if the remote control is not to be used for a long time Do not mix batteries old and new or carbon and alkaline etc Batteries contain chemical substances so...

Страница 13: ...ple to install Proper system placement is critical to ensure an optimum sound experience The placement diagrams shown here are only guidelines that provide great system performance you may find other placement choices that are more suitable for your room layout and provide the sound experience you enjoy Placing the speakers When placing the speakers ensure that The center speakers FRONT CENTER REA...

Страница 14: ...s attach one side of the supplied velcro strip on the junction box and another at the place you wish to fix the Junction box Placing the AV wireless receiver box You may place the AV wireless receiver box at the back of the room and at a convenient distance so that you can connect the REAR CENTER REAR LEFT and REAR RIGHT speakers to the box Ensure the AV wireless receiver box is placed near to the...

Страница 15: ...peakers To TV Example of TV s back panel Before you start If you wish to mount the DVD system on the wall see section Optional Connections before making any connections Extend the FM pigtail antenna and place its end where the reception is best received To AC power outlet To AC power outlet TV To change the power cord remove the DVD system cover Connect your speaker to the supplied speaker stand s...

Страница 16: ...pplied speaker wire to the tab on the base of each speaker stand See Step 1 Assemble the speakers RIGHT CENTER LEFT SPEAKERS REAR RIGHT REAR LEFT REAR CENTER Base view of AV wireless receiver box AV wireless receiver box B Connect the colored speaker plug from each speaker to the matching speaker jack on the base of the AV wireless receiver box For convenience each speaker jack has been color code...

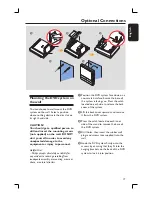
Страница 17: ... accidents or damage resulting from inadequate assembly or mounting misuse or abuse or natural disasters A Position the DVD system face down on a non scratch surface Ensure the base of the system is facing you Press the catch located on each side to release the back cover of the system B Lift the back cover upwards and remove it from the DVD system C Press the catch located on each inner side of t...

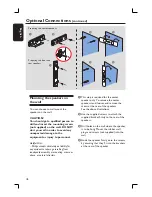
Страница 18: ...ate assembly or mounting misuse or abuse or natural disasters A B C D A This step is required for the center speaker only To remove the center speaker stand loosen and remove the scews at the rear of the speakers See the above illustrations B Use the supplied screws to attach the supplied bracket firmly to the rear of the speakers C Drill holes on the wall where the speaker is to be hung Mount the...

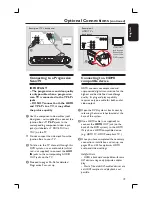
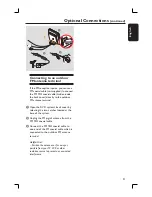
Страница 19: ...he TV C Proceed to pages 25 26 for detailed Progressive Scan set up Connecting to a HDMI compatible device HDMI connects uncompressed and unprocessed digital transmission for the highest and best defined sound image quality Its plug and play capability requires only one cable for both audio video output A Open the DVD system s back cover by releasing the two catches located at the base of the syst...

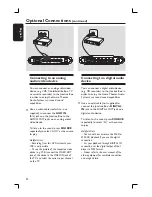
Страница 20: ...vice e g VCR connect the VIDEO OUT jack of the device to the VIDEO IN jack of the TV and select the correct input channel on the TV Connecting to a digital audio device You can connect a digital audio device e g CD recorder to the Junction Box in order to enjoy the Home Theater Audio System s surround sound capabilities Use a coaxial cable not supplied to connect the Junction Box s DIGITAL IN jack...

Страница 21: ... FM antenna terminal A Open the DVD system s back cover by releasing the two catches located at the base of the system B Unplug the FM pigtail antenna from the FM 75 coaxial cable C Connect the FM 75 coaxial cable to one end of the FM coaxial cable which is connected to the outdoor FM antenna terminal Helpful Hint Position the antennas as far away as possible from your TV VCR or other radiation so...

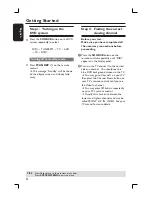
Страница 22: ...ng A Press the SOURCE button on the remote control repeatedly until DISC appears on the display panel B Turn on the TV and set it to the correct video in channel You should see the blue DVD background screen on the TV You may go to Channel 1 on your TV then press the Channel Down button on your TV s remote control until you see the Video In channel You may press button repeatedly on your TV s remo...

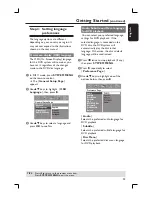
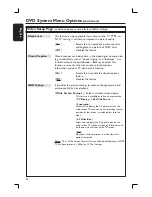
Страница 23: ...dio Subtitle and Menu language for DVD playback You can select your preferred language settings for DVD playback If the selected language is recorded on the DVD disc the DVD system will automatically play the disc in that language Otherwise the disc s default language will be used instead A Press Ç twice to stop playback if any then press SYSTEM MENU B Press X repeatedly to select Preference Page ...

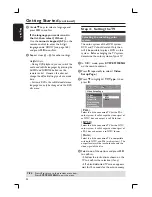
Страница 24: ...or system of your TV A In DISC mode press SYSTEM MENU on the remote control B Press X repeatedly to select Video Setup Page C Press T to highlight TV Type then press X Video Setup Page TV Type TV Display Progressive Picture Setting Black Level Closed Caption PAL NTSC Multi PAL Select this if the connected TV has the PAL color system It will change the video signal of an NTSC disc and output it to ...

Страница 25: ...K to confirm Setting up Progressive Scan feature for Progressive ScanTV only The progressive scan feature displays twice the number of frames per second than interlaced scanning ordinary normal TV system With nearly twice the number of lines progressive scan offers a higher picture quality and resolution IMPORTANT Before enabling the progressive scan feature you must ensure 1 Your TV can accept pr...

Страница 26: ...o highlight OK in the menu and press OK to confirm The set up is complete now and you can start to enjoy the high quality picture Getting Started continued If no picture is displayed Wait for 15 seconds for the auto recovery OR A Deactivate the Progressive Scan feature by pressing the ç EJECT on the front panel B PressÉon the remote control C Press SUBTITLE on the remote control The blue DVD backg...

Страница 27: ...ht one of the options below at a time then press X Speakers Volume Volume level setting for individual speakers 6dB 6dB Speakers Volume Setup Front Left Front Right Center Subwoofer Rear Left Rear Right Rear Center 0dB 0dB 0dB 0dB 0dB 0dB 0dB Speakers Delay Delay times setting in relation to the listening position distance for center and surround speakers Speakers Delay Setup Center Rear Left Rear...

Страница 28: ... DVD discs and players are designed with regional restrictions Before playing a disc make sure the disc is for the same region as your player The regional code for this DVD system is indicated at the rear panel IMPORTANT If the inhibit icon ø or X appears on the TV screen when a button is pressed it means the function is not available on the current disc or at the current time Do not put any objec...

Страница 29: ...nter your six digit password see page 45 E To remove the disc press ç EJECT or press and hold the Ç button on the remote control Basic playback controls Pausing playback During playback press u PLAY PAUSE or Å on the remote control To resume playback press u again or PLAY X on the remote control Selecting another track chapter Press PREV NEXT or use the numeric keypad 0 9 to key in a track chapter...

Страница 30: ...older SHUFFLE random play RPT OFF exit repeat mode Helpful Hint Repeat playback is not possible on VCDs when the PBC mode is turned on Other playback features for video discs DVD VCD SVCD É Å WXST OK Ç SUBTITLE ZOOM AUDIO DISPLAY SYSTEM MENU ON STANDBY Using the Disc Menu Depending on the disc format a menu may appear on the TV screen once you load in the disc To select a playback feature or item ...

Страница 31: ...point This DVD system is able to resume disc playback from its last stopped point only possible for the last 10 discs that were recorded without a menu A Load one of the last 10 discs played B While LOADING appears on the display panel press PLAYÉ or u on the display panel to start playback from the last stop point To cancel the resume mode C Press Ç STOP twice Zooming in This function allows you ...

Страница 32: ... recorded from different camera angles This allows you to view the picture from different angles Press ANGLE repeatedly to select the available camera angles Playback Control VCD only PBC playback allows you to play Video CDs interactively following the menu on the display This function can also be accessed via the Preference Page menu see page 44 For VCDs with Playback Control PBC feature version...

Страница 33: ...ST keys to select a desired folder and press OK to open the folder C Use ST keys to select a track file and press OK to start playback Playback will start from the selected file and continue till the end of the folder During playback you can Press to select another track file in the current folder Press and hold to fast reverse forward search for a music track To select another folder from the cur...

Страница 34: ...atedly to select a different zoom factor B Use WXST keys to pan through the zoomed image Rotating flipping the picture During playback use WXST keys to rotate flip the picture on the TV S flip the picture vertically T flip the picture horizontally W rotate the picture counter clockwise X rotate the picture clockwise Supported file format The file extension has to be JPG and not JPEG It can only di...

Страница 35: ...ents during internet downloading Only the first session of a multi session CD will be played back Playing a Super Audio CD SACD There are three types of SACD discs single layer double layer or hybrid discs The hybrid disc contains both Super Audio CD and standard audio CD layers only the SACD layer can be played back on this DVD system A Insert a SACD The disc menu appears on the TV B Playback wil...

Страница 36: ...ntrol If multilingual subtitles are embedded on the DivX disc you can press SUBTITLE to change the subtitle language while playing Helpful Hints Subtitle files with the following filename extensions srt smi sub ssa ass are supported but do not appear on the file navigation menu The subtitle filename has to be the same as the filename of the movie The subtitle can only be displayed up to a maximum ...

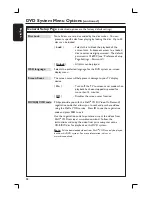
Страница 37: ...t the setting you wish to change and press OK to confirm and go back to the previous selected item Instructions and explanations of the options are provided in the following pages If the option in the menu is grayed out that means the setting is not available or cannot be changed in the current state E To exit press SYSTEM MENU see page 38 see page 39 see page 40 see page 44 General Setup Page Dis...

Страница 38: ...een Saver The screen saver will help prevent damage to your TV display device On Turns off the TV to screen saver mode when playback has been stopped or paused for more than 15 minutes Off Disables the screen saver function DIVX R VOD code Philips provide you with the DivX VOD Video On Demand registration code that allows you to rent and purchase videos using the DivX VOD service Press X to see th...

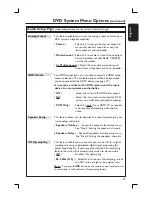
Страница 39: ...Select this to turn off HDMI audio output All Select this if you have connected the DVD system to a multi channel decoder receiver PCM Only Select this only if your HDMI TV or receiver is not capable of decoding multi channel audio Speaker Setup This feature allows you to optimize the sound according to your surroundings and setup Speakers Volume Access the speakers level setup menu See Step 5 Set...

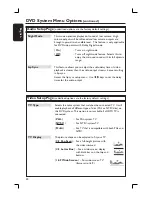
Страница 40: ... set the delay times for the audio output Audio Setup Page underlined options are the factory default settings Video Setup Page underlined options are the factory default settings TV Type Selects the color system that matches the connected TV It will enable playback of different type of disc PAL or NTSC disc on this DVD system This option is not available if a HDMI TV is connected PAL For PAL syst...

Страница 41: ...UBTITLE on the remote control Picture Setting This DVD system provides three predefined sets of picture color settings and one personal setting which you can define yourself Standard Original color setting Bright Vibrant color setting Soft Warm color setting Personal Select this to personalize your picture color by adjusting the brightness contrast tint and color saturation Use W X keys to adjust ...

Страница 42: ...so has this function On Selects this to enable the closed captions feature Off Disables the feature HDMI Setup It provides the picture settings to enhance the appearance and picture quality for disc playback Wide Screen Format Select a suitable screen display This feature is available only if you have selected TV Display 16 9 Wide Screen Superwide Select this to display the 4 3 picture disc on the...

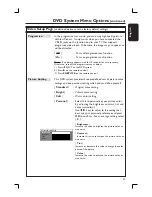
Страница 43: ...tput in 480 lines for NTSC TV Selecting this will disable the Wide Screen Format feature 576p Progressive output in 576 lines for PAL TV Selecting this will disable the Wide Screen Format feature 720p if a HDMI TV is connected Progressive output upscale to 720 lines 1080i if a HDMI TV is connected Interlaced output upscale to 1080 lines Auto The video output will automatically follow the display s...

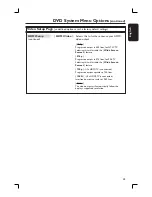
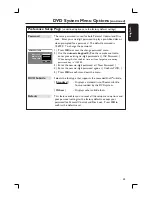
Страница 44: ...nter your six digit password DVDs that are rated higher than the level you selected will not be played unless you enter the same six digit password Note Some DVDs are not encoded with a rating though the movie rating may be printed on the Disc cover The rating level feature does not prohibit playback of such Discs VCD SVCD and CD have no level indication so parental control has no effect on these ...

Страница 45: ...ing this for the first time or if you forget your existing password key in 136900 3 Enter the new six digit password at New Password 4 Enter the new six digit password again at Confirm PWD 5 Press OK to confirm and exit the menu DIVX Subtitle Selects the font type that supports the recorded DivX subtitle Standard Displays a standard list of Roman subtitle fonts provided by this DVD system Others D...

Страница 46: ...nstall for first time setup only Using automatic preset Using manual preset Helpful Hints The system will exit presetting mode if no button is pressed within 20 seconds If no valid frequency is detected during tuner installation PLEASE CHECK FM ANTENNA appears Using auto install This feature is only applicable for the first time radio station programming You will be prompted for installing the rad...

Страница 47: ...r former presets will be overridden Using manual preset Use manual presetting to store only your favorite radio stations A Tune to your desired radio station see Tuning to radio stations B Press PROGRAM C Use WX keys to select a preset number that you want to store the current radio station under D Press PROGRAM again to store Selecting a preset radio station Use WX keys to select a preset number ...

Страница 48: ...ote control B Within five seconds use the VOL to adjust the Bass or Treble level MIN 2 1 0 1 2 or MAX If the volume control is not used within five seconds it will resume its normal volume control function Selecting digital sound effects Select a preset digital sound effect that matches your disc s content or that optimizes the sound of the musical style you are playing Press SOUND to select the a...

Страница 49: ...until SLEEP XX appear on the display panel XX 15 30 45 60 or OFF B To select the next sleep timer value press DIM button again while in sleep timer mode until it reaches the desired preset turn off time SLEEP will be showed on the display panel except if OFF is selected Before the system switches to the standby mode a countdown of 10 seconds is displayed SLEEP10 SLEEP 9 SLEEP1 SLEEP To cancel the ...

Страница 50: ... Digital IEC 60958 IEC 61937 DTS IEC 60958 IEC 61937 SACD D A converter PCM SACD cut off frequency 50 kHz CENTER UNIT Power Supply Rating 120V 60 Hz Power Consumption 12W Dimensions 273 x 284 x 144 mm w x h x d Weight 2 8 kg AV SUBWOOFER Power Supply Rating 120 V 60 Hz Power Consumption 130 W System Bass Reflex System Impedance 4 Speaker drivers 165mm 6 5 woofer Frequency response 30 Hz 120 Hz Dim...

Страница 51: ...e progressive scan feature is activated but the connected TV does not support progressive signals or the cables are not connected accordingly see pages 25 26 for proper progressive scan set up or deactivate the progressive scan feature as below 1 Turn off your TV progressive scan mode or turn on to interlaced mode 2 Press çEJECT on the DVD system 3 Press X on the remote control 4 Press SUBTITLE on...

Страница 52: ... system turned on for about an hour Press the SURR button to select a correct surround sound setting Make sure the source you are playing is recorded or broadcast in surround sound DTS Dolby Digital etc If the signal is too weak adjust the antenna or connect an external antenna for better reception Increase the distance between the system and your TV or VCR Tune in to the correct frequency Place t...

Страница 53: ...vices with HDCP High Bandwidth Digital Content Protection If you wish to connect to a DVI connector equipped with HDCP you will need a separate adaptor DVI to HDMI Make sure the resolution of this DVD system matches the device you have connected using the HDMI See DVD System Menu Options Video Setup Page You need to switch to another frequency channel to avoid bandwidth interference by other wirel...

Страница 54: ... and right center and subwoofer Dolby Digital EX A surround sound system developed by Dolby Laboratories containing up to seven channels of digital audio front left and right surround left and right center front and rear subwoofer Dolby Surround Pro Logic II It is an improved matrix decoding technology that provides better spatiality and directionality on Dolby Surround program material provides a...

Страница 55: ...ally increases the vertical resolution Region code A system allowing discs to be played only in the region designated This unit will only play discs that have compatible region codes You can find the region code of your unit by looking on the product label Some discs are compatible with more than one region or ALL regions Super Audio CD SACD This audio format is based upon the current CD standards...

Страница 56: ...llation of programs data or other information is not covered under this Limited Warranty This warranty does not apply a to damage caused by accident abuse misuse misapplication or non Philips product b to damage caused by service performed by anyone other than Philips or Philips Authorized Service Location c to a product or a part that has been modified without the written permis sion of Philips o...

Отзывы: