Using more of your HD recorder
30
Digital output
• HDMI output resolution
- Use this to
set the HDMI video resolution to
576i
,
576p, 720p
,
1080i
,
1080p
,
Auto
(default)
or
Original
. Note that you can also
change this setting using the
RES
button
on the front panel of your HD recorder.
• Audio capabilities on HDMI
- Use this
to set the HDMI audio format to
PCM
(default) or
Auto
*.
• Audio capabilities on S/PDIF
- Use this
to set the S/PDIF audio format to
PCM
(default) or
Dolby Digital
*. You can also
set this to
Not connected
.
• Easy Link mode
- For future use.
• TV format
- Use this to set the format
of the high-definition video that is output
on the
HDMI
connector of your HD
recorder. You can set this to
16/9 Pillar
Box
(default),
16/9 Full Screen
or
16/9
Zoom
. These options determine how
standard (4:3) programmes show on a
TV with aspect ratio of 16:9. Note that
you can directly change this setting using
the
picture format
button on your
remote control.
* The
Auto
and
Dolby Digital
settings on
HDMI or S/PDIF are not recommended until
your HD recorder has been updated with the
appropriate software.
Visit www.philips.com/support regularly to
check if the relevant software update is available.
Automatic eco mode
Use this to set the time after which your
inactive HD recorder automatically enters
into the active standby mode. You can set
this to
off
,
3 hours
(default),
4 hours
,
5 hours
,
6 hours
,
7 hours
or
8 hours
.
Return channel
Use this to configure your HD recorder
to connect to the internet, which then
serves as a return channel to your Digital
TV service provider. The return channel is
necessary to use any interactive applications
that your Digital TV service provider may
offer. Before configuring the return channel,
be sure to connect your HD recorder to
your network router using an Ethernet
cable. Then choose either
DHCP
to set up
your connection automatically or manually
enter all the parameters like
IP address
,
Network mask
,
Gateway
and
DNS
settings to match your router’s settings.
Default volume
Use this to set the default volume at wake-
up of your HD recorder.
Recording auto deletion
When you select a programme to record,
your HD recorder checks whether there
is enough disk space to record it. If the
disk is nearly full, your HD recorder will
automatically delete some of your old and
unprotected programmes to make space for
the new programme. Use this setting to turn
off or on (default) this feature.
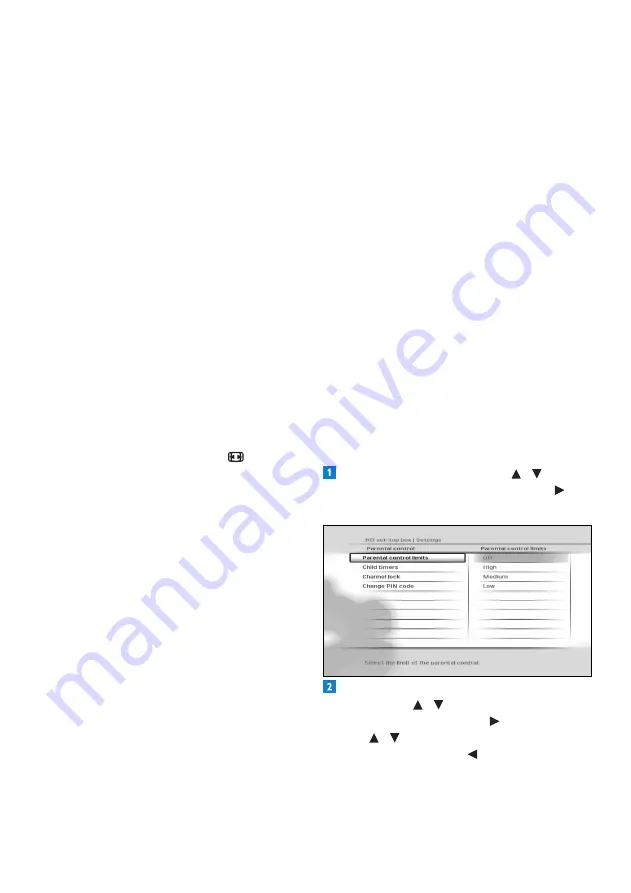
Changing parental control settings
From the
Settings
menu, use
/ to
highlight
Parental control
and press
or
OK
. The
Parental control
menu appears.
To change the parental control severity
settings, use
/ to highlight
Parental
control limits
, and press
or
OK
.
Use / to highlight the severity level you
want to set, and press
or
OK
to save your
changes and return to the previous menu.
Note that if you set the
Parental control
limits
to
Off
, the child timers and channel


