background image

10

EN

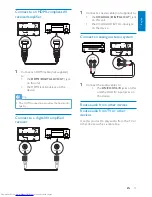
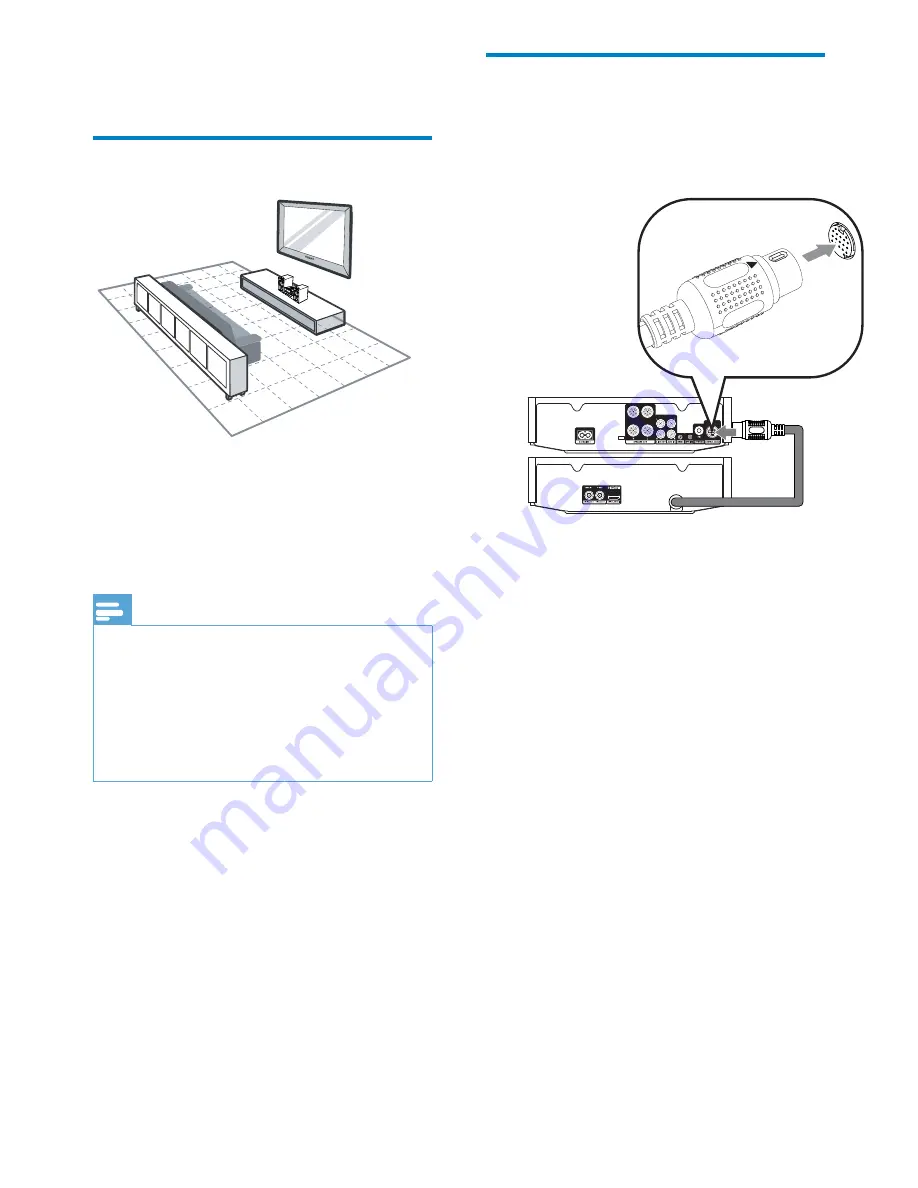
Connect control cable

"

Connect the control cable connector 
from the back of the DVD unit to the 

CONTROL CABLE

 jack on the back of 

 !%

3 Connect

Place the unit


1

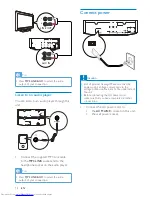
  Place the unit near to the TV.

2

  Place the left and right speakers at equal 

distance from the TV and at an angle 
of approximately 45 degrees from the 
listening position.

Note


"

To avoid magnetic interference or unwanted 
noise, never place this apparatus and speakers 
too close to any radiation devices.


"

Place this unit on top of a table or mount it on 
the wall.


"

Never place this unit in an enclosed cabinet.


"

Install this unit near the AC outlet where the 
AC power plug can be easily reached.

Содержание Harmony DCD8000

Страница 1: ...EN User manual DCD8000 Register your product and get support at www philips com welcome ...

Страница 2: ...Press button Play ...

Страница 3: ...ough headphone 30 11 Product information 31 31 Supported disc formats 32 USB playability information 32 RDS program types 33 12 Troubleshooting 34 Contents 1 Important 2 Safety 2 Notice 4 2 Your DVD Micro Theater 6 Introduction 6 What s in the box 6 Overview of the main unit 7 Overview of the remote control 8 3 Connect 10 Place the unit 10 Connect control cable 10 Connect speakers 11 Connect FM an...

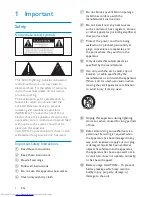
Страница 4: ...ave fallen into the apparatus the apparatus has been exposed to rain or moisture does not operate normally or has been dropped n Battery usage CAUTION To prevent battery leakage which may result in bodily injury property damage or damage to the unit 1 Important Safety Know these safety symbols This bolt of lightning indicates uninsulated material within your unit may cause an electrical shock For ...

Страница 5: ... not to adjust the volume as your hearing adapts Do not turn up the volume so high that you can t hear what s around you You should use caution or temporarily discontinue use in potentially hazardous situations Do not use headphones while operating a motorized vehicle cycling hazard and is illegal in many areas Install all batteries correctly and as marked on the unit Do not mix batteries old and ...

Страница 6: ...ce iPod and iPhone are trademarks of Apple Inc registered in the U S and other countries iPad is a trademark of Apple Inc Notice device that are not expressly approved by Philips Consumer Lifestyle may void the user s authority to operate the equipment This product complies with the radio interference requirements of the European Community Your product is designed and manufactured with high qualit...

Страница 7: ... are trademarks of Dolby Laboratories ABOUT DIVX VIDEO DivX is a digital video J J J Visit www divx com for more information and J video ABOUT DIVX VIDEO ON DEMAND This J device must be registered in order to play DivX Video on Demand VOD content To generate the registration code locate the DivX VOD section in the device setup menu Go to vod divx com with this code to complete the registration pro...

Страница 8: ... your purchase and support that Philips offers register your product at www philips com welcome Introduction With this unit you can Watch video from DVD VCD SVCD or USB storage devices Enjoy audio from discs iPod iPhone iPad or USB storage devices View pictures from discs or USB storage devices Listen to FM radio You can enrich sound output with these sound effects Bass treble enhancement Automati...

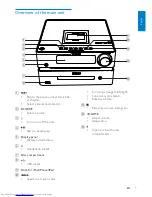
Страница 9: ...the disc compartment Overview of the main unit a Skip to the previous next track title or chapter Select a preset radio station b SOURCE Select a source c Turn on or off the unit d Start or pause play e Display panel Display current status f Headphone socket g Disc compartment h USB socket i Dock for iPod iPhone iPad j Search in a track or disc i l k c b a j f e d h g m ...

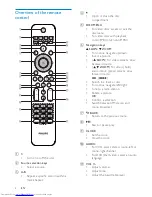
Страница 10: ...dio station Rotate a picture OK Switch between FM stereo and mono broadcast g BACK Return to the previous menu h Start or pause play i CLOCK Set the clock View the clock j AUDIO For VCD select stereo mono left or mono right channel For DVD DivX video select an audio language k VOL Adjust volume Adjust time Adjust the bass treble level Overview of the remote control a Turn on or off the unit b Sour...

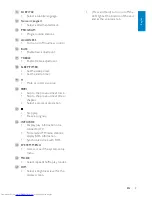
Страница 11: ...nt q TREBLE Enable treble adjustment r SLEEP TIMER Set the sleep timer Set the alarm timer s Mute or restore volume t Skip to the previous next track Skip to the previous next title or chapter Select a preset radio station u Stop play Erase a program v INFO RDS Display play information on a connected TV For selected FM radio stations display RDS information Synchronize clock with RDS w SYSTEM MENU...

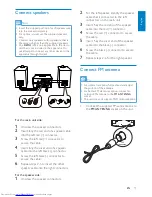
Страница 12: ...eakers at equal distance from the TV and at an angle of approximately 45 degrees from the listening position Note To avoid magnetic interference or unwanted noise never place this apparatus and speakers too close to any radiation devices Place this unit on top of a table or mount it on the wall Never place this unit in an enclosed cabinet Install this unit near the AC outlet where the AC power plu...

Страница 13: ... ANTENNA socket on the unit Connect speakers Note Insert the stripped portion of each speaker wire into the socket completely For optimal sound use the supplied speakers only Connect only speakers with impedance that is the same or higher than the supplied speakers The DEMO jack is only applicable to the demo unit that is not included in the apparatus Do not attempt to connect any other device to ...

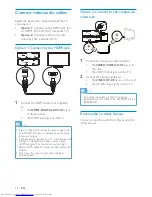
Страница 14: ...he best video connection that theTV can support Option 1 Connect to the HDMI jack for an HDMI DVI or HDCP compliant TV Option 2 Connect to the composite video jack for a standard TV Option 1 Connect to the HDMI jack 1 Connect an HDMI cable not supplied to the HDMI DIGITAL AV OUT jack on this product the HDMI input jack on the TV Tip If the TV has a DVI connector only connect via an HDMI DVI adapto...

Страница 15: ...this unit the AUDIO input jacks on the device Route audio from other devices Route audio from TV or other devices Use this product to play audio from the TV or other device such as a cable box AUDIO IN R L Connect to an HDMI compliant AV 1 Connect an HDMI cable not supplied to the HDMI DIGITAL AV OUT jack on this unit the HDMI jack input jack on the device Tip The HDMI connection provides the best...

Страница 16: ...onnect the AC power cord to the AC MAINS socket on this unit the wall power socket Tip Press MP3 LINK AUX to select the audio output of your connection Listen to an audio player You can listen to an audio player through this unit Connect the supplied MP3 Link cable to the MP3 LINK socket and to the headphone socket on the audio player Tip Press MP3 LINK AUX to select the audio output of your conne...

Страница 17: ...o set the minute 6 Press CLOCK 4 Get started Caution Use of controls or adjustments or performance of procedures other than herein may result in hazardous radiation exposure or other unsafe operation Always follow the instructions in this chapter in sequence If you contact Philips you will be asked for the model and serial number of this apparatus The model number and serial number are on the back...

Страница 18: ...nge system menu language 1 Press SYSTEM MENU 2 Select General Setup 3 Select OSD Language and then press 4 Select a setting and then press OK 5 To exit the menu press SYSTEM MENU Adjust brightness of display panel 1 In power on or standby mode press DIM repeatedly to select different brightness levels Turn on or off LED light 1 In power on mode press and hold DIM to turn on or off the LED light at...

Страница 19: ... access the menu Play from USB or recored discs You can play DivX Ultra MP3 WMA J recordable DVD or USB storage device 5 Play Caution Risk of damage to the unit During play never move the unit Play a disc Caution Never look at the laser beam inside the unit Risk of product damage Never play discs with accessories such as disc stabilizer rings or disc treatment sheets Never put any objects other th...

Страница 20: ...Search forward backward 1 During video audio play press repeatedly to select a search speed To resume play at normal speed press 1 Select a source For a USB storage device press USB For a disc press DISC 2 Insert the USB storage device or disc The play starts automatically 1 Press to stop play 2 Press to select a folder and then press OK To return to the upper level directory press to select and t...

Страница 21: ...ature is only available for DVD VCD play 1 In stop mode and when the disc has not been removed press To cancel resume mode and stop play completely 1 In stop mode press Play options Display play information 1 During play press INFO RDS to display play information on the TV Zoom in out image 1 During video play hold ZOOM to zoom in out the image When the image is zoomed in you can press to move to ...

Страница 22: ...ss BACK to access the menu press to select an item and then press OK 6 Play iPod iPhone iPad You can enjoy audio from iPod iPhone iPad through this unit Note The audio is only output through the supplied speakers Compatible iPod iPhone iPad The unit supports the following iPod iPhone and iPad models List of compatible iPod iPhone iPad Made for iPod mini iPod touch 1st 2nd 3rd and 4th generation iP...

Страница 23: ... s h Charge the iPod iPhone iPad When the unit is connected to power the docked iPod iPhone iPad begins to charge Remove the iPod iPhone iPad 1 Pull the iPod iPhone iPad out of the dock 2 Press down to hide the dock ...

Страница 24: ...io stations automatically You can also search and store radio stations manually Tune to a radio station 1 Press RADIO 2 Press and hold for more than 2 seconds The radio tunes to a station with strong reception automatically 3 Repeat step 2 to tune to more stations To tune to a weak station press reception Tip STEREO is the default setting for tuner mode In tuner mode you can press OK repeatedly to...

Страница 25: ...tation that transmits the time signal Tune to a preset radio station 1 Press to select a preset number that you want Show RDS information RDS Radio Data System is a service that allows FM stations to show additional information If you tune to an RDS station an RDS icon and the station name are displayed 1 Tune to an RDS station 2 Press INFO RDS repeatedly to scroll through the following informatio...

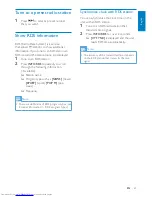
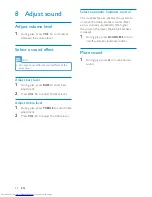
Страница 26: ...c loudness control Mute sound 1 During play press to mute resume sound 8 Adjust sound Adjust volume level 1 During play press VOL to increase decrease the volume level Select a sound effect Note You cannot use different sound effects at the same time Adjust bass level 1 During play press BASS to enter bass adjustment 2 Press VOL to adjust the bass level Adjust treble level 1 During play press TREB...

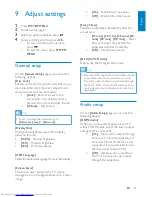
Страница 27: ...format on the disc is not supported it is downmixed to two channel sound Linear PCM Off disable audio output from the TV The sound is only output through this apparatus 9 Adjust settings 1 Press SYSTEM MENU 2 Select a setup page 3 Select an option and then press 4 Select a setting and then press OK To return to the previous menu press To exit the menu press SYSTEM MENU General setup On the General...

Страница 28: ...Link feature One Touch Play After you enable this feature the connected HDMI CEC TV automatically switches to the HDMI input channel when you play a disc One Touch Standby After you enable this feature you can press and hold on the remote control Audio Sync When you play a video disc set the default delay time for audio output 1 To start press OK 2 Select a speaker delay in the menu then press to ...

Страница 29: ...sword 3 Enter the new password again at Password 4 Press OK to exit the menu of this unit to switch all connected HDMI CEC devices to standby mode simultaneously System Audio Control When you play audio that is routed from the connected devices this unit switches to the corresponding audio source automatically After you enable this feature proceed to Audio Input Mapping to scan and map all the con...

Страница 30: ... set a new password DivX Subtitle Select a character set that supports the DivX subtitle Note Q Q Movie srt Version Info Display the software version of this apparatus Default Reset all the settings to factory default except for the password and parental settings ...

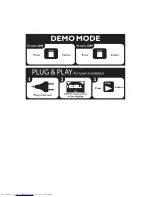
Страница 31: ...EEP TIMER repeatedly until SLE OFF sleep off is displayed When the sleep timer is deactivated is no longer displayed 10 Other features Activate demonstration mode You can see an overview of all features 1 In the standby mode with clock display if set press on the main unit to activate the demonstration mode A demonstration of major available features starts To deactivate the demonstration mode 1 P...

Страница 32: ...n audio device through this unit 1 Make sure that the external audio device is connected to this unit see Connect Connect an external audio device 2 Press MP3 LINK AUX repeatedly to select the audio input through the MP3 LINK socket or AUX IN L and R sockets 3 Start to play the device see the device user manual ...

Страница 33: ...oduct information Note Product information is subject to change without prior notice Rated Output Power 2 X 80 W RMS Frequency Response 30 Hz 16000 Hz 3 dB Signal to Noise Ratio 82 dBA Aux Input 1000mV RMS 22k ohm Disc Laser Type Semiconductor Disc Diameter 12 cm 8 cm Video Decoding MPEG 1 MPEG 2 DivX Video DAC 12 Bits Signal System PAL NTSC Video Format 4 3 16 9 Video S N 57 dB Audio DAC 24 Bits ...

Страница 34: ...TF8 maximum length 128 bytes Unsupported formats Empty albums an empty album is an album that does not contain MP3 Q the display skipped For example Word Q General information AC power 220 240 V 50 60 Hz Operation Power Consumption 45 W Eco Standby Power Consumption 0 5 W Composite Video Output 1 0 Vp p 75 ohm Coaxial Ouput 0 5 Vpp 0 1 Vpp 75 ohm Headphone output 2 X 15 mW 32 ohm USB Direct Versio...

Страница 35: ... mp4 aac Q RDS program types NO TYPE No RDS programme type NEWS News services AFFAIRS Politics and current affairs INFO Special information programs SPORT Sports EDUCATE Education and advanced training DRAMA Radio plays and literature CULTURE Culture religion and society SCIENCE Science VARIED Entertainment programs POP M Pop music ROCK M Rock music MOR M Light music LIGHT M Light classical music ...

Страница 36: ...g and then turn on the system again As a power saving feature the system turns off automatically 15 minutes after disc play reaches the end and no control is operated 12 Troubleshooting Caution Never remove the casing of this apparatus To keep the warranty valid never try to repair the system yourself If you encounter problems when using this apparatus check the following points before requesting ...

Страница 37: ...d Audio or subtitle languages cannot be set The disc is not recorded with sound or subtitles in multiple languages The audio or subtitle language setting is prohibited on the disc device has exceeded a certain limit This phenomenon is not a malfunction supported USB device not supported The USB device is incompatible with the unit Try another one Timer does not work Set the clock correctly Switch ...

Страница 38: ... 2011 Koninklijke Philips Electronics N V All rights reserved DCD8000_UM_12_V2 0 ...

Отзывы: