background image

18

EN

7  Wall mount 

your product

Before you mount your product on the wall, 
read all safety precautions. (see ‘Safety’)

Wall mount

Note


 Improper wall mounting may result in 
accident, injury or damage. If you have any 
query, contact Consumer Care in your country.


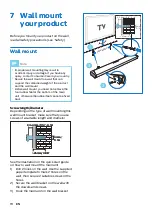
 Secure the wall mount to a wall that can 
support the combined weight of the product 
and the wall mount.


 Before wall mount, you need not remove the 
four rubber feet at the bottom of the main 
unit, otherwise the rubber feet cannot be fixed 
back.

Screw length/diameter

Depending on the type of wall mounting this 
wall mount bracket, make sure that you use 
screws of a suitable length and diameter.

3.5-4mm/0.14”-0.16”

4mm/

0.16”

>25mm/0.98”

3.5-4mm/0.14”-0.16”

4mm/

0.16”

>25mm/0.98”

See the illustration on the quick start guide 
on how to wall mount the main unit.
1)   Drill 2 holes on the wall. Use the supplied 

paper template to mark 2 holes on the 
wall, then secure 2 suitable screws in the 
holes.

2)   Secure the wall bracket on the wall with 

the dowels and screws.

3)  Hook the main unit on the wall bracket.

1

~50mm/2.0"

3

3.5-4mm/0.14”-0.16”

4mm/

0.16”

>25mm/0.98”

1

790mm/31.1"

~50mm/2.0

"

3

3.5-4mm/0.14”-0.16”

4mm/

0.16”

>25mm/0.98”

22
Содержание Fidelio B95

Страница 1: ...ur product and get support at www philips com support User manual TAPR802 Fidelio B95 Soundbar 5 1 2 Register your product and get support at www philips com support User manual TAPR802 Fidelio B95 Soundbar 5 1 2 ...

Страница 2: ...a USB 17 7 Wall mount your product 18 Wall mount 18 8 Product specifications 19 9 Troubleshooting 20 1 EN Contents 1 Important 2 Safety 2 Care for your product 3 Care of the environment 3 Compliance 3 Help and support 3 2 Your product 4 What s in the box 4 Main unit 4 Remote control 5 Wireless subwoofer 6 Connectors 6 3 Connect and set up 7 Placement 7 Connect to TV 7 Connect TV or digital devices...

Страница 3: ...ediate medical attention When you change the batteries always keep all new and used batteries out of 2 EN 1 Important Read and understand all instructions before you use your product If damage is caused by failure to follow instructions the warranty does not apply Safety Risk of electric shock or fire Before you make or change any connections make sure that all devices are disconnected from the po...

Страница 4: ...nd serial number of your product You can find this information on the back or bottom of your product 3 EN reach of children Ensure that the battery compartment is completely secure after you replace the battery If the battery compartment cannot be completely secured discontinue use of the product Keep out of reach of children and contact the manufacturer This is CLASS II apparatus with double insu...

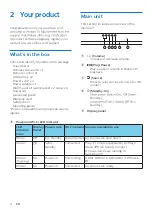
Страница 5: ...d Wi Fi LED indicator LED indicator Color Display Panel Power state Wi Fi network Sources available to use White Eco standby Disconnected All sources are shut down Amber Semi standby Connected Play Fi Chromecast Audio AirPlay2 Alexa 3PDA Spotify Connect These sources are running in background Amber On Power on Connecting HDM1 HDMI2 E ARC ARC OPTICAL BT Amber On Power on Connected All sources are r...

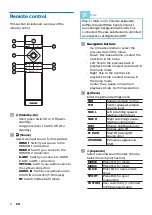
Страница 6: ... talk show SPORT Preset EQ for sport programme CUSTOM User custom EQ controlled in Philips Sound app 5 EN Remote control This section includes an overview of the remote control 3 4 2 1 5 6 8 9 7 a Standby On Short press Switch On Off Semi standby Long press 5 sec Switch Off Eco standby b Source Select an input source for this product HDMI 1 Switch your source to the HDMI IN 1 connection HDMI 2 Swi...

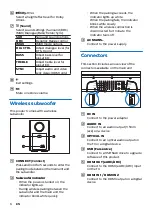
Страница 7: ...e HDMI eARC ARC input on the TV f HDMI IN 1 HDMI IN 2 Connect to the HDMI output on a digital device 6 EN f Select a height effect level for Dolby Atmos g Sound Select sound settings Surround DRC IMAX Dialogue Bass Treble Sync SUR Surround sound options DRC Dynamic Range control IMAX IMAX mode options DLG CTRL Adjust dialogue level for DTS X only BASS Adjust bass level for preset EQ TREBLE Adjust ...

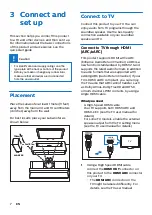
Страница 8: ... TV The HDMI ARC connector on the TV might be labeled differently For details see the TV user manual 7 EN 3 Connect and set up This section helps you connect this product to a TV and other devices and then set it up For information about the basic connections of this product and accessories see the quick start guide Caution For identification and supply ratings see the type plate at the back or bo...

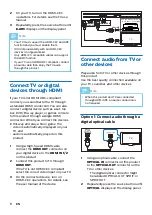
Страница 9: ... SPDIF or SPDIF OUT 2 Repeatedly press the source button until OPTICAL displays on the display panel 8 EN 2 On your TV turn on the HDMI CEC operations For details see the TV use manual 3 Repeatedly press the source button until E ARC displays on the display panel Note Your TV must support the HDMI CEC and ARC function and you must enable them 100 interoperability with all HDMI CEC devices is not g...

Страница 10: ...pairs up with the main unit for wireless connection when you turn on the main unit and the subwoofer 9 EN Determine the status based on the wireless subwoofer indicator LED behavior Status Fast blink Subwoofer in pairing mode Constant on Connected Pairing successfuly Slow blink Connecting Pairing failed Note Do not press the CONNECT Connect button on the rear of the subwoofer except for manual pai...

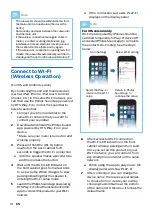
Страница 11: ...wered by DTS Play Fi Follow the instructions in the app to connect this product to yourWi Fi network 10 EN If the connection succeeds PLAY FI displays on the display panel Note For iOS version only Wi Fi network used by iPhone should be switched temporarily to Play Fi device AP and restart Philips Sound app to complete the product s Wi Fi setup See the steps below Go to Settings Select Wi Fi setti...

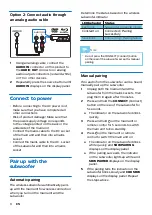
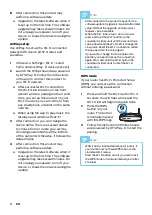
Страница 12: ...veral minutes Do not unplug your speaker turn off your device or break the network during the update 11 EN Note After connection the product may perform a software update Upgrade is required after initial setup Without the upgrade not all product features can be available When the first time setup is not successful press and hold the Wi Fi button on the soundbar for 8 seconds until the second tone...

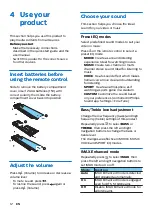
Страница 13: ...ease or decrease a volume level To mute sound press To restore the sound press again or press Volume 12 EN Choose your sound This section helps you choose the ideal sound for your video or music Preset EQ modes Select predefined sound modes to suit your video or music Press on the remote control to select a preset EQ mode MOVIE Create a surround listening experience Ideal for watching movies MUSIC...

Страница 14: ... refer to Connect to TV Best Dolby Atmos effects may be achieved through the following two use cases 13 EN Surround mode SURR Repeatedly press to select SURR then press the left and right navigation buttons to select surround mode options UPMX Up mixing mode for driving output to all speakers even when content with audio channels lesser than the 5 1 2 B95 or 7 1 2 B97 speaker configuration Up mixi...

Страница 15: ... MP3 player to play your audio files or music What you need An MP3 player A 3 5mm stereo audio cable 14 EN From your Blu ray disc player Movie with Dolby Atmos Your Blu ray disc player is connected to this product via HDMI IN 1 2 connector On your Blu ray disc player enable bitstream raw audio format for HDMI sound output A high speed HDMI cable From your TV Movie with Dolby Atmos Your TV supports...

Страница 16: ...your phone tablet or computer as a remote control for Spotify go to spotify com connect to learn how 15 EN 1 Using the 3 5mm stereo audio cable connect the MP3 player to the AUDIO IN connector on this product 2 Repeatedly press the source button until AUDIO IN displays on the display panel 3 Press the buttons on your MP3 player to select and play audio files or music Play Fi multi room With Play F...

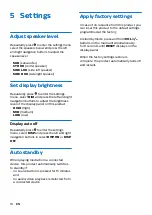
Страница 17: ...panel When the factory settings restore is complete the product automatically turns off and restarts 16 EN 5 Settings Adjust speaker level Repeatedly press to enter the settings menu select the speakers below and press the left and right navigation buttons to adjust the speaker level SUB subwoofer CTR XX center speaker SIDE L XX side left speaker SIDE R XX side right speaker Set display brightness...

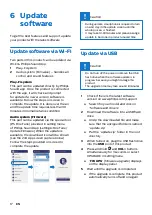
Страница 18: ...he upgrade is completed If the upgrade is complete this product automatically turns off and on again 17 EN 6 Update software To get the best features and support update your product with the latest software Update software via Wi Fi Two parts in this product can be updated via Wi Fi Philips Sound App 1 Play Fi system 2 Audio system Firmware handles all control and sound features Play Fi system Thi...

Страница 19: ... 5 4mm 0 14 0 16 4mm 0 16 25mm 0 98 1 790mm 31 1 50mm 2 0 3 3 5 4mm 0 14 0 16 4mm 0 16 25mm 0 98 2 2 18 EN 7 Wall mount your product Before you mount your product on the wall read all safety precautions see Safety Wall mount Note Improper wall mounting may result in accident injury or damage If you have any query contact Consumer Care in your country Secure the wall mount to a wall that can suppor...

Страница 20: ... DolbyDigital DolbyDigital plus LPCM 2ch Bluetooth SBC Play Fi MPEG4 AAC MPEG4 M4A MP3 WAV FLAC AIFF 19 EN 8 Product specifications Note Specifications and design are subject to change without notice Amplifier Total output power 808W MAX 410W RMS 1 THD Frequency response main unit 150Hz 20kHz Frequency response Subwoofer 35Hz 150Hz Signal to noise ratio 65 db CCIR A weighted Audio S PDIF Digital a...

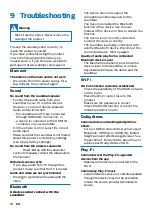
Страница 21: ...ailable through the device may not be accessible in case the service provider terminates its service 20 EN Warning Risk of electric shock Never remove the casing of the product To keep the warranty valid never try to repair the product yourself If you have problems using this product check the following points before you request service If you still have a problem get support at www philips com su...

Страница 22: ...ecast is a trademark of Google Inc Google Play and the Google Play logo are trademarks of Google Inc 21 EN Dolby Dolby Vision Dolby Atmos and the double D symbol are registered trademarks of Dolby Laboratories Licensing Corporation Manufactured under license from Dolby Laboratories Confidential unpublished works Copyright 2012 2020 Dolby Laboratories All rights reserved Manufactured under license ...

Страница 23: ...hen the first time setup is not successful press and hold the Wi Fi button on the soundbar for 8 seconds until the second tone can be heard and the Wi Fi LED is changed to slow pulse Reset the Wi Fi connection restart the app and start the setup again If you want to change from one network to another you need to set up the connection again Press and hold the Wi Fi button the soundbar for 8 seconds...

Отзывы: