8
Tip
You can optimise the audio output (see ‘Adjust settings’
•
>
[Audio Setup]
>
[Analogue Output]
) for details.
Connect USB fl ash drive
1
Connect a USB fl ash drive to the
jack on
this product.
Note
This product can only play/view MP3, WMA, DivX or
•
JPEG fi les that are stored on a USB fl ash drive.
Press the
•
button to access the content and play
the fi les.
Connect power
Caution
Risk of product damage! Ensure that the power supply
•
voltage corresponds to the voltage printed on the back
of the product.
Before connecting the AC power cord, ensure you have
•
completed all other connections.
Note
The type plate is located on the back of the product.
•
1
Connect the AC power cable to the wall
socket.
The product is ready to be set up for use.
»
4 Get
started
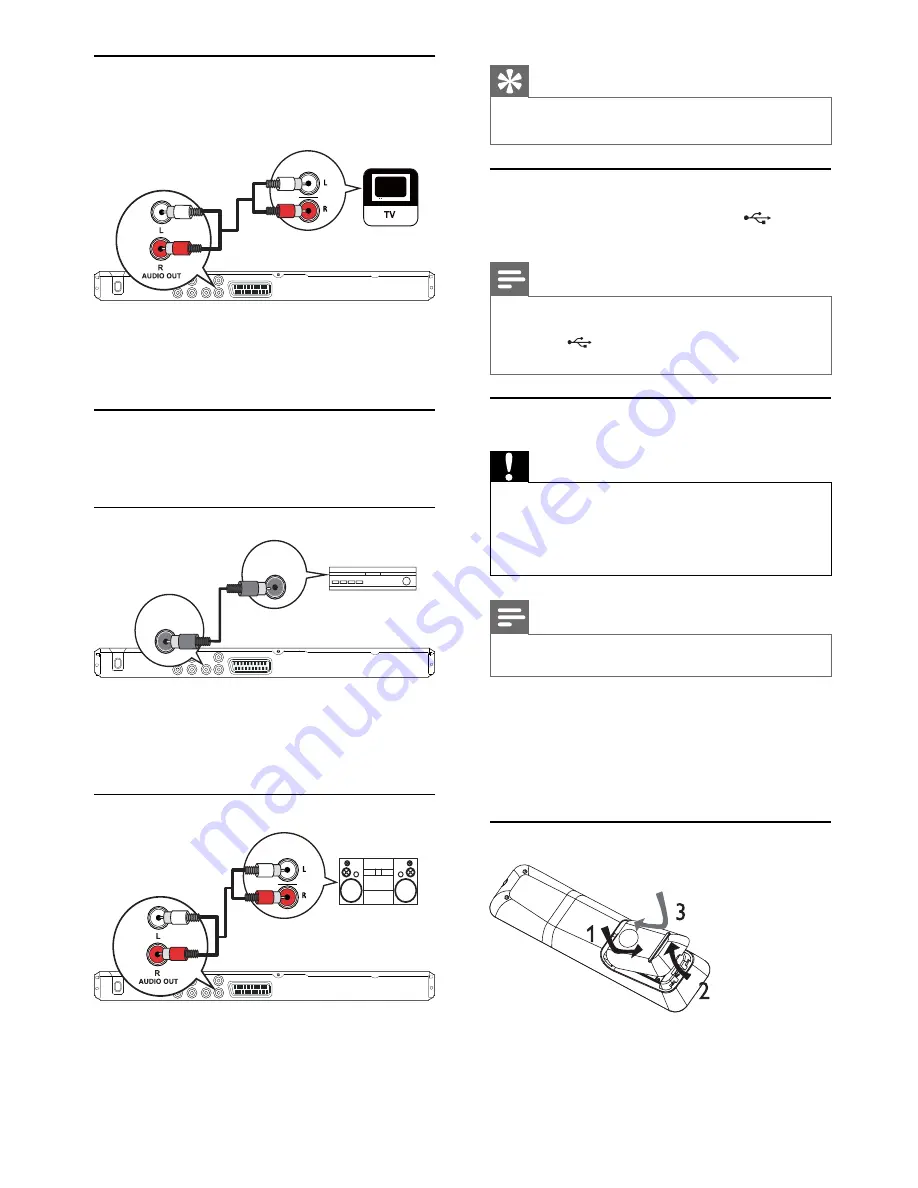
Prepare the remote control
1
Open the battery compartment.
2
Insert 2 AAA batteries with correct polarity
(+/-) as indicated.
Connect audio cables
Connect the audio from this product to the TV to
allow sound output through the TV.
1
Connect the audio cables (not supplied) to:
the
•
AUDIO OUT L/R
jacks on this
product.
the audio input jacks on the TV.
•
Route audio to other devices
Route the audio from this product to other devices
to enhance audio play.
Connect to digital amplifi er/receiver
1
Connect a coaxial cable (not supplied) to:
the
•
COAXIAL
jack on this product.
the COAXIAL/DIGITAL input jack on
•
the device.
Connect analogue stereo system
1
Connect the audio cables (not supplied) to:
the
•
AUDIO OUT L/R
jacks on this
product.
the audio input jacks on the device.
•
AUDIO IN
DIGITAL IN
COAXIAL
DIGITAL
OUT
AUDIO IN
EN


