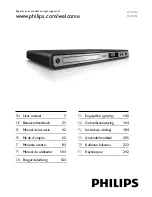
Philips DVP3354/12 Скачать руководство пользователя страница 13

13

Once complete, a new folder is created 

»

automatically in the USB fl ash drive to store 
all the new fi les.

5


To stop copy progress, press  , then press 

OK

.

Note

When you copy, never press any button.

Copy-protected media cannot be copied.

Create MP3 fi les

With this product, you can convert audio CDs into 
MP3 audio fi les. The created MP3 audio fi les are saved 
in the USB fl ash drive.

1


Insert an audio CD.

2


Connect a USB fl ash drive to the  

 jack on 

this product.

3


During disc play, press  

AUDIO/CREATE MP3

.

The MP3 creation menu is displayed.

»

4

 Select 


[Yes]

 in the menu, then press  

OK

.

5


Select a conversion option in the  

[OPTIONS]

panel, then press  

OK

 repeatedly to select an 

item.

Option

 Description

[Speed]

Select a copying speed.

[Bitrate]

Select a quality level.
Higher bitrate for better sound 
quality and bigger fi le size.

[CRT ID3]

 Copy track information into the 
MP3 fi le.

[Device]

The createed fi les can only be saved 
in a USB fl ash drive.

6

 Press 


 to access the  

[Track]

 panel.

Create MP3

OPTIONS

TRACK

Summary

Start

Exit

Select all

Deselect all

to change speed.

Track01          04:14

Track02          04:17

Track03          03:58

Track04          04:51

Track05          03:53

Track06          04:09

Track07          04:38 

Press [OK] button

CRT ID3            Yes

Device            USB 1

Speed 

    Normal

Bitrate            128kbps

Slideshow begins and continues till the end 

»

of the photo folder or album. 
Audio continues to play until the end of 

»

the disc.

To stop slideshow play, press 

.

To stop music play, press 

again.

Play from USB fl ash drive

This product plays/views MP3, WMA, DivX or JPEG 
fi les that are stored on a USB fl ash drive.

1


Connect a USB fl ash drive to the  

 jack on 

this product.

2


Press the  

 button.

A contents menu is displayed.

»

3


If play does not start automatically, select a fi le 
to play.

For more information, see the chapters 

“Play music”, “Play photo” and “Play 
video” for details.

4


To stop play, press  .

To switch to the disc mode, press the 

 button.

6 Advanced 

features

Media copy

You can copy fi les (such as MP3, WMA or JPEG) from 
disc to a USB fl ash drive.

1


Insert a disc that contains the MP3/WMA/
JPEG fi les.

2


In the stop mode, connect the USB fl ash drive 
to the  

 jack on this product.

3


Select a fi le to copy, then press  

SUBTITLE

.

4

 Select 


[Yes]

 in the menu, then press  

OK

.

Previous

Do you want 

00:00/00:00                               005/030

to copy this file

\MP3

Track 1          

Track 2          

Track 3          

Track 4         

Track 5          

Track 6          

Track 7          

Yes      No

English

EN

Содержание DVP3354/12

Страница 1: ...zerhandbuch 21 ES Manual del usuario 42 FR Mode d emploi 62 IT Manuale utente 83 PT Manual do utilizador 103 DA Brugervejledning 123 EL ƆƣƷƥƩƱƟƤƩƯ ƷƱƞƳƧƲ 142 NL Gebruiksaanwijzing 164 PL Instrukcja obsãugi 184 SV Användarhandbok 205 TR Kullanım kılavuzu 223 FI Käyttöopas 242 DVP3350 DVP3354 ...

Страница 2: ...derfor tilsluttet til lysnettet så længe netstikket sidder i stikkontakten S Klass 1 laseraparat Varning Om apparaten används på annat sätt än i denna bruksanvisning specifi cerats kan användaren utsättas för osynlig laserstrålning som överskrider gränsen för laserklass 1 Observera Stömbrytaren är sekundärt kopplad och bryter inte strömmen från nätet Den inbyggda nätdelen är därför ansluten till el...

Страница 3: ... Get started 8 Prepare the remote control 8 Find the correct viewing channel 9 Select menu display language 9 Turn on progressive scan 9 5 Play 9 Play a disc 9 Play video 10 Play music 11 Play photo 12 Play from USB flash drive 13 6 Advanced features 13 Media copy 13 Create MP3 files 13 7 Adjust settings 14 General setup 14 Audio setup 14 Video setup 15 Preferences 16 8 Additional information 17 Upd...

Страница 4: ...mportant Safety and important notice Warning Risk of overheating Never install the product in a confined space Always leave a space of at least 4 inches around the product for ventilation Ensure curtains or other objects never cover the ventilation slots on the product Never place the product remote control or batteries near naked flames or other heat sources including direct sunlight Only use this ...

Страница 5: ... is an official DivX Certified device that plays DivX video Visit www divx com for more information and software tools to convert your files into DivX video ABOUT DIVX VIDEO ON DEMAND This DivX Certified device must be registered in order to play DivX Video on Demand VOD content To generate the registration code locate the DivX VOD section in the device setup menu Go to vod divx com with this code to ...

Страница 6: ... Start pause or resume disc play p INFO For discs access the play options or display the current disc status For slideshows display a thumbnail view of photo files q OK Confirm an entry or selection r SETUP Access or exit the setup menu 3 Connect Make the following connections to use this product Basic connections Video Audio Optional connections Route audio to other devices Digital amplifier receive...

Страница 7: ...gs Before you make or change any connections ensure that all the devices are disconnected from the power outlet Tip Different types of connectors may be used to connect this product to your TV depending on availability and your needs A comprehensive interactive guide to help you connect your product is available at www connectivityguide philips com Connect video cables Connect this product to TV t...

Страница 8: ... socket The product is ready to be set up for use 4 Get started Prepare the remote control 1 Open the battery compartment 2 Insert 2 AAA batteries with correct polarity as indicated Connect audio cables Connect the audio from this product to the TV to allow sound output through the TV 1 Connect the audio cables not supplied to the AUDIO OUT L R jacks on this product the audio input jacks on the TV...

Страница 9: ...a disc Caution Do not place any objects other than discs into the disc compartment Do not touch the disc optical lens inside the disc compartment 3 Close the battery compartment Caution Remove batteries if they are exhausted or if the remote control is not to be used for a long time Do not mix batteries old and new or carbon and alkaline etc Batteries contain chemical substances so they should be ...

Страница 10: ...contents 1 During play press INFO The disc status menu is displayed 1 Press to open the disc compartment 2 Insert a disc with its label facing up 3 Press to close the disc compartment and start disc play To view disc play turn on the TV to the correct viewing channel for this product To stop disc play press Note Check the types of discs supported see Specifications Play media If the password entry ...

Страница 11: ...ess 3 Select a preview option then press OK A thumbnails preview screen is displayed To go to the next previous prview screen select Prev or Next then press OK To start play press OK at the selected thumbnail picture Skip play to a specific time 1 During play press INFO The disc status menu is displayed 2 Select an option for the current elapsed playing time then press TT Time title time CH Time ch...

Страница 12: ...G files on the same disc USB flash drive 1 Play MP3 WMA music 2 Press BACK to return to the main menu 3 Navigate to the photo folder album and press OK to start slideshow play Quick skip play 1 During play press INFO repeatedly to select an option Display Action Disc Go To Skip play to a specific time within the disc Track Go To Skip play to a specific time within a track Select Track Skip play to a s...

Страница 13: ...ck01 04 14 Track02 04 17 Track03 03 58 Track04 04 51 Track05 03 53 Track06 04 09 Track07 04 38 Press OK button CRT ID3 Yes Device USB 1 Speed Normal Bitrate 128kbps Slideshow begins and continues till the end of the photo folder or album Audio continues to play until the end of the disc To stop slideshow play press To stop music play press again Play from USB flash drive This product plays views MP...

Страница 14: ...od The DivX videos rented or purchased through the DivX VOD Video On Demand service can be played only on the device to which it is registered Audio setup 7 Select an audio track then press OK To select another track repeat step 7 To select all tracks select Select All in the menu and press OK To deselect all tracks select Deselect all in the menu and press OK 8 Select Start in the menu then press...

Страница 15: ... is displayed 2 Press to select Audio Setup then press 3 Select an option then press OK 4 Select a setting then press OK To return to the previous menu press To exit the menu press SETUP Analogue Output Select an analogue setting based on the audio device that is connected through the analogue audio jack Stereo For stereo output LT RT For surround sound output through two speakers Digital Audio Se...

Страница 16: ...gs 1 Press OK 2 Select a rating level then press OK 3 Press the numeric buttons to enter the password NTSC For NTSC system TV TV Display Select a display format 4 3 Pan Scan For 4 3 screen TV full height display with the trimmed sides 4 3 Letter Box For 4 3 screen TV wide screen display with black bars on the top and bottom of the screen 16 9 For wide screen TV display ratio 16 9 Progressive If a ...

Страница 17: ... to compare with the latest software if available at the Philips website Caution Power supply must not be interrupted during software upgrade 1 Press SETUP 2 Select Preferences Version Info then press OK 3 Write down the file name then press SETUP to exit the menu Note Rated DVDs above the level you set in Parental control require a password to be played The ratings are country dependent To allow a...

Страница 18: ...nit Dimensions w x h x d 360 x 37 x 209 mm Net Weight approximately 1 3 kg Power Power supply rating For U K 240 V 50 Hz For the rest of Europe 230 V 50 Hz Power consumption 10 W Power consumption in standby mode 1 W 4 Visit www philips com support to check for the latest software version using the file name for this product 5 Refer to the upgrade instructions on the website for more information No...

Страница 19: ... InGaAIP DVD AIGaAs CD Wave length 658 nm DVD 790 nm CD Output Power 7 0 mW DVD 10 0 mW VCD CD Beam divergence 60 degrees 9 Troubleshooting Warning Risk of electric shock Never remove the casing of the product To keep the warranty valid never try to repair the product yourself If you have problems using this product check the following points before you request service If you still have a problem ...

Страница 20: ...ivx com with this code to complete the registration process and learn more about DivX video J JPEG A very common digital still picture format A still picture data compression system proposed by the Joint Photographic Expert Group which features small decrease in image quality in spite of its high compression ratio Files are recognized by their file extension jpg or jpeg M MP3 A file format with a so...

Страница 21: ...585 Lao 7679 Latina 7665 Latvian 7686 Letzeburgesch 7666 Limburgan Limburger 7673 Lingala 7678 Lithuanian 7684 Luxembourgish 7666 Macedonian 7775 Malagasy 7771 Magyar 7285 Malayalam 7776 Maltese 7784 Manx 7186 Maori 7773 Marathi 7782 Marshallese 7772 Moldavian 7779 Mongolian 7778 Nauru 7865 Navaho Navajo 7886 Ndebele North 7868 Ndebele South 7882 Ndonga 7871 Nederlands 7876 Nepali 7869 Norsk 7879 ...

Страница 22: ...262 FI 2009 Koninklijke Philips Electronics N V All rights reserved Document order number DVP3350 3354_12_UM_V2 1 ...

Отзывы: