User Manual BDL5587XL
RETURN TO THE CONTENTS
•
Brightness
- Select
On
and the brightness of the image will be reduced to an appropriate level, and the
Brightness
setting in the
Picture
menu will become unavailable. Use the
PLUS
/
MINUS
button to make
selection.
•
Pixel shift
- Select the time interval for the display to slightly expand the image size and shift the pixel
position in four directions (up, down, left, and right). Use the
PLUS
/
MINUS
button to make selection
(
Off
-
900
seconds from current time). The default time interval is 300 seconds.
This helps to alleviate the
issues of image sticking.
IMPORTANT
: It is not recommended to keep a single static image displayed on your unit for long periods
of time. This can cause image sticking, or ghost imaging, which will decrease the quality of your images. In
some instances, ghost image damage can be permanent. To avoid such issues, we strongly recommend one of
the following actions:
• Change the picture periodically
• Enable
Pixel shift
(See Pixel shift under Section 4.2.4.Configuration 1 MENU)
• Use a screen saver with changing images
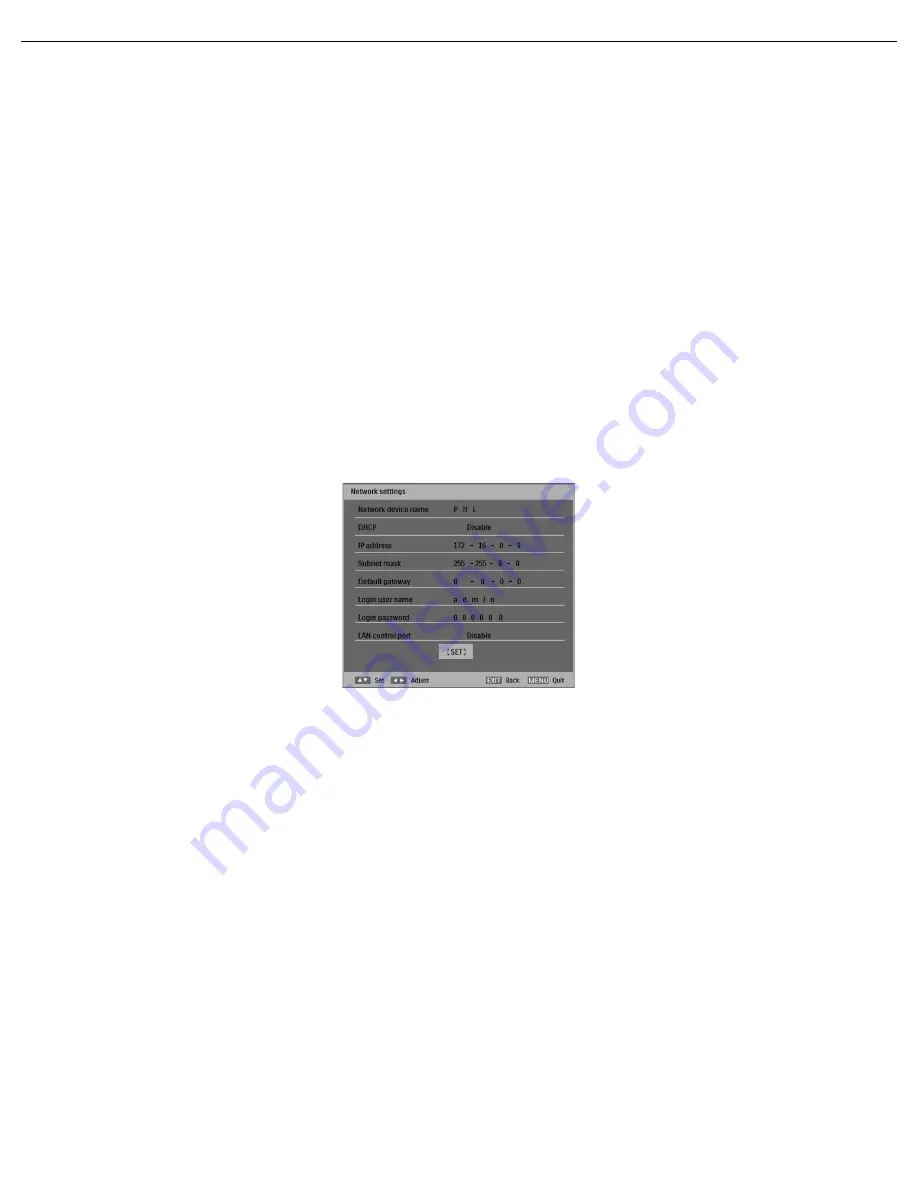
Network settings
To set the display to connect to a local area network:
1. Connect a RJ45 cable to the corresponding ports on the display and your LAN switch or router.
2. Enter the submenu of Network settings. You will see the OSD page similar to the following picture.
3. Use the
UP
/
DOWN/PLUS
/
MINUS
buttons to set the
Network device name
.
4. If you are in a DHCP environment, highlight
DHCP
and select
Enable
. Once selected, the
IP address
,
Subnet mask
, and
Default gateway
settings will be displayed.
If you are not in a DHCP environment, highlight
DHCP
and select
Disable
. Contact your ITS
administrator for information on the
IP address
,
Subnet mask
, and
Default gateway
settings and
enter it accordingly.
5. Make sure the information on the
Login user name
is displayed.
6. Use the
UP
/
DOWN/PLUS
/
MINUS
buttons to set
Login password
. The password is required when
using a computer browser to log in.
7. To control the display with a computer browser, highlight
LAN control port
and select
Enable.
8. To save the settings and return to the previous menu, highlight
Set
and press the
SET
button on the
remote control.
Once you have the correct IP address for your display and the display is on or in standby mode, you can use
any computer that is on the same local area network to control the display.
Notes:
• You cannot control the display via the RS-232C connector when LAN control is in use.
• Currently most browsers are supported. However, if using Internet Explorer, only versions 7.0 or higher are supported.
• The screen shots in this manual are for reference only, and may differ from what is displayed on your screen.


