background image

EN-39

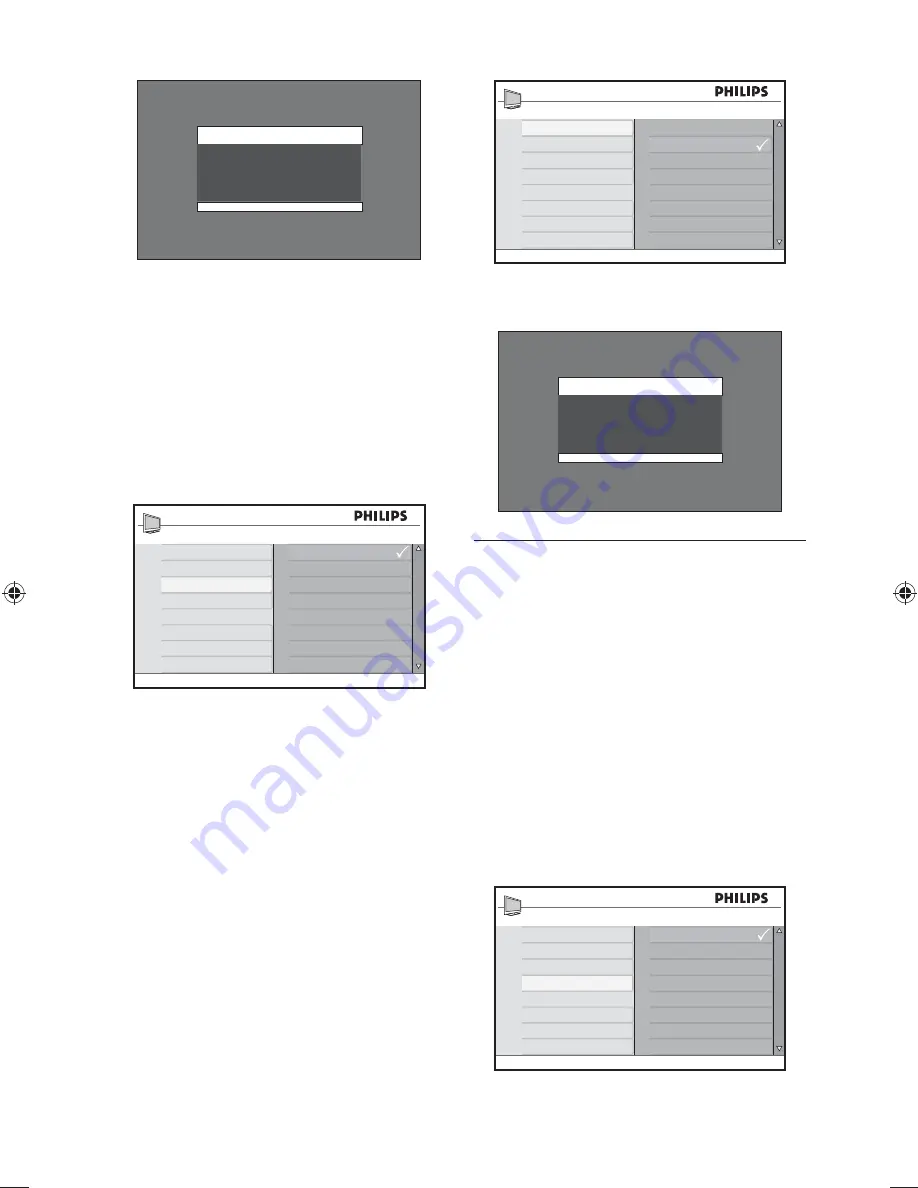
Channel 5
Blocked By
TV - 14
Access Code : ----

Unblock programs

Access 

1. 

Parental Lock

 menu as 

described in  

Access Parental Lock

 on page 

35 .

Press 

2. 

ï 

to select 

Block Options 

and 

press 

OK

 to select.

Press 

3. 

ï 

or 

Î

 to highlight 

Off 

and press 

OK

.

Block Options

Unrated

No Rating

Blocking

Off

On

Block other programs

Block programs that are unrated, such as 
documentaries, “director’s cut” edition or 
programs that have no advisory data (No 
Rating).

Access 

1. 

Parental Lock

 menu as 

described in  

Access Parental Lock

 on page 

35 .

Press 

2. 

ï 

to select 

Block Options 

and 

press 

OK

 to select.

Press 

3. 

ï 

or 

Î

 to highlight 

Unrated 

or 

No Rating

, and press 

OK

 to select.

Press 

4. 

OK


to select 

On.

Block Options

Unrated

No Rating

Blocking

Off

On

Note: 


D

Programs with no rating or 

unrated are blocked.

Channel 5
Blocked By
No rating
Access Code : ----

Turn on closed captions

8.6 

Closed captions (CC) are subtitles hidden 
in the video signals which you can turn on 
or off unlike the normal subtitles in movies 
which cannot be turned off. Closed captions 
are subtitles for dialog and descriptions for 
the hearing-impaired.

Press 

1. 

SOURCE

 and 

Î

 or 

ï 

to select 

TV

 from the source list.

Press 

2. 

ANALOG MENU

 to display the 

on-screen menu.

Select 

3. 

Features

 > 

Closed Caption

 and 

press 

OK

.

Features
Timer

Child Lock

Parental Lock

CC Off

CC1

CC2

CC Mute

Closed Caption

Demo*

Press 

4. 

ï 

or 

Î

 to highlight 

CC Off

,

 CC1, 

Содержание 42PFL7803D

Страница 1: ...Flat TV Register your product and get support at 42PFL7803D 52PFL7803D User Manual www philips com welcome ...

Страница 2: ......

Страница 3: ...n common industry standards and is not a malfunction Compliance with EMF Koninklijke Philips Electronics N V manufactures and sells many products targeted at consumers which like any electronic apparatus in general have the ability to emit and receive electromagnetic signals One of Philips leading Business Principles is to take all necessary health and safety measures for our products to comply wi...

Страница 4: ...Install channels 6 25 Automatically install channels 25 Manually install channels 25 Manage channels 26 Use your TV 7 28 Adjust TV settings 28 Change your picture format 29 Use Smart Mode settings 30 Use the Surf feature 31 Use more of your TV 8 32 Use the Advance Picture features 32 Use the Timer 33 Child lock the TV 34 Control access to TV channels 35 Control access to TV programs 37 Turn on clo...

Страница 5: ...ventilation Be sure air flow is not obstructed If mounting the TV on a flat surface be sure to use only the supplied stand and to mount the TV on a level solid surface Do not move the TV if the stand is not properly screwed to the TV Wall mounting of the TV should only be performed by qualified personnel The TV must only be mounted on an appropriate wall bracket and on a wall that can safely hold ...

Страница 6: ...he screen with hard objects as this may damage the screen permanently Where possible avoid stationary images that remain on screen for extended periods of time Examples include screen menus teletext pages black bars or stock market tickers If you must use stationary images reduce the screen contrast and brightness to avoid screen damage Environmental care 1 3 This product is designed and manufactu...

Страница 7: ...annel POWER 4 To turn off or turn on the TV Side connectors 2 2 Use the side connectors for mobile devices such as a digital camera or game console You can also connect a pair of headphones Rear connectors 2 3 HDMI 2 AV1 IN R L AUDIO IN VGA SPDIF OUT L R VIDEO HDMI 1 CVI 1 L Pr Pb Y R CVI 2 L Pr Pb Y R SERV C PBS SX TV ANTENNA 75X Use the rear connectors for antenna and permanent devices such as a...

Страница 8: ...cm eight inches away from the wall Ambilight also works best in a room with dim lighting Install the remote control 2 5 batteries Slide the battery cover off the back of 1 the remote control Insert the two supplied batteries Be sure 2 the and ends of the batteries line up with the markings inside the case Slide the cover back into position 3 Note D Remove the batteries if not using the remote cont...

Страница 9: ...patible wall bracket 1 Depending on the size of your TV screen purchase one of the following wall brackets Remove the TV stand 2 Note D These instructions are only applicable to TV models with mounted stands If your TV stand is not mounted see Secure the VESA compatible wall bracket to the TV on this page Carefully place the TV face down on a flat stable surface that is covered by soft cloth The c...

Страница 10: ...A compatible wall bracket to yourTV Note D Depending on yourVESA compatible wall bracket you may need to separate the mounting plate from the wall bracket for easier installation Refer to yourVESA compatible wall bracket documentation for instructions TV screen size in cm VESA compatible wall bracket mm Bolt and spacer type Special instructions 32 82cm Adjustable 300 x 300 4 of M6 x 10mm steel bol...

Страница 11: ...n on or turn off Ambilight SURF 5 To channel surf up to 8 channels Color buttons Digital mode only 6 To use preset functions on the on screen display ANA DIGI 7 To toggle between analog and digital modes CURSOR 8 To navigate and select menu items and adjust individual settings BACK 9 To return to the previous menu ANALOG MENU 10 To switch the menu on or off in analog mode VOL 11 Volume To turn up ...

Страница 12: ...available channels GUIDE Digital mode only 19 Electronic Program Guide button To get program listings and information OK 20 To select menu items or confirm a selection DIGITAL MENU 21 To switch the menu on or off in digital mode CH 22 Channel To switch to the next or previous channel Dot 23 Digital mode only To enter values for minor channels example 36 5 Tip E Press OK or press Æ to select menu i...

Страница 13: ...nd change the channels at the set top box to view the program When the set top box is connected to the television using AV connection select the television input source for the set top box to view the program Change the channels at the set top box to view the program Switch on theTV for the 4 2 first time When you turn on TV for the first time the TV is in digital mode You must set the language an...

Страница 14: ...p Favorite list indication y b d e t a c i d n I 2 a tick if you have added this program to your favorite list setting Channel number 3 In the format 000 0000 Channel name 4 Program title 5 Program start time 6 Program time progress bar s y a l p s i D 7 time left indicator bar Program end time 8 9 Clock Current time Install channels 4 4 Check for newTV channels Check the availability of TV channe...

Страница 15: ...es Manual install services Reinstall services 4 4 4 4 4 4 4 4 4 4 4 _ 4 4 5 5 5 5 5 5 5 5 5_ 5 5 5 5 5 6 6 6 6 6 6 6 6 6_ 6 6 6 6 7_ 7 8 _ 8 Close Installation I t ll ti Installation Service Setup Add newServices Press 4 Æ to Add new services and press OK to activate the installation A search begins Any new channels are added to the channel list menu The percentage of the installation completed an...

Страница 16: ...e ep p p pt t t tiiiio o o on n n n 0 0 05 5 5 3 3 3 T T TV V V G G GL L LO O OB B BO O O M M M A Ac cc ce es ss s r re es st tr riic c c c c I I In n ns s st t ta a alllllla a at t tiiio o on n n Frequency 57143 Start Scan 7_ 8 _ Signal Strength Signal Quality Press 4 Í and Æ to select the channel number and ï to select Start Scan Press 5 OK to start the search When the search is complete press 6...

Страница 17: ...anguage Tip E Press ANA DIGI to switch be tween the digital and analog modes Set your time zone Press 1 SOURCE and Î or ï to select Digital TV from the source list Press 2 DIGITAL MENU to display the on screen menu Select 3 Preferences Time Zone and press Æ Press 4 Î or ï to select the time zone and press OK Press 5 Í to return to the previous menu or press DIGITAL MENU to exit Setup Preferences S...

Страница 18: ...Press 1 SOURCE and Î or ï to select Digital TV from the source list Press 2 DIGITAL MENU to display the on screen menu Select 3 Preferences Transparency and press Æ Setup Preferences Setup p Preferences Contrast C C C C t t C C C Contrast C C C C NR N Preferences Transparency Digital Audio Output Time Zone Close Language 0 20 40 60 80 Transparency Press the 4 Î or ï button to select the level of t...

Страница 19: ...otection on this page Press the 2 ï to select Change Pin Code and press OK Enter your PIN code using the numeric 3 buttons 0 9 on the remote control Enter your new PIN code 4 Setup Access restrictions Setup p Access restrictions Color Temp C C C C C l T C C Color Temp C C C C C Contrast C C C C t t C C C Contrast C C C C NR N Change pin code Ch i d Change pin code Change PIN Code Set Pin Protectio...

Страница 20: ...bove 16 years Set Pin Protection Press 3 Î or ï to select the rating and press OK to confirm Note D You are prompted to enter the PIN code if the TV program is blocked by the Maturity Rating filter Enter the PIN code to temporarily access the program Restrict access toTV programs with Block Content Enter the 1 Access restrictions menu as described in Turn on Set PIN Protection on the previous page...

Страница 21: ...s List 3 L L Li t 3 L L List 3 L L L List 4 L L L L L Li t 4 L L L List 4 L L Color Temp C C C C C l T C C Color Temp C C C C C Contrast C C C C t t C C C Contrast C C C C NR N Close Enter the name for the list Name Favorite List 1 Select 3 Yes and press OK to confirm changing the list name Setup Favorites List 1 Favorite List 1 Setup p Favorites List 1 Favorite List 1 Fa Fa List 1 Favorite List 1...

Страница 22: ...ess OK to confirm removing all the services Press 3 Í to return to the previous menu or press DIGITAL MENU to exit Tip E Press ANA DIGI to switch be tween the digital and analog modes Update yourTV 4 9 View the current version information of the TV software or install new versions when they are available Viewing the current software version Press 1 SOURCE and Î or ï to select Digital TV from the s...

Страница 23: ...This is BBC Fou 18 58 This is BBC Fou 16 10 Newsround sho 16 45 Tracy Beaker 16 20 Step inside 16 30 Koala Brothers 19 00 BBC News 19 30 Tales from the 18 45 Rock from the 19 45 Dark Angel More info Record Prev day Next day 16 35 The fairly odd parents 15 miins Genre name Sub genre name Welcome to the show that literally turns hidden treasures into cash and dreams into realities BBC America s late...

Страница 24: ... ï to select TV from the source list Press 2 ANALOG MENU to display the on screen menu Select 3 Location and press OK Press 4 ï or Î to select the location and press OK to confirm Main Picture Setting Advance Picture Sound Ambilight Features Install Location Home Shop Note D To select your menu language refer to Set your language on page 17 ...

Страница 25: ...ng Auto Program to search for channels Press 1 SOURCE and Î or ï to select TV from the source list Press 2 ANALOG MENU to display the on screen menu Select 3 Install Tuner Mode and press OK Press 4 ï or Î to select Auto Antenna or Cable and press OK to select Install Tuner Mode Auto Program Manual Name Fav Program Auto Antenna Cable Press 5 Í to return to the previous menu or press ANALOG MENU to ...

Страница 26: ...u or press ANALOG MENU to exit Manage channels 6 3 Name your channels Assign a short name for your channels with the Name This is available in TV mode only Press 1 SOURCE and Î or ï to select TV from the source list Press 2 ANALOG MENU to display the on screen menu Select 3 Install Manual Name and press OK Install Tuner Mode Auto Program Manual Name Fav Program 001 002 003 004 005 SPORT 006 007 00...

Страница 27: ...marked as favorite channels Install Tuner Mode Auto Program Manual Name Fav Program 001 002 003 004 005 006 007 008 Press 5 OK to select the first channel number on the list or press ï to move down the list Press 6 OK to remove the tick or add the tick to the corresponding number Only channel numbers with the tick are added to your favorite list When you use the CH buttons on the remote control on...

Страница 28: ...ings Brightness Adjusts the brightness Color Adjusts color saturation Contrast Adjusts the contrast Sharpness Adjusts the detail level of the picture Tint Adjusts the detail of the skin tones of the picture TV or AV modes only Color Temp Sets the color to Cool more blue Normal balanced or Warm more red Adjust your sound settings Press 1 SOURCE and Î or ï to select TV from the source list Press 2 A...

Страница 29: ...m SAP Secondary Audio Programming Activates alternative languages or commentary Forced Mono Select Off to leave broadcast signal as is Select On to force the signal to mono Note D Select Stereo or Incr Surround modes when the TV broadcast is in stereo Press INCR SURR to toggle with the sound modes Change your picture 7 2 format Select various screen formats to suit the type of programs you watch P...

Страница 30: ...tings The settings are displayed at the bottom of the screen 10 Power 100 0 Personal 10 Power 100 0 Personal Smart Mode settings Personal Based on the settings you customized in the Picture Setting menu Sports Vivid picture settings and clear sound for high action Standard For normal TV viewing Movie Brilliant picture settings for a cinematic experience Game Optimized for PCs and game consoles Pow...

Страница 31: ...020 020 015 015 015 024 024 024 002 Press 3 OK to add the channel to the Surf list A tick is displayed beside the channel number to indicate that it is stored in the Surf list Surf Surf 037 037 037 050 050 012 012 012 020 020 020 015 015 015 024 024 024 002 003 Repeat the above steps to add more 4 channels to the Surf list Remove channels from Surf list Press 1 SURF to display the Surf list Press ...

Страница 32: ...on screen menu Select 3 Advance Picture Active Control and press OK Press 4 ï or Î to highlight Off On or On Light Sensor and press OK to select Advance Picture Contrast Active Control Artifacts Reduction Dig Natural Motion Off On On Light Sensor Press 5 Í to return to the previous menu or press ANALOG MENU to exit Active Control settings Off Turns off Active Control On Turns on Active Control On ...

Страница 33: ... mode and press OK to select Press 5 Í to return to the previous menu or press ANALOG MENU to exit Tip E Press STATUS EXIT to check if the sleep timer is enabled or time remaining for the TV to switch to standby mode To cancel the sleep timer select Off in the Sleep menu Set theTV time Press 1 SOURCE and Î or ï to select TV from the source list Press 2 ANALOG MENU to display the on screen menu Sel...

Страница 34: ...s menu and select Activate and press OK Timer Sleep Time Start Time Stop Time Off Once Daily Channel No Activate Press 10 ï or Î to select Off Once or Daily and press OK to select Press 11 ANALOG MENU to exit Press 12 to switch the TV to standby mode Activate settings Off Cancels the TV timer Once Activates TV timer once only Daily Activates TV timer everyday at this time Note D If the TV is switc...

Страница 35: ...d press OK Features Timer Child Lock Parental Lock Off On Closed Caption Demo Control access toTV 8 4 channels Parental Lock lets you control the type of TV programs that can be accessed according to program ratings based on age and content Access Parental Lock Press 1 SOURCE and Î or ï to select TV from the source list Press 2 ANALOG MENU to display the on screen menu Select 3 Features Parental L...

Страница 36: ... repeat all the steps as described in Access Parental Lock Lock channels Access the 1 Parental Lock menu as described in Access Parental Lock on the previous page Press 2 OK to select Lock Channel and press ï or Î to highlight the channel number Press 3 OK to lock the channel A padlock symbol is displayed beside the channel number Parental Lock Lock Channel Change Code Clear All Lock All Movie Rat...

Страница 37: ...choice of movie rating label and press OK A tick appears beside the rating label to indicate the rating lock is enabled Press 4 Í to return to the previous menu or press ANALOG MENU to exit Parental Lock Lock Channel Change Code Clear All Lock All Movie Rating TV Rating Block Options G PG PG 13 R NC 17 X Note D Movies are blocked if they fall under the movie rating category that you enabled A mess...

Страница 38: ...ne or more content based ratings highlight only those and press OK TV Rating TV Y TV Y7 TV G TV PG TV 14 TV MA Lock All V S L D TV Y Suitable for all children Programs are not expected to frighten children TV Y7 For children 7 years or older who can tell make believe from reality Some mild fantasy violence or comedic violence Programs may frighten younger children under 7 years of age TV Y7 FV Fan...

Страница 39: ... ï or Î to highlight Unrated or No Rating and press OK to select Press 4 OK to select On Block Options Unrated No Rating Blocking Off On Note D Programs with no rating or unrated are blocked Channel 5 Blocked By No rating Access Code Turn on closed captions 8 6 Closed captions CC are subtitles hidden in the video signals which you can turn on or off unlike the normal subtitles in movies which cann...

Страница 40: ...hlight On and press OK to select Off On Dig Natural Motion 100Hz Demo Pixel Plus HD Pixel Plus 2HD When Demo modes are used the TV displays a vertical split screen showing the new features enabled on one half and the other half without the features Press 6 Í to return to the previous menu or press ANALOG MENU to exit Demo modes Pixel Plus 2HD Like Pixel Plus HD but able to detect and reduce artifa...

Страница 41: ... to select Press 3 ï or Î to adjust the ambient brightness level Ambilight Ambilight Brightness Mode Balance Press 4 Í to return to the previous menu or press ANALOG MENU to exit Select Ambilight modes Turn on 1 Ambilight as described in Turn on Ambilight on this page Press 2 ï until Mode is highlighted and press OK to select Press 3 ï or Î to highlight the mode and press OK to select Ambilight Am...

Страница 42: ...ghlight Color and press ï to highlight Custom Color Ambilight Ambilight Brightness Mode Color Custom Color Balance Palette Saturation Press 4 ï or Î to highlight Palette or Saturation and press OK to select Press 5 ï or Î to adjust the settings Custom Color Palette Saturation 50 Press 6 Í to return to the previous menu or press ANALOG MENU to exit Ambilight Custom colors Palette Adjusts the color ...

Страница 43: ...d see your computer display on the TV screen Picture settings VGA 9 1 mode Horizontal Adjusts the picture to the left or right Vertical Adjusts the picture upwards or downwards Main Picture Setting Sound Features Location Brightness Contrast Horizontal Vertical Color Temp Feature settings VGA 9 2 mode Phase Clock Fine tunes your TV to match the computer s display settings Auto Adjust Synchronizes ...

Страница 44: ...o highlight the settings and Í or Æ to adjust the settings Press 4 Í to return to the previous menu Press 5 Í to return to the previous menu or press ANALOG MENU to exit Picture menu The Picture menu options are Brightness Color Contrast Sharpness Horizontal Vertical and Color Temp All the options work the same way as the ones in Picture menu except for Horizontal and Vertical Horizontal lets you ...

Страница 45: ...80p models HD format 480p 576p 720p 1080p 1080i SD format 480i 576i Note Your Philips TV is HDMI compliant If you do not get a good picture it is not a defect of your TV set Please change the video format on your device DVD player cable set top box etc to a standard format For example you should select 480p 576p 720p 1080i or 1080p for DVD players Use Philips EasyLink 10 5 Your TV is enabled for H...

Страница 46: ...t HDMI port on the TV Audio cable is not connected 2 Connect an audio cable to the DVI AUDIO IN port on the TV 3 Press SOURCE on the remote control and select any one of the HDMI sources TV does not respond to the remote control Batteries are installed incorrectly or low battery power 1 Ensure the indicator light on the TV blinks when the remote control buttons are pressed 2 Ensure that you are us...

Страница 47: ...rrect 5 For HDMI connections certain accessory devices have an HDMI audio output setting that must be turned on for HDMI to HDMI connections Bad picture quality with a coaxial connection Standard definition channels are not as clear as high definition channels 1 Connect the devices via component or HDMI cables No picture or sound Incorrect channel 1 Ensure you have selected the correct channel Inc...

Страница 48: ...2 supporting 480i p 576i p 720p 1080i 1080p 24Hz 60Hz CVBS In with audio L R S Video 2 X HDMI 3 ver1 3a HDMI supporting video 480i p 576i p 720p 1080i 1080p 24Hz 60Hz PC input up to WUXGA Digital audio out Yes supporting AC 3 PCM Headphone 1 X Side MISCELLANEOUS Operating power consumption 100 240 V 50 60 Hz Standby power Watt typ 0 165W Accessories Power cord Quick Start Guide User Manual Remote ...

Страница 49: ...sole etc SPDIF Out 5 Digital audio out Audio IN for VGA 6 Service ports 7 For service personnel HDMI 1 In 8 HDMI in connector for Blu ray Disc player HD digital receiver or game console etc HDMI 2 In 9 Second HDMI in connector VGA 10 Video Graphics connector for personal computers HDMI In Side 11 See HDMI 1 In description Headphones 12 Side Stereo Mini Jack Video Side 13 Video input connector to b...

Страница 50: ...h definition content in DVD or Blu ray Discs Component YPbPr Higher quality Component Y Pb Pr video provides better picture quality than S Video or composite video connections Although component video supports high definition signals the picture quality is analog and lower than that of HDMI When connecting a component video cable match the cable colours to the CVI connectors on the back of the TV ...

Страница 51: ...d and white Audio L R cinch cable Match the cable colors when connecting to the composite Video and Audio L R input connectors on the side of the TV Audio L R cable Red White Composite audio video cable Yellow red and white Note D For various device connections to your TV please refer to the Quick Start Guide for detailed instructions ...

Страница 52: ...3139 125 39891 ...

Отзывы: