background image

20

Use more of your TV

Press 

b

.

®

Press 

Menu

.

Ò

Press navigation key up or down to select an
option.

Press 

OK

to change a setting.

º

Press 

Menu 

to quit the teletext menu.

Press 

b

to switch off teletext.

5.4.7

Digital text services

(UK only)

Some digital TV broadcasters offer dedicated digital
text or interactive services (for example BBC1) on
their digital TV channels . These services work as
normal Teletext with the number, colour and
navigation keys to select and navigate.

Press 

b

.

®

Press navigation key left, right or up, down to
select or highlight items.

Ò

Press one of the colour keys to select an
option.

Press 

OK

to confirm or activate.

º

Press 

MHEG Cancel

to cancel Digital text or

interactive services.

ç

Caution

Digital text services are blocked when subtitles are
broadcasted and Subtitle On is set in the Features
menu. See section 

5.8 Subtitles

.

5.4.8

Teletext 2.5  

If broadcasted by the TV channel this teletext offers
more colours and better graphics.
Teletext 2.5 is switched on as a factory setting.

Press 

Menu

on the remote control and select

TV menu >  Installation > Preferences >

Teletext 2.5

and press navigation key right to

enter the list.

®

Select on or off.

5.5

Create favourite channel
lists

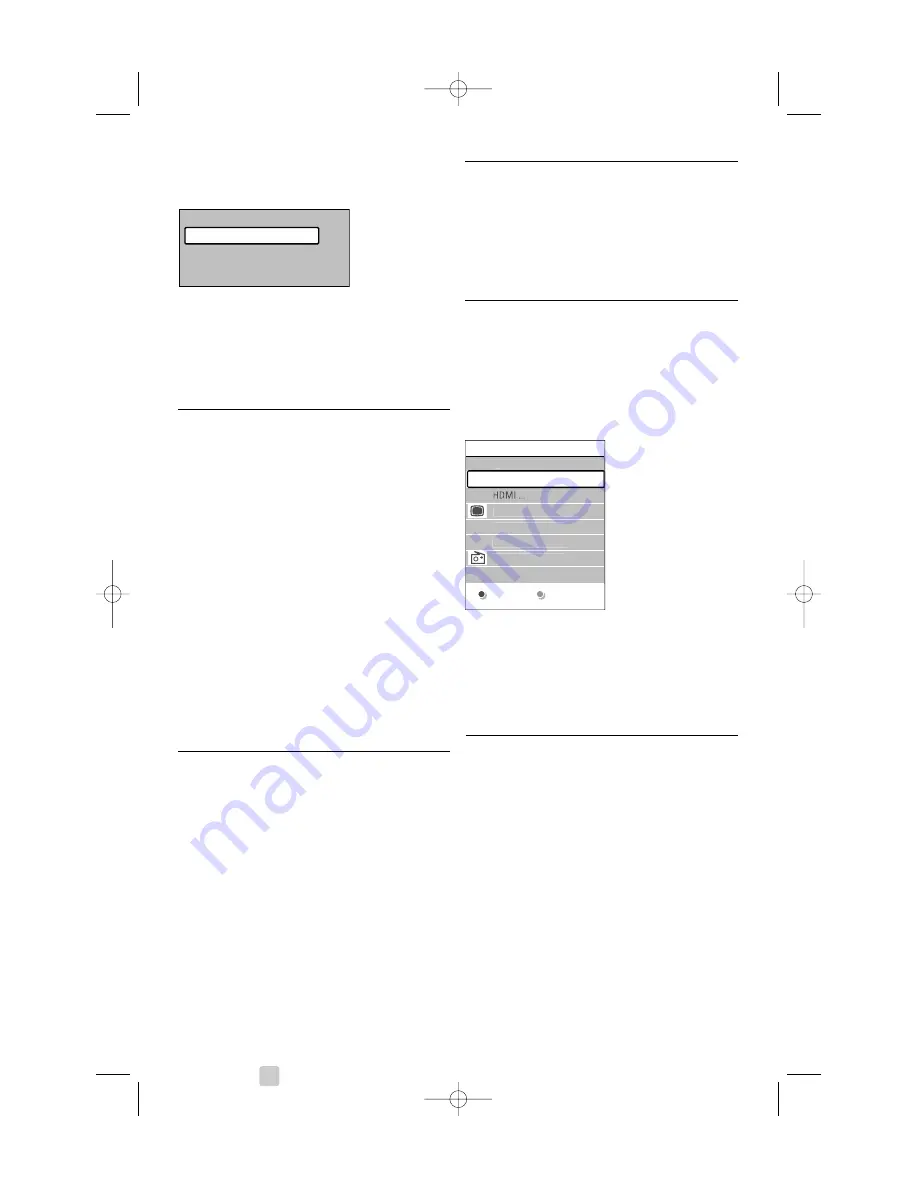
View the All channels list or set up a Favourite list
of your own with your preferred TV channels and
radio stations. For example, each member of your
family can create his or her own favourite list.

5.5.1

Select a favourite list

Learn how to select one of the favourite channel
lists.

Press 

OK

.

The first time after you have finished the
installation, the All channels list is shown. In
other situations, it brings up the last selected
favourite list.

®

Press the red key to show all favourite lists.

Ò

Press navigation key up or down to select a list.

Press 

OK

.

The selected favourite list appears.

º

Press 

OK

again to quit.

5.5.2

To set up a favourite list

Create or modify your own favourite list.

Press 

OK

.

The last selected list appears.

®

Press the red key to show all favourite lists.

Ò

Press navigation key up or down to select a list.

Press 

OK

.

º

Press the green key to enter the Edit mode.
The selected list brings up a full channel list.

Press navigation key up or down to highlight a

channel.

Press 

OK

to mark (or unmark) the highlighted

channel. The channel is added to (or removed
from) the selected list.

Press the green key again to leave the Edit

mode.
The modified channel list appears again.

Teletext menu

Reveal

Language

Gr. II

Off

Cycle subpages

Off

All channels

....

EXT 3

3 Digital channel 2

4 Radio channel 1

2 Digital channel 1

1 Analogue channel 1

....

Select list

A

2690.1 en  18-09-2007  16:50  Pagina 20

Содержание 32PFL7862D

Страница 1: ... settings 16 5 4 Teletext 19 5 5 Create favourite channel lists 20 5 6 Electronic Programme Guide 21 5 7 Timers and locks 22 5 8 Subtitles 23 5 9 View and play photos MP3 24 5 10 Listen to digital radio channels 26 5 11 Software update 26 6 Channel installation 29 6 1 Automatic channel installation 29 6 2 Manual channel installation 30 6 3 Rearrange stored channels 30 6 4 Automatic channel managem...

Страница 2: ...ells many products targeted at consumers which like any electronic apparatus in general have the ability to emit and receive electromagnetic signals One of Philips leading Business Principles is to take all necessary health and safety measures for our products to comply with all applicable legal requirements and to stay well within the EMF standards applicable at the time of producing the products...

Страница 3: ...rtly loosened mains plugs can cause arcing or fire 1 2 Care of the screen Unplug the TV before cleaning Clean the surface with a soft damp cloth Do not apply any other substance chemical or household cleaning agent This may damage the screen Do not touch push or rub or strike the screen with anything hard as this may scratch mar or damage the screen permanently To avoid deformations and colour fad...

Страница 4: ...Channel up and down 4 Power switch 5 Led indicator Blue On Red Standby 6 Remote control sensor Side connectors To connect a camera game console headphone or a USB memory device Back connectors 32 80 cm 32PFL7862D 42 107 cm 42PFL7862D To connect the antenna DVD VCR or other device 4 Your TV PROGRAM VOLUME MENU B POWER 5 6 1 2 3 4 2690 1 en 18 09 2007 16 50 Pagina 4 ...

Страница 5: ...tion better black level high contrast with a flicker free quiet image and a larger viewing angle DVB T integrated tuner Next to normal analogue TV broadcast your TV receives digital terrestrial TV and radio broadcasts Electronic Programme Guide EPG The EPG shows the scheduled digital TV programmes on screen The guide can remind you when programmes start switch the TV on etc HDMI connectors 3 HDMI ...

Страница 6: ... Kensington Security Slot at the back of the TV for an anti theft lock An anti theft Kensington lock has to be purchased separately 32 80 cm 32PFL7862D 42 107 cm 42PFL7862D 3 2 Wall mounting VESA 3 2 1 32 80 cm 32PFl7862D Caution Consider the TV s weight if you wall mount it Improper mounting could result in severe injury or damage Koninklijke Philips Electronics N V bears no responsibility for im...

Страница 7: ...ll mounting This bracket is not included Use a VESA compliant bracket with code VESA MIS F 600 400 M8 ç Warning Consider the TV s weight if you wall mount it Improper mounting could result in severe injury or damage Koninklijke Philips Electronics N V bears no responsibility for improper mounting that results in accident or injury Locate the 4 small discs at the back of the TV Unscrew the discs an...

Страница 8: ...ry cover on the back of the remote control Insert the 2 batteries supplied Type AA R6 1 5V Make sure the and ends of the batteries line up correctly inside of case is marked Ò Close the cover rNote Remove the batteries if you don t use the remote control for a long time 3 4 Antenna cable 32 80 cm 32PFL7862D 42 107 cm 42PFL7862D Locate the antenna connection at the back of the TV Insert the antenna...

Страница 9: ...time 3 6 First time installation The first time and only the first time the mains cord is inserted the installation procedures starts up automatically Follow the instructions on screen à Tips If you notice you have selected a wrong language press the red key on the remote control to return to the language selection menu To rearrange the stored channels see section 6 3 Rearrange stored channels You...

Страница 10: ...dby power consumption 4 2 Watch TV 4 2 1 Switch channels To switch TV channels Press a number 1 to 999 or press P or P on your remote control Press Program Channel or on the side controls of the TV Press 0 to return to the previously viewed TV channel 4 2 2 Adjust volume To adjust the volume Press V or on the remote control Press Volume or on the side controls of your TV To mute the sound Press on...

Страница 11: ...not appear Press AV v on the remote control Press AV v repeatedly to select the DVD player Wait a few seconds until the picture appears Ò Press OK Press Play π 4 6 Select a Teletext page Most TV channels broadcast information via Teletext To watch Teletext Press b The main index page appears To select a page of your choice Enter the page number with the number keys Press P or P or navigation key u...

Страница 12: ...re it 11 Number keys To select a TV channel 12 Previous channel 0 To return to the previously viewed channel 13 Audio and video keys Ò π To use with connected Philips devices MHEG cancel only for UK To cancel only Digital text or Interactive services 14 FAV To display the favourite channels list 5 Use more of your TV This section deals with the more advanced use of your TV how to use the menus to ...

Страница 13: ...X to operate Press SELECT repeatedly to select one of the devices you want to operate with the TV remote control Use the relevant keys on the TV remote control to operate the device Ò Select TV to return to normal TV mode When no key is pressed for 60 seconds the remote control will switch back to normal TV 5 1 3 Device functions overview When the remote control is selected for a particular device...

Страница 14: ...programme See section 5 6 Electronic Programme Guide Multimedia Select this item to view photos or play music stored on a USB device See section 5 9 View and play photos MP3 5 2 2 Use of the menu Learn to use the menus with this example Press Menu on the remote control The main menu appears on the screen Press navigation key right to enter the TV menu ÒPress navigation key right to enter the TV se...

Страница 15: ...ation key up down left right to adjust the settings in the menu º Press Option to quit the menu Audio language See section 5 3 5 Adjust sound settings Subtitle language See section 5 8 3 Select a digital subtitle language Subtitles See section 5 8 Subtitles Picture format See section 5 3 4 Widescreen picture format Equalizer See section 5 3 5 Adjust sound settings Clock Display the clock Press OK ...

Страница 16: ...Current Natural Vivid Movie 5 3 3 Picture settings This section describes how to adjust all picture settings Press Menu on the remote control and select TV menu TV settings Picture and press navigation key right to enter the list Press navigation key up or down to select a setting Contrast Changes the level of bright parts in the picture but keeps the dark parts unchanged Brightness Changes the le...

Страница 17: ... section 5 3 4 Widescreen picture format 5 3 4 Widescreen picture format Avoid black bars on the sides or on top and bottom of the picture Change the picture format to a format that fills the screen Press Menu on the remote control and select TV menu TV settings Picture Picture format and press navigation key right to enter Press navigation key up or down to select an available picture format Ò Pr...

Страница 18: ...tion 5 2 3 Quick access menu To permanently change the audio language see section 6 Channel installation Dual I II If broadcasted you can choose between two different languages Mono stereo If stereo broadcasting is available you can select Mono or Stereo per TV channel Surround mode To select a more spatial sound if broadcasted or if available from a connected device Headphone volume Changes the v...

Страница 19: ... Press OK to highlight the first word or number Ò Press navigation key left right or up down to jump to the next word or number on the page Press OK to search a page which holds the highlighted word or number º Press navigation key up until no word or number is highlighted to quit Search 5 4 5 Enlarge teletext pages For a more comfortable reading you can enlarge the teletext page Press b and selec...

Страница 20: ... View the All channels list or set up a Favourite list of your own with your preferred TV channels and radio stations For example each member of your family can create his or her own favourite list 5 5 1 Select a favourite list Learn how to select one of the favourite channel lists Press OK The first time after you have finished the installation the All channels list is shown In other situations i...

Страница 21: ...s a The following type of EPG appears Now and Next EPG Detailed information about the current programme is shown Or 7 or 8 day EPG It may take some time to receive the EPG data The list of TV programmes will show Use the colour keys to activate the available actions at the bottom of the screen Next to show information about the next programme Remind to mark or unmark a programme as a reminder Watc...

Страница 22: ...f your TV earlier or reset the time during countdown 5 7 2 Automatically switch the TV on On timer switches the TV on automatically to a specified channel at a specified time from standby Press Menu on the remote control and select TV menu Features On timer and press navigation key right to enter the On timer menu Use navigation key left right or up down to select and enter the menu items one by o...

Страница 23: ...nd right ÚPress OK Lock one or more channels and connected devices Select Custom lock Press navigation key right to enter Ò Press navigation key up or down to select Channel lock Press navigation key right º Press navigation key up or down to select the channel s you want to lock or unlock Each time press OK to lock or unlock the channel Set an age rating to a digital programme Some digital broadc...

Страница 24: ... MP3 Watch pictures or listen to music stored on a USB device not supplied with the TV Watch your pictures as a slideshow or listen to a self made music playlist rNote Philips can not be held responsible if your USB device is not supported nor shall Philips accept any liability for damage or loss of stored data 5 9 1 Insert a USB device Insert a device at the side of the TV while the TV is switche...

Страница 25: ...list Ò Press the green key Press navigation key up or down left or right to highlight a picture º Press OK to view the picture Press navigation key left to return to the thumbnail overview Press the green key again to go back to the picture list 5 9 5 Listen to music Find your songs in the Music album of the Multimedia menu Highlight Music in the Multimedia menu Press navigation key right to enter...

Страница 26: ...ices do not work with our TV Contact your dealer 5 11 1 Update assistant The Update assistant helps you to update the TV s software TV identification The TV will identify itself to your USB memory device Press Menu Press navigation key right Ò Press navigation key up or down to select Software update Press navigation key right º Press navigation key up or down to select Update assistant Press navi...

Страница 27: ...the update do not remove the USB memory device from the TV The TV will continue the update as soon as the power comes back Insert the USB memory device to the USB connector at the side of the TV The TV switches off The screen stays black for about 10 seconds Wait and do not use the power switch B on the TV Ò The update process starts automatically Please wait The update is finished when the messag...

Страница 28: ... select Current software info The version and the description of the current software appears 5 11 5 Software update by digital broadcast DVB T Your TV might receive new software from the digital broadcast system automatically If you receive an update message on screen it is strongly advised to update the software immediately select Now Select Later if you want to be reminded later on Select Cance...

Страница 29: ... language when available Step 2 Select your country Select the country where you are located The TV will install and arrange the TV channels according to your country Press navigation key down to select Country Press navigation key right to enter the list Ò Press navigation key up or down to select your country Press navigation key left to return to the Installation menu Step 3 Time zone selection...

Страница 30: ...ine tune a found channel when the reception is poor Press Menu on the remote control and select TV menu Installation Channel installation Analogue manual installation Fine tune Press navigation key right to enter the Fine tune menu Ò Press navigation key up or down to adjust the frequency Press navigation key left when you finished fine tuning º Select Store current channel to store the fine tuned...

Страница 31: ...ct TV menu Installation Channel installation Installation update Press navigation key right to enter the Installation update menu Ò Press OK Press the green key to start The update starts and may take a few minutes º When the update is completed press the red key to return to the Channel installation menu Press Menu to quit the menu 6 5 Digital reception test If you receive Digital TV broadcasting...

Страница 32: ... HD digital receiver or HD game console etc 9 HDMI 2 In Second HDMI in connector 10 HDMI 3 In Third HDMI in connector 11 Antenna input Side connectors 12 S Video S Video input connector to be used together with Audio L R connectors for camcorder game console etc 13 Video Video input cinch connector to be used together with Audio L R connectors for camcorder game console etc 14 Audio L R in Audio L...

Страница 33: ...or Blu ray Disc player HD digital receiver or HD game console etc 9 HDMI 2 In Second HDMI in connector 10 HDMI 3 In Third HDMI in connector 11 Antenna input Side connectors 12 S Video S Video input connector to be used together with Audio L R connectors for camcorder game console etc 13 Video Video input cinch connector to be used together with Audio L R connectors for camcorder game console etc 1...

Страница 34: ...supports HDCP High bandwidth Digital Contents Protection HDCP is a copy protection signal that comes with HD content DVD disc or Blu ray Disc 7 2 2 HDMI control if present HDMI with Consumer Electronics Control CEC adds to the normal HDMI advantages It offers easy operation of the TV and connected devices These devices also have to be equipped with HDMI with CEC Press Menu on the remote control an...

Страница 35: ...Basic quality Use a Video cinch cable together with an Audio L R cinch cable Match the cable colours when you connect Combined Video yellow and Audio L R cable red and white 7 2 7 Display synchronised audio out For the best match of image and sound in speech on screen connect a Home Theatre System to Audio Out L R or Digital Audio output if present See diagrams 7 3 4 and 7 3 8 Do not connect the a...

Страница 36: ...na cables 7 3 3 DVD Recorder and Digital Receiver Use 3 scart cables and 3 antenna cables EXT 3 Y Pb Pr AUDIO L R HDMI 3 HDMI 1 HDMI 2 EXT 1 EXT 2 AUDIO OUT L R OUT IN ANTENNA DIGITAL AUDIO Receiver Cable box DVD Recorder IN OUT IN OUT EXT 3 Y Pb Pr AUDIO L R HDMI 3 HDMI 1 HDMI 2 EXT 1 EXT 2 DVD Player AUDIO OUT L R OUT IN ANTENNA DIGITAL AUDIO EXT 3 Y Pb Pr AUDIO L R HDMI 3 HDMI 1 HDMI 2 EXT 1 EX...

Страница 37: ...nd 2 antenna cables EXT 3 Y Pb Pr AUDIO L R HDMI 3 HDMI 1 HDMI 2 EXT 1 EXT 2 Satellite receiver AUDIO OUT L R OUT IN ANTENNA DIGITAL AUDIO EXT 3 Y Pb Pr AUDIO L R HDMI 3 HDMI 1 HDMI 2 EXT 1 EXT 2 AUDIO OUT L R OUT IN ANTENNA DIGITAL AUDIO OUT Home Theatre System DVD Recorder DIGITAL AUDIO IN IN OUT DIGITAL AUDIO EXT 3 Y Pb Pr AUDIO L R HDMI 3 HDMI 1 HDMI 2 EXT 1 EXT 2 AUDIO OUT L R OUT IN ANTENNA ...

Страница 38: ...DMI 1 HDMI 2 EXT 1 EXT 2 Blu ray Disc player AUDIO OUT L R OUT IN ANTENNA DIGITAL AUDIO OUT HDMI EXT 3 Y Pb Pr AUDIO L R HDMI 3 HDMI 1 HDMI 2 EXT 1 EXT 2 HD Digital receiver HD Satellite receiver AUDIO OUT L R OUT IN ANTENNA DIGITAL AUDIO IN OUT OUT HDMI EXT 3 Y Pb Pr AUDIO L R HDMI 3 HDMI 1 HDMI 2 EXT 1 EXT 2 AUDIO OUT L R OUT IN ANTENNA DIGITAL AUDIO OUT Home Theatre System Digital Receiver DVD ...

Страница 39: ...ors or use the S Video and Audio L R connectors 32 80 cm 32PFL7862D 42 107 cm 42PFL7862D Connected at the back of the TV Use a HDMI or the YPbPr EXT3 input for HD quality 7 3 12 Personal Computer The best connection for a PC is at the back of the TV A more practical connection but only for viewing photos and films from your PC is the connection at the side of the TV ç Caution Before connecting the...

Страница 40: ... you use the Digital Audio In connection assign this connection in the menu to the device from where the sound comes from Press Menu on the remote control and select TV menu Installation Connections Digital Audio In Press navigation key right to enter the list Ò Press navigation key up or down to select the connector used by the device 7 4 2 Audio In L R If you use the Audio In L R connection assi...

Страница 41: ...d with a Conditional Access Module CAM and a Smart card provided by a digital TV service operator The CAM may enable several services depending on the operator you choose e g Pay TV Contact your digital TV service operator for more information and terms 7 5 1 Insert a Conditional Access Module CAM Warning Switch off your TV before inserting a CAM Look on the CAM for the correct inserting direction...

Страница 42: ... mm height 543 mm 675 mm depth 125 mm 125 mm weight 18 kg 27 kg TV stand width 829 mm 1060 mm height 606 mm 740 mm depth 219 mm 256 mm weight 20 kg 30 kg Sound Sound system Virtual Dolby Digital BBE Multimedia Connections USB Playback formats MP3 LPCM Slideshow alb JPEG Remote control Type RC4350 Batteries 2 Size AA R6 type Connectivity EXT1 scart Audio L R CVBS in out RGB EXT2 scart Audio L R CVB...

Страница 43: ...enu to quit the menus TV channels Some TV channels are gone Verify if the correct channel list is chosen A channel could be uninstalled in the Rearrange menu No digital channels found during installation Verify if the TV supports DVB T in your country See the list of countries on the TV typeplate Picture The blue light is on but there is no picture Verify if the antenna is connected properly Verif...

Страница 44: ...ee the user manual of the device to verify the output settings If that does not help connect an additional audio cable If an HDMI to DVI adaptor is used verify if an additional audio connection is in place to complete the DVI connection USB connection The TV does not show the USB device content Set your device camera to Mass Storage Class compliant The USB device may need specific driver software ...

Страница 45: ...Custom lock 23 Custom tint 16 Decoder channel 40 Delta volume 18 Device connecting 34 naming 40 watch 11 Digital audio out 32 subtitle language 24 receiver 38 text services 20 test reception 31 Dual I II 18 Dual screen 12 DVB T 5 DVD connect 36 playback 11 player 36 recorder 36 Dynamic contrast 17 Electronic Programme Guide 21 Equalizer 18 External 1 2 3 EXT 32 Factory settings 31 Favourite channe...

Страница 46: ...aning 3 Search channels 35 teletext pages 19 Set code 22 Settings assistant 16 Sharpness 16 Shift 17 Sleeptimer 22 Software update 26 Sound menu 18 surround mode 18 Standby 12 22 Super zoom 17 Stationary images 3 Stereo 18 Subtitle 23 Switch on 10 Table of Pages T O P 19 Technical data 42 Teletext 19 teletext 2 5 20 digital 28 dual screen 19 menu 20 page 19 Time zone 29 Timers 22 Tint 16 Troublesh...

Отзывы: