7
3.
Press
oœp
π
to select one of the followings to
con
fi
gure the settings:
•
Language
.
•
Picture:
Sets the Smart Picture or Personalized settings
via different controls.
•
Audio:
Sets the Smart Audio or Personalized settings
via different controls.
•
Security:
Sets the level of security by con
fi
guring the
settings such as TV Lock, Keyboard Lock, RC Lock and
Smart Secure.
•
Control:
Customizes the control and performance
settings such as Digit Timeout, 3-Digit entry, Step tuning
and HDMI CEC.
•
Energy Saving Features:
Sets different Power Saving
modes such as Smart Power, Auto Sense, ESP, and
Standby mode.
•
Customizable UI:
Sets the level of customization of
TV Graphical User Interface.
•
Programmable UI:
Enables the TV’s Graphical User
Interface to be programmed via Flash or Browser.
•
Power On:
Sets the different Switch on Setting when
AC main power is applied.
•
SmartGuide Category:
Enables/disables the display
of the SmartGuide Category icons on the SmartGuide
screen.
•
Clock Setup:
Enter the TV channel number that will
provide the date and clock information.
•
Factory Default:
Set to factory default Out-Of-Box
setting.
Con
fi
gure the Switch On
settings
1.
Press
M
on the setup remote control to display the setup
menu.
2.
Press
oœp
π
to select the Guess TV settings and go
one level down to Switch On/OSD option.
3.
Press
oœp
π
to select one of the followings to
con
fi
gure the settings:
•
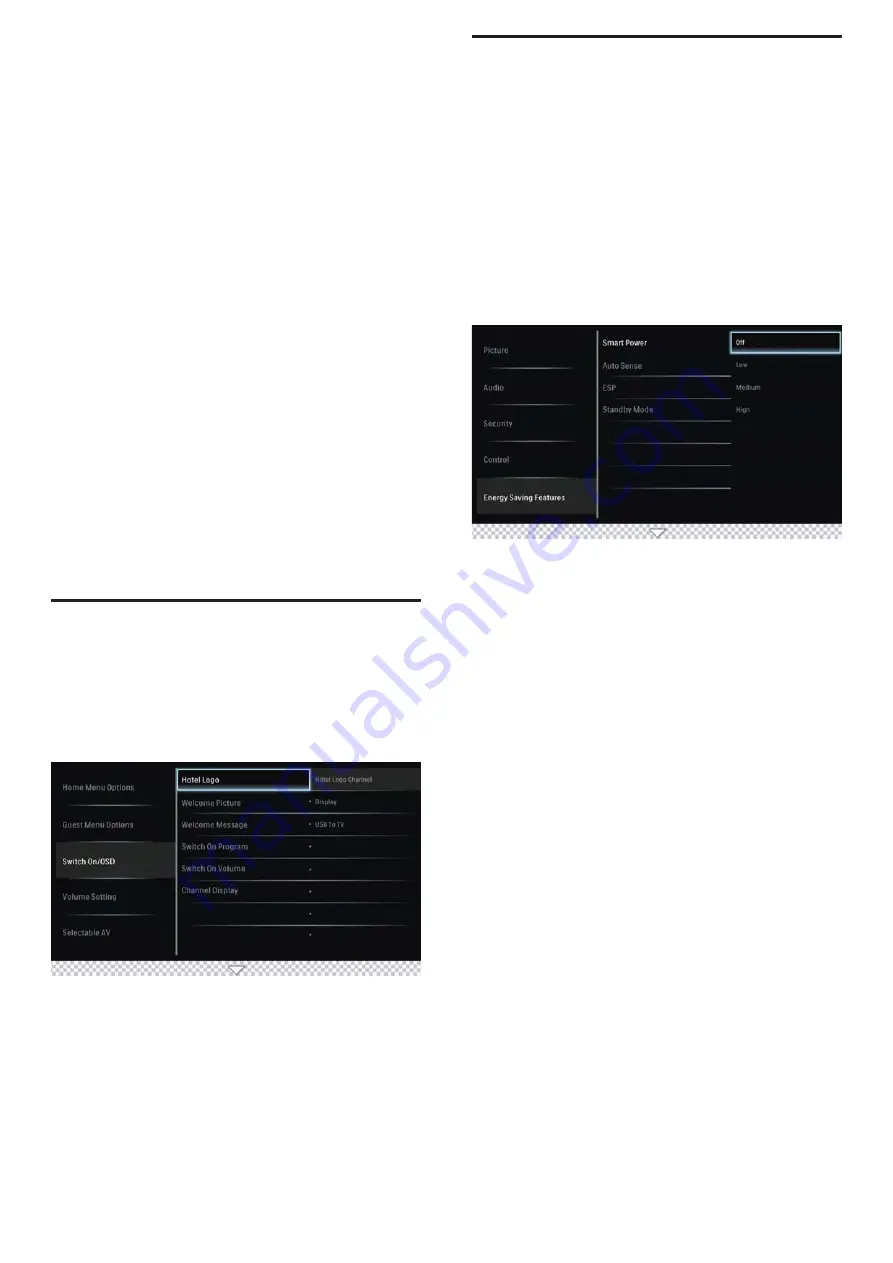
Hotel Logo:
Sets the Hotel Logo during turn on.
•
Welcome Picture:
Sets the Hotel Welcome Image.
•
Welcome Message:
Sets Welcome Message.
•
Switch On Program:
Sets a channel that is displayed
when TV is turned on.
•
Switch On Volume:
Speci
fi
es the volume at which the
TV is turned on.
•
Channel Display:
Sets the display of channel number,
channel label and channel logo on the screen.
Con
fi
gure Smart Feature
settings
Configure the Smart Power Settings
Philips continuously focuses on lowering the environmental
impact of its consumer products by adopting energy efficient
ways of power management.
This section describes how to select a setting for maximum
power savings.
1.
Press
M
on the setup remote control to display the setup
menu.
2.
Press
oœp
π
to select the Installer TV settings and
press
oœp
π
to go one level down to Energy Saving
Features option.
3.
Press
oœp
π
to select one of the followings to
con
fi
gure the settings:
•
SMART POWER:
Sets a power saving mode.
Selection one of the options :
•
Off:
Rich and dynamic settings, ideal for daylight
use. Disable power savings.
•
Low:
Natural picture setting. Achieve low
power savings.
•
Medium:
Ideal settings for watching movies.
Achieves medium power savings.
•
High:
Applies low-energy settings. Achieves
highest possible power savings.
•
Auto Sense:
Enable/disable the Light sensor of the TV.
If enabled, the ambient light conditions of the room will
be measured to automatically con
fi
gure the optimum
power consumption and picture performance of the TV,
according to the room ambience conditions.
•
ESP:
Enables the customization of the duration (in
hours) in which TV will automatically turn off if there is
no user interaction via remote control or keyboard.
•
Standby:
Enables the customization of the TV standby
behavior. Set to Standard, the TV will consume the least
power during standby, but startup time will be longer
and hospitality communication is not possible. Set to
Fast, the TV will be best performing in terms of turn-on
time and hospitality communication is also available, but
power consumption will be higher.


