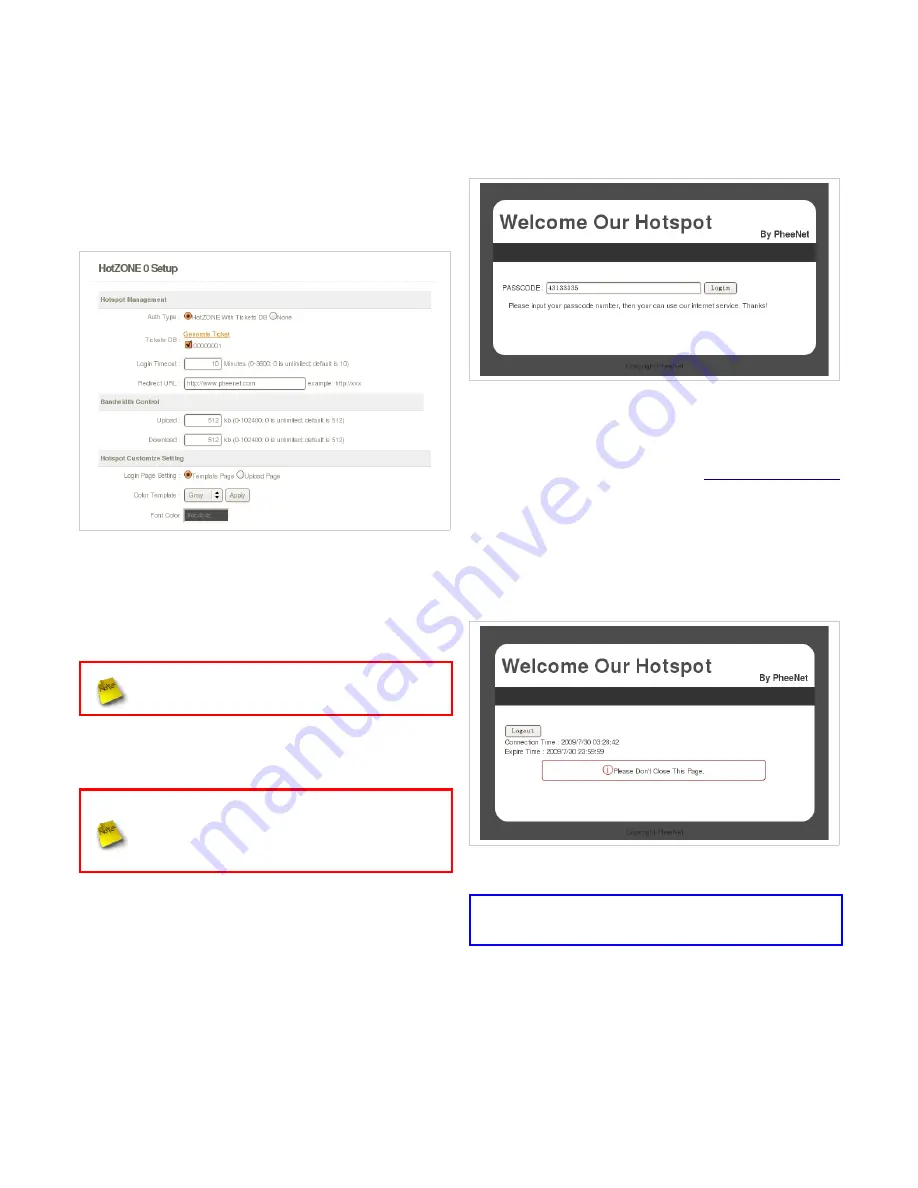
Step 7 : Create HotZONE With VLAN0
Click
HotZONE
, and then
HotZONE
Management
page appears. Click “Edit” on
VAP0
of HotZONE
List, and then
HotZONE0
Setup
page appears.
Select desired setting for HotZONE0. Below depicts
an example for
Create HotZONE on VLAN0
and
use
File
ID
“
00000001
” of Ticket Database. Click
Save
button to save the settings.
Step 8 : Restart System
Click
Reboot
to activate all settings configured so
far. The Reboot message will appear on the screen
during the restarting process.
Please do not interrupt the system until
the System Overview Page appears.
Step 9 : User Login
WAS-103R supports NTP time
synchronization only, it is strongly
recommended to make sure the NTP
server is reachable and alive
1. Connect a client device (e.g. Notebook, PC) with
wireless interface to scan the configured VAP0's
ESSID of WAS-103R (e.g. “
AP00
”) and get
associated with this ESSID.
2. The client device will obtain an IP Address
automatically via VLAN0's DHCP from
WAS-103R. Open a WEB Browser on a client
device, access any URL, and then the
HotZONE
0 User Login
Page
will appears.
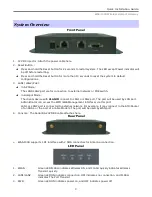
3. Enter the Passcode of File ID “00000001”
previously generated via Generate
HotZONE
Ticket's Passcode
. Click “Login” button. (e.g.
43133335
; you can get Passcode from Ticket
List)
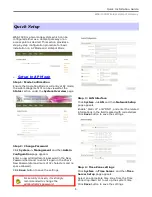
Congratulation !
The Login Page will redirected to
www.pheenet.com
and pop-on
Timer Page
after a client has
successfully logged into WAS-103R and has been
authenticated by the system.
The appearance of Login Timer Page means that
WAS-103R has been installed and configured
properly
For further configuration and information, please
refer to the User's Manual.


