Friabilimeter
operating instructions
Page 30 of 48
Revision 7
© 2016 – Pfeuffer GmbH
Adjustment by moving the detent plate
8.6
Before you move the detent plate, carry out and make a note of an investigation with a
test malt (see master copy on last page).
Disconnect the mains cable from the electrical power supply, or pull out the
coupler.
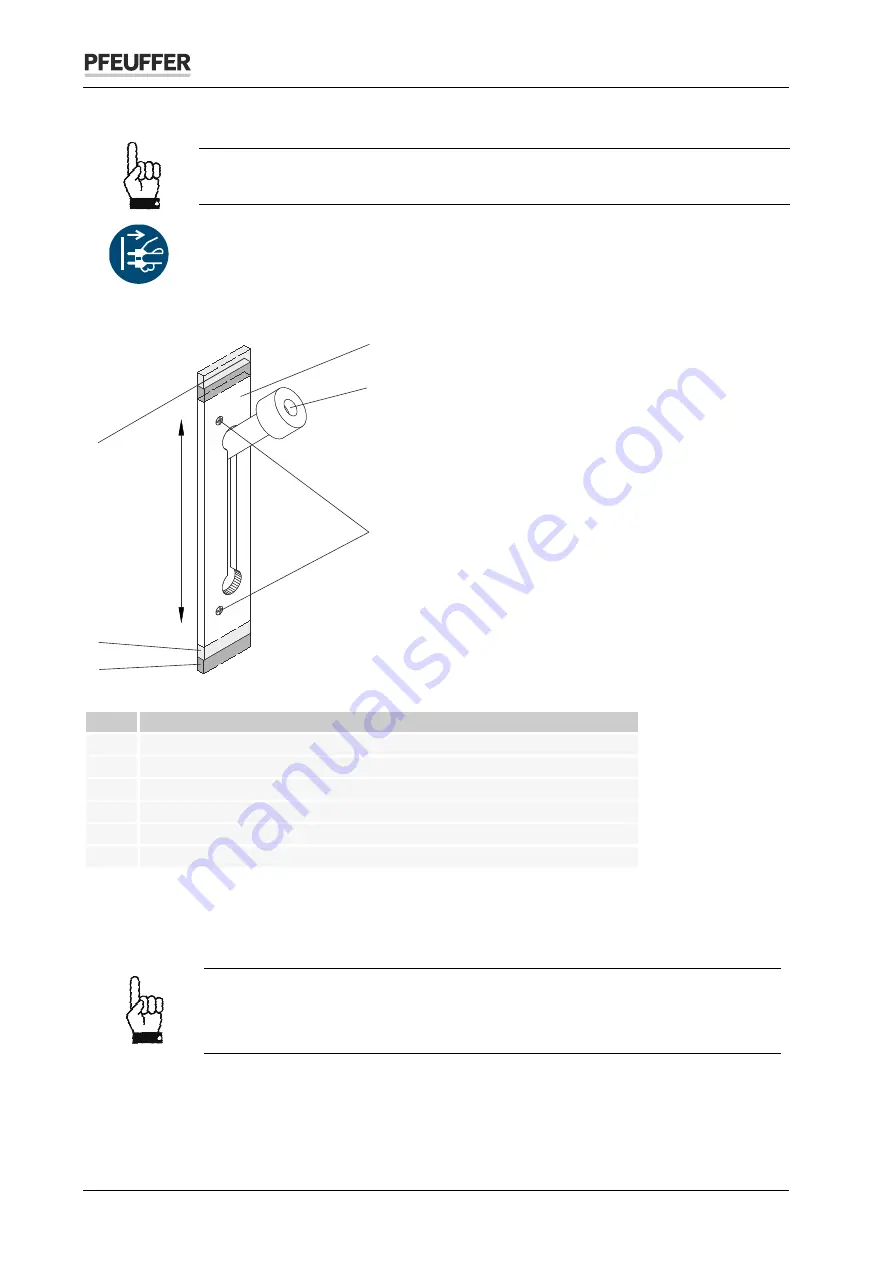
Another adjustment possibility is the detent plate attached to the housing on the left.
Figure 27: Moving the detent plate
Item Designation
1
Detent plate
2
Pull handle
3
Countersinking screw M4
4
Mark the initial setting!
5
Moving the detent plate upward
= lower friability
6
Moving the detent plate downward
= higher friability
Use an indelible pen to mark the initial setting of the detent plate.
Unscrew both countersinking screws.
Move the detent plate.
A 3 mm movement corresponds to about 1.5 % friability
Moving upward = lower friability
Moving downward = higher friability
Then tighten the two countersinking screws firmly again.
Make a note of the movement of the detent plate and the subsequent check with test malt in a test
log (see master copy on last page).
4
1
2
3
5
6


