background image

708plus_13/10/17                                                                                  8/28                                                                Copyright  ©  2015 Peruzzo Italy - MADE IN ITALY

EN

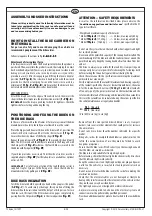
ASSEMBLY AND USER INSTRUCTIONS

Whenever this product is used the following information must be 

taken into consideration: the bike rack is a safe product if used 

correctly, but if it is used incorrectly it can cause damages to you 

and to anyone driving behind you.

For personal safety and to avoid damaging the vehicle we 
recommend 2 people mount the bike carrier.

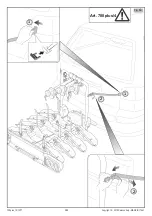
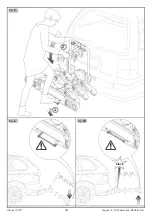
Follow in sequence the actions in fig. 

A-B-C-D-E-F.

Adjustment of closing lever force

It is always necessary to make the first adjustment when the product is 
purchased. Then, every time the product is used, the clamping force must 
be checked and adjusted if necessary. In order to prevent accidents and 
damage it is advisable to ask a second person to assist you in this 
procedure as well. After disengaging and lifting the lever orizontal 
position (

1-2 Fig. A

), The screw must be adjusted with the wrench 

provided so that the clamping force on the lever is increased to a 
minimum of 

45 Kg

. (

2-3 Fig. B

). Make sure that the bike rack does 

not rotate when the clamping device has been locked.

ONLY FOR ART.708/4

Attach the strap hooks to the edges of the vehicle hatch, then insert the 
straps in the buckles (make sure the inlet direction is correct)(

1-2 Fig. G

).

IMPORTANT

: Give the straps a good tug to check for tightness. Check the 

tightness before starting and during the trip.

HOW TO INSTALL THE BIKE CARRIER ON 

THE TOWBALL     

In the case of bikes with carbon frames or forks, always consult the bike 
manufacturer or dealer to check if you are allowed to use the carrier.

Place the biggest and heaviest bike on the bike rack first, position the 
wheels in the tire cradles and fix it to the shortest arm (

1 Fig. H

) . 

Secure the wheels by means of the fixing straps (

2 Fig. H

).

Repeat the operations in (

1-2 Fig.H

) for the second, third and fourth 

bikes. The first, second and third bikes are secured to the fixing arch with 
the fixing arms (

1 Fig. H

), whereas the fourth bike is secured to the 

third bike with fixing arm (

3 Fig. H1

).

If your bike protrudes excessively from the wheel cradles, use the 2 
supplied adapters (

Fig. H2

); further adapters are available as optional 

extras art. 985.

IMPORTANT

: For safe transportation of the load the bike carrier is 

supplied trap for tying es to the fixing arch . Check that the belt is 
mounted correctly by pulling on it (

4 Fig. H3

).

POSITIONING AND FIXING THE BIKES ON 

THE BIKE RACK  

BIKE RACK INCLINATION

To tilt the bike rack hold it up with one hand while you press the pedal 
(

1-2 Fig. 

I

) . To avoid injury or damage, this operation of tilting the 

bike rack should be carried out with the help of a third person. To close 
the bike rack, lift it until the tilt mechanism engages completely by 
passing from the tilt position (

Fig. L

) to the closed position (

Fig. M

).

As  well  as  the  information  described  below  please  observe  the 
"

Conditions, suggestions and limits for use

" specified in the EC 

type test certificate.

- Weight and maximum capacity of bike racks:
* Model 

708plus/4

 (19,89 kg.)     --->  4 bikes, max. capacity 60 kg.

* Model 

708plus/3

 (17,38 kg.)     --->  3 bikes, max. capacity 60 kg.

* Model 

708plus

     (15,68 kg.)     --->  2 bikes, max. capacity 60 kg. 

- Do not use the cycle carrier on the road with wheel supports and light 

bar in closed position.

- Never exceed the permitted capacity of the towing hook installed. The 

combined weight of the bike rack and the load must never exceed the 
permitted capacity. Keep the towing hook ball surface clean from dirt 
and oil.

- The driver is always responsible for the load he is transporting and 

consequently he is also responsible for checking the fastenings both 
before starting the trip and at regular intervals during the trip.

- Check the car manual for the specifications concerning the maximum 

permissible rear axle weight.

- Verify compliance with the value 

D

 (maximum load bearing capacity) 

of the towball specified by the car or towball manufacturer; the value 
D for the towball must be at least 

(760 Kg) 7.6kN

; older towballs 

often only specify the permissible load on the towball 

G

A

 and the 

total permissible load of the towing vehicle 

G

K

 rather than value 

D

; in 

this case the value 

D

 can be calculated using the values specified in 

the vehicle maintenance or registration booklet:


- Remove from  the  transported  bikes children's  seats,  transport 

baskets, rain covers or other elements that could get lost or increase 
the air resistance.

- Do not carry  more  bikes  than the number  indicated  for a specific 

model.

- Bike parts, such as for example the handlebars or pedals, must not be 

left in  the  normal position  of  use; they must  be  folded  to  avoid 
dangerous projections.

- Ensure that the bike rack is fitted correctly on the towing hook and 

that the bikes are secured as instructed. 

- The bike rack is only suitable for transporting bicycles.
- Before leaving, check that the rear lights function correctly. Also check 

that the indicator lights work correctly.

- Keep the connections clean (lighting board power plug and power 

outlet on the vehicle ); use suitable cleaning materials when 
necessary.

- Do not use and/or attach the bike rack to the car before making the 

electrical connections.

- Check  that  the  electrical  cables  are  not  damaged  or  likely to be 

damaged by interference with other elements of the vehicle or that 
they could, in any way, be accidently cut.

- The  lighting devices are not designed t be immersed in water.
- Any major work required to be done on the electrical system and 

connections must be performed by qualified personnel.

- Provide an additional number plate to be attached to the towball bike 

rack.

ATTENTION – SAFETY REQUIREMENTS

D =

x

9,81

     (G

A   

x


G

K

)

1000 

    (G

A  

+


G

K

)

(D 

in [kN] / 

G

A

 in [kg] / 

G

K

 in [kg])

Содержание 708plus

Страница 1: ...R MOUNTING ON TOW BAR HINTERRADFAHRRADTRÄGER ZUR MONTAGE AUF DER ANHÄNGERKUPPLUNG PORTE VELOS ARRIERE POUR DISPOSITIF D ATTELAGE PORTABICI POSTERIORE GANCIO DI TRAINO PORTA BICICLETA PARAAPLICAR A LA BOLA DE REMOLQUE BAGAŻNIK ROWEROWY NA HAK HOLOWNICZY ZADNÍ NOSIČ JÍZDNÍCH KOL PRO MONTÁŽ NA TAŽNÉ ZAŘÍZENÍ NOSILEC KOLES NA VLEČNI KLJUKI PORTACICLO TRASEIRO PARA O GANCHO DE TRAÇÃO FIETSENHOUDER VOOR...

Страница 2: ...2 5 5 CLA C K Fig A Fig B 708plus_13 10 17 2 28 Copyright 2015 Peruzzo Italy MADE IN ITALY 1 2 3 1 ...

Страница 3: ...708plus_13 10 17 3 28 Copyright 2015 Peruzzo Italy MADE IN ITALY Fig C Fig D 1 2 2 1 2 2 1 2 1 2 1 ...

Страница 4: ...708plus_13 10 17 4 28 Copyright 2015 Peruzzo Italy MADE IN ITALY 2 Fig E Art 708plus 4 3 Fig F 1 2 1 1 Art 692 ADAPTER FROM 7 PIN PLUG TO 13 PIN ADATTATORE SPINA 7 POLI PRESA 13 POLI ...

Страница 5: ...708plus_13 10 17 5 28 Copyright 2015 Peruzzo Italy MADE IN ITALY Fig G 1 2 Art 708plus 4 1 2 ...

Страница 6: ...708plus_13 10 17 6 28 Copyright 2015 Peruzzo Italy MADE IN ITALY 4 3 2 Fig H3 Fig H2 Fig H1 Fig H 1 NO OK art 985 OK 1 2 NO NO OK ø min 20 mm max 50 mm ...

Страница 7: ...708plus_13 10 17 7 28 Copyright 2015 Peruzzo Italy MADE IN ITALY Fig I 1 Fig L Fig M 2 Clack ...

Страница 8: ...ngages completely by passing from the tilt position Fig L to the closed position Fig M As well as the information described below please observe the Conditions suggestions and limits for use specified in the EC type test certificate Weight and maximum capacity of bike racks Model 708plus 4 19 89 kg 4 bikes max capacity 60 kg Model 708plus 3 17 38 kg 3 bikes max capacity 60 kg Model 708plus 15 68 k...

Страница 9: ...n must be attached to it Check all the bike rack fixing elements after a short while then at regular intervals Check the distance between the bike rack the bikes and the exhaust pipe s to avoid heat damages To increase road safety and to reduce fuel consumption remove the bike rack when not in use Modifications to the bike rack and its components are not permitted Immediately replace any worn or d...

Страница 10: ...sreichendes Spannen des Riemens dass dieser korrekt montiert ist 4 Abb H3 POSITIONIERUNG UND BEFESTIGUNG DER FAHRRÄDER AUF DEM FAHRRADTRÄGER NEIGEN DES FAHRRADTRÄGERS Um den Fahrradträger abzuklappen halten Sie ihn mit einer Hand hoch und schieben die Stange gleichzeitig mit dem Fuß nach unten 1 2 Abb I UmVerletzungen und Schäden auszuschließen muss sich die ausführende Person beim Schrägstellen d...

Страница 11: ...er Rückfahrleuchten sind für den Fahrradträger auf der Anhängerkupplung vorgeschrieben Der 7 polige Stecker kann verwendet werden Sind Stecker und Buchse inkompatibel verwenden Sie bitte die entsprechenden im Handel erhältlichen Adapter ZULASSUNG ZWISCHEN DEM 01 01 1987 UND DEM 31 12 1990 Alle Leuchten des auf der Anhängerkupplung angebrachten Fahrradträgers müssen funktionieren Nebelschlussleucht...

Страница 12: ...ur la fermeture le porte vélo doit être soulevé jusqu à ce que le dispositif d inclinaison s enclenche complètement en passant de la position d inclinaison Fig L à la position de fermeture Fig M En plus des dispositions ci dessus veuillez respecter les Conditions conseils et contraintes d utilisation visés dans le rapport d essai pour l homologation CE correspondante Poids propre et capacité de ch...

Страница 13: ...ugmenter la sécurité routière et pour éviter toute consommation énergétique inutile démontez le porte vélos lorsqu il n est pas utilisé Il est défendu de modifier le porte vélo et ses composants Remplacez immédiatement toute partie usée ou endommagée exclusivement avec des pièces de rechange originales Nettoyez le porte vélo avec de l eau tiède et ou un produit détergent pour véhicules Rangez le p...

Страница 14: ... effettuata facendosi aiutare da una terza persona Per la chiusura il portabici viene sollevato fino a quando il dispositivo di inclinazione si innesta completamente passando dalla posizione di inclinazione Fig L alla posizione di chiusura Fig M Oltre a quanto di seguito esposto preghiamo di osservare Condi zioni consigli e limitazioni d uso di cui al certificato di prova per l omologazione CE del...

Страница 15: ...sponsabile dei danni causati da un uso non conforme alle istruzioni allegate ed al non rispetto delle norme di sicurezza sopra elencate ATTENZIONE attenersi alla normativa del codice stradale vigente nello stato in cui si usa il portabici Se il carico proietta più di 40 cm oltre la superficie delle luci del porta bici gancio traino allora è necessario segnalarlo visivamente Controllare inizialment...

Страница 16: ...on el pie 1 2 Fig I Para evitar lesiones y daños la inclinación del portabicicletas debe ser regulada con la ayuda de una tercera persona Para cerrarlo el portabicicletas se levanta hasta que el dispositivo de inclinación se engancha completa mente pasando de la posición de inclinación Fig L a la posición de cierre Fig M Además de lo indicado a continuación se ruega observar las Condiciones consej...

Страница 17: ...orro energético desmonte el portabicicletas cuando no se utiliza Se prohíbe modificar el portabicicletas y sus componentes Sustituya inmediatamente cualquier parte desgastada o deteriorada utilizando exclusivamente repuestos originales La limpieza del portabicicletas puede hacerse con agua templada y o un producto detergente para automóviles Guarde el portabicicletas a temperaturas moderadas y pro...

Страница 18: ... odchylanie bagażnika przez operatora powinno odbywać się z pomocą osoby trzeciej Aby dokonać zamknięcia należy podnieść bagażnik rowerowy aż do całkowitego zaczepienia się urządzenia odchylającego które przechodzi w ten sposób z pozycji odchylonej Rys L do pozycji zamkniętej Rys M Prosimy o stosowanie się do niżej podanych zasad bezpieczeństwa oraz o przestrzeganie Warunków zaleceń i ograniczeń u...

Страница 19: ...owymi w celu uniknięcia ewentualnych szkód mogących powstać na skutek wystawienia na działanie ciepła Aby zwiększyć bezpieczeństwo jazdy na drodze oraz ze względu na oszczędność energetyczną należy zdemontować bagażnik rowerowy gdy nie jest on wykorzystywany Zabrania się dokonywania przeróbek bagażnika oraz jego elementów składowych Każda zużyta lub uszkodzona część powinna zostać bezzwłocznie zas...

Страница 20: ...iče pomoci třetí osoby Pro zavření nosiče ho zvedejte směrem nahoru dokud nedojde k celkovému zavření sklápěcího zařízení které přejde z nakloněné polohy Obr L do zavřené polohy Obr M Kromě níže uvedených nařízení vás prosíme abyste se řídili Podmínkami radami a provozními omezeními které jsou uvedené v certifikátu o schválení typu ES schválení typu Vlastní hmotnost a maximální nosnost nosičů Mode...

Страница 21: ... Je zakázáno provádět na nosiči a jeho komponentech jakékoliv úpravy Při výměně jakékoliv opotřebené či poškozené části používejte výhradně originální náhradní díly Při čištění nosiče používejte vlažnou vodu a nebo přípravek na čištění aut Skladujte nosič při mírných teplotách a chraňte ho před vlhkostí DOPORUČUJEME ŘÁDNĚ USCHOVAT NÁVOD K POUŽITÍ A PŘEČÍST SI HO PŘED KAŽDÝM POUŽITÍM VÝROBKU Výrobc...

Страница 22: ...vstavi in se premakne od položaja za nagibanje Slika L na položaj za zapiranje Slika M Poleg tistega kar je navedeno v nadaljevanju vas prosimo da upoštevate Pogoje nasvete in omejitve uporabe ki so navedeni v potrdilu za podelitev ES homologacije tipa Lastna teža in maksimalna nosilnost nosilca koles Model708plus 4 19 89kg 4kolesa maks nosilnost60kg Model708plus 3 17 38kg 3kolesa maks nosilnost60...

Страница 23: ...a tovor štrli več kot 40 cm čez površino luči ki so na nosilcu koles na vlečni kljuki potem ga je potrebno vidno označiti Preverite na začetku in po kratki vožnji in kasneje v rednih intervalih vse pritrdilne elemente nosilca koles Preverite razdaljo med nosilcem koles kolesi in izpušno cevjo izpušnimi cevmi da bi se izogibali morebitnih poškodb zaradi toplote Za večjo varnost na cesti in za pravi...

Страница 24: ... pedimos para observar Condições conselhos e limites de uso como no certificado de prova para a homologação CE do tipo Peso próprio e capacidade máxima dos porta bicicletas Modelo708plus 4 19 89kg 4bicicletas capacidademáx 60kg Modelo708plus 3 17 38kg 3bicicletas capacidademáx 60kg Modelo708plus 15 68kg 2bicicletas capacidademáx 60kg Não utilizar o porta bicicletsa na estrada com o apoio para roda...

Страница 25: ...quer parte estragada ou danejada exclusivamente com partes originais A limpeza do portabicicletas pode ser feita com àgua morna e ou um produto detergente para automovel Guardare o portabicicletas a uma temperatura moderada e ao abrigo da umidade RECOMENDAMOS TAMBÉM DE CONSERVAR AS INSTRUÇÕES DE USO DO PRODUTO E DE AS CONSULTAR EM CADA UTILIZAÇÃO O fabricante não é responsável pelos danos causados...

Страница 26: ...tang naar beneden duwen 1 2 Fig I Om letsels en schade te vermijden wordt de bijstand van een derde persoon vereist tijdens de afstelling van de schuine stand van de fietsenhouder Ga als volgt te werk voor de sluiting van de fietsenhouder hef hem zo hoog op dat het hoekafstelmechanisme correct overschakelt van de schuine stand Fig L naar de geblokkeerde stand Fig M Wij verzoeken u om buiten de ond...

Страница 27: ...en en de uitlaat uitlaten van het voertuig correct is om schade door oververhitting te vermijden Demonteer de fietsenhouder wanneer hij niet wordt gebruikt Zo rijdt u veiliger en zuiniger Het is verboden wijzigingen aan te brengen op de fietsenhouder en zijn onderdelen Beschadigde of versleten onderdelen moeten onmiddellijk worden vervangen door originele vervangstukken Maa kd e fi e t s e n h o u...

Страница 28: ...ight 2015 Peruzzo Italy MADE IN ITALY Spareparts Ersatzteile Piècesdétachées Ricambi Refacciones Częścizamienne Náhradnídíly Rezervnideli 400 GANCIO CM 100 2 CINGHIE CON CANCIO 2 STRAPS 100CM WITH HOOK 905 365 6 COPRIGANCIO 6 HOOK COVERS POMELLO CON CHIAVE KEYED KNOB 693 CA BRACCETTO CORTO ALLUMINIO ALUMINUM SHORT ARM 693 CP BRACCETTO CORTO ACCIAIO STEEL SHORT ARM 693 MA BRACCETTO MEDIO ALLUMINIO ...

Отзывы: