background image

GETTING STARTED

09

GETTING STARTED

08

4) Power On/Off

5) Antenna Setting

To turn on the unit, push Power On/Off but-
ton for more than one second. To turn off the
unit, push Power On/Off button for more 
than one second again. 
DR301 saves last mode, station and settings
when powered off. When DR301 is powered
on again it recalls last saved mode,
station and settings and resumes operation.

To adjust volume to a desired level press vol-
ume key upward or downward. When the vol-
ume key is pressed and held the volume level
will gradually be raised or lowered.
DR301 has 20 steps of digital volume control.
To avoid hearing problem please do not keep
the volume level too high.

DR301 has two antenna systems for Band-III and L-Band.

When DR301 works on Band-III service, stereo earphones are working as
Band-III antenna. 
Do not fold or twist earphone wire to avoid reception problem.
When DR301 works on L-Band service, pull out the L-Band antenna and
keep it stretched out. 

6) Volume Control

1)

2)

1)

2)

1)

2)

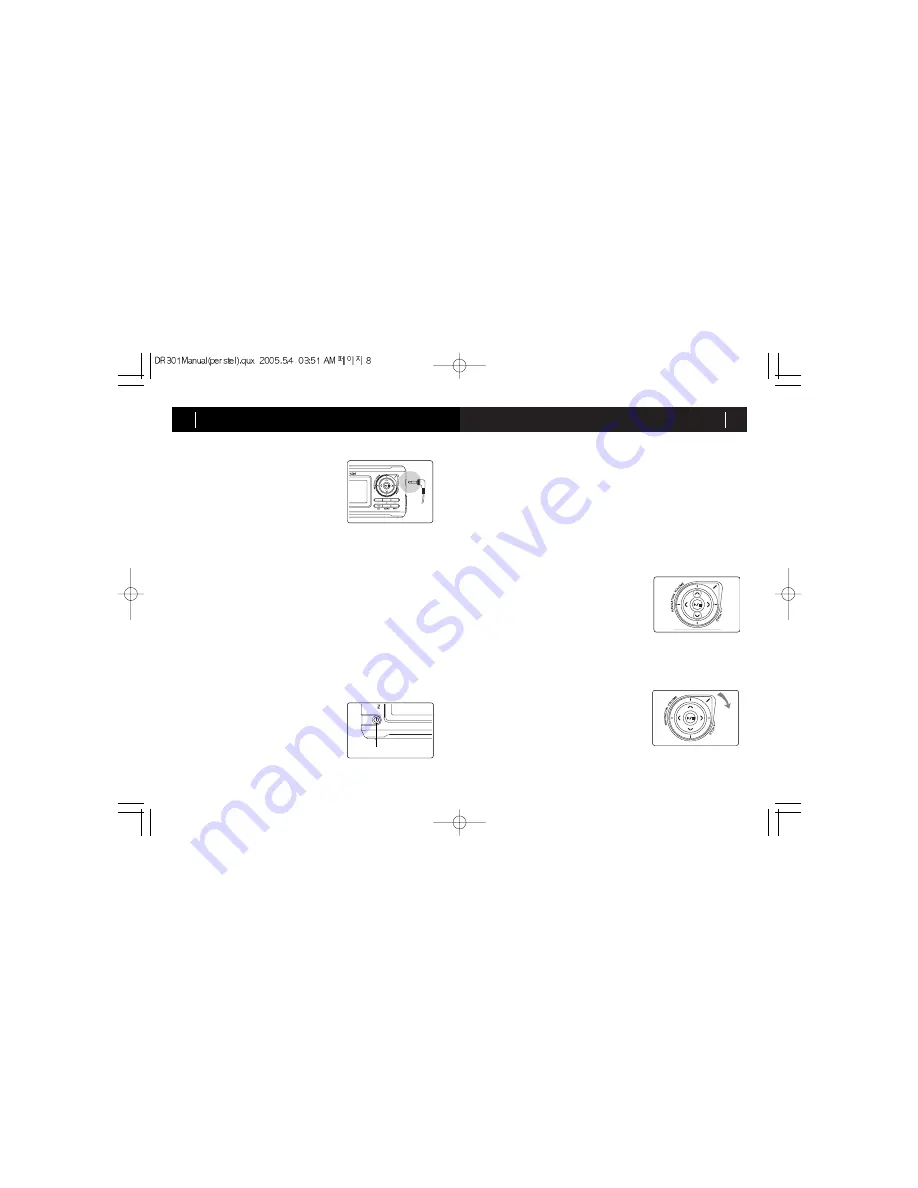
Power On/Off

While you enjoy services it is recommended to
lock all buttons to avoid unwanted service
interruption from accidental button work.

To lock/ hold buttons slide HOLD key
clockwise. All keys and buttons are locked,
and HOLD icon appears on LCD.
To unlock/ release buttons slide HOLD key
counter-clockwise. All keys and buttons
are active, and HOLD icon disppears.

7) Button Hold

2) Plug-in earphone

Before use, gently plug the earphone into the
earphone jack located at the right side of the
unit. Use supplied earphone or one designed for
portable stereo music systems for best match to
the unit.

3) Memory card

To use the music player and recording features of the DR301,
you need to use a Secure Digital (SD) flash memory card. The following types
are supported:

Manufacturers: San Disk/ Kingston
Memory size 16MB to 1GB

To insert the card, Hold it with the label facing the front of the DR301. 
Push it all the way into the card slot until a click is heard, and then release.
It should be level with the edge of the slot. 

To remove the card, Press the card in  and then release it.
It will come out far enough to remove completely.

Содержание DR 301

Страница 1: ...tal technology which gives you crystal clear sound and easy tuning You don t need to search for channels across a waveband the autoscan function creates a list of all the radio channels in your location from which you can chose your favourites DAB has extra stations not available on other wavebands and displays scrolling text which may give news contact details or song lyrics and titles With DAB S...

Страница 2: ...vices using the Hot Keys DAB signal recording REW FM Receiver Manual Tune Mode Auto Tune Preset Tune Mode Hot Keys Record and Rewind Functions Operation Guide Music Player File Playback and Stop Track Search Additional Menu Options in Music Player Menu Setting Region Contrast Backlight Scroll Speed Sound Balance DLS Text Size Announcement Sleep Memory Card Status Firmware Upgrade Battery and Mains...

Страница 3: ...D REWIND MENU LCD Display Power On Off Earphone Jack USB port L Band Antenna Package Contents DR301 DAB Digital Radio Stereo Earphone 3 AA Alkaline Batteries Wrist Strap USB Cable CD Owner s Manual Driver installation program Owner s Manual Stereo Earphone DR301 DAB Digital Radio 3 AA Alkaline Batteries Wrist Strap Owner s Manual USB Cable CD Manual Driver installation program ...

Страница 4: ... left until it clicks 1 2 1 2 LCD Display 1 Mode Symbol DAB 2 RSSI Receiving Signal Strength Indicator 3 SD 4 Tune Type 5 Stereo Mono Data 6 Battery Balance 7 Ensemble Label 8 Service Label 9 Program Type 10 Data Rate kbps 11 DLS Dynamic Label Segment 1 Mode Symbol FM Radio 2 Tuned 3 Tune Type 4 Stereo Mono 5 Battery Balance 6 Frequency Tuned 7 Frequency Location DAB Receiver Display FM Radio Disp...

Страница 5: ...d out 6 Volume Control 1 2 1 2 1 2 Power On Off While you enjoy services it is recommended to lock all buttons to avoid unwanted service interruption from accidental button work To lock hold buttons slide HOLD key clockwise All keys and buttons are locked and HOLD icon appears on LCD To unlock release buttons slide HOLD key counter clockwise All keys and buttons are active and HOLD icon disppears ...

Страница 6: ...301 is a multi function DAB radio that has FM radio music player and recording functions This chapter gives information on how to operate DAB functions and how to customize various settings in DAB mode There are 3 modes of operation DAB FM and Music play mode To change the operation mode press the MENU button and use the and keys to select the mode required To navigate to the other menu option pag...

Страница 7: ... you interrupt the full scan by pressing the SELECT button the preset list will be empty and you can then add services manually ENSEMBLE SERVICE SERVICE PRIMARY SERVICE COMPONENT PRIMARY SERVICE COMPONENT SECONDARY SERVICE COMPONENT SECONDARY SERVICE COMPONENT Preset Table 3 OPERATION IN PRESET MODE To select preset mode press MENU and move to SER Searching menu using nav igation key Locate the cu...

Страница 8: ...annel up or down Storing Preset You can add services to the list of preset channels for easy tuning in preset mode The order they will appear on the preset list is the same as you store them so you can cre ate your own list To add a service to the preset list press and hold the SELECT button and then select YES to the question Add to Preset When you have added all the services you need to the pres...

Страница 9: ...ack to listen to the live program press REW again 1 Manual tune mode Set tune mode to MAN manual tune To tune press the or buttons to select the required frequency When any signal is tuned tuned the TUNED icon appears and audio is broadcasted You can add any frequency to the preset list by pressing and holding the SELECT button At the message Add to Preset locate the cursor at OK and press SELECT ...

Страница 10: ...ntries in the preset list press the SELECT button to show the preset list Select the frequency to be deleted and the press and hold the SELECT button 1 File Playback and Stop Before using DR301 in Music Player mode please insert an SD into the card slot If SD is not inserted Please insert SD message will appear DR301 supports the following file formats MP2 files DAB signal recorded files MP3 files...

Страница 11: ...d USB cable Windows 98 will detect the USB device as New Hardware You will be prompted to Add New Hardware Press Next button to pro ceed When asked for the driver location insert the installation CD into the CD ROM drive Specify driver path to driver for example DR301_Win98_usbdrv and click OK When ready click Next Driver installation will begin automatically When driver installation is completed ...

Страница 12: ...s For best compatibility with other devices the FAT16 file system is recom mended All files in DR301 are erased by this operation NOTE L Band is an option and may not be available on your set Please check the box for model details If you have a Band III only set you should set the Region to Band III NOTE Above stated regional coverage is subject to change in accordance with DAB service change Menu...

Страница 13: ...press SELECT button to enter sound balance setting menu Sound balance can be set 5 left to 5 right Adjust sound balance using navigation key and press SELECT when sound balance is properly set 30 6 DLS Text Size DAB Mode only The DLS is the line of scrolling text information at the bottom of the display You can change the DLS Text size to display either 2 lines of smaller char acters or 1 line of ...

Страница 14: ...nu using navigation key Locate cursor at Sleep and press SELECT button to set sleep timer Sleep timer can be set from 0 off to 60 minutes in 1 minutes increments Set the sleep time using the navigation key and press SELECT when sleep timer is set Sleep timer is activated when setting is done This setting is common to DAB Receiver FM Radio and Music Player modes 9 Memory Card Status This enables yo...

Страница 15: ...es may cause perma nent damage to the unit A suitable mains adaptor can be purchased from Perstel For connection plug the adaptor into the socket on the base of the unit The internal batteries are disconnected when the power adaptor is plugged in NOTE Do not try to turn off or remove the batteries during the firmware update Damage could result Disconnect the DR301 BATTERY AND MAINS ADAPTOR OPERATI...

Страница 16: ...uired to try another location Keep away from PC s or other possible interference sources Check audio format icon If audio format shows DATA no audio service is provided Earphone is not properly plugged or malfunctioning Replace earphone or plug in properly Volume is turned fully down Check if Hold icon is on Release Button Hold mode by sliding HOLD key counter clockwise Adjust the contrast of the ...

Страница 17: ... Preset Scroll Speed Sleep Music Player Mode Setting Equalizer Play Mode DAB Receiver Contrast Normal FM Radio Backlight Classic Scroll Speed Jazz Sound Balance Rock Pop User Normal Repeat One Repeat All Shuffle Intro Sleep Memory Status Firmware Upgrade Delete Exit Delete One Exit Menu APPENDIX 2 Menu Tree APPENDIX 2 Menu Tree ...

Страница 18: ...Hz 11B Appendix 3 Regional Frequency Table Band III Frequency Label Frequency Label Frequency Label L Band Europe 1452 960MHz LA 1466 656MHz LI 1480 352MHz LQ 1454 672MHz LB 1468 368MHz LJ 1482 064MHz LR 1456 384MHz LC 1470 080MHz LK 1483 776MHz LS 1458 096MHz LD 1471 792MHz LL 1485 448MHz LT 1459 808MHz LE 1473 504MHz LM 1487 200MHz LU 1461 520MHz LF 1475 216MHz LN 1488 912MHz LV 1463 232MHz LG 1...

Страница 19: ...d you have any problems within this period simply take the product and your proof of purchase to your dealer and the product will be repaired without charge for parts and labour Perstel Limited reserves the right to charge for transportation Any product that has been subject to misuse or accidental damage is excluded from this warranty This warranty is only applicable to products purchased through...

Страница 20: ...r improper medication do not open the circuitry without Service Manual uncontrollable forces keep away from fire salty water flood etc and out of product life There is a charged service for parts replacement This warranty Statement will not be reissued Please keep with Owner s Manual with good care Perstel Limited Lansdowne Building 2 Lansdowne Road Croydon CR9 2ER www perstel co uk Contact suppor...

Страница 21: ...MEMO 40 ...

Отзывы: