background image

3

GB

NL

D

F

18

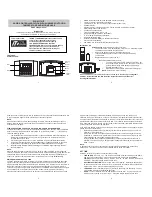
 Speakers

19

 Multimedia compartment fixture

20

 Aux in 2 socket

21

 USB charging socket

22

 FM rubber antenna

23

 DC IN socket

24

 Power cord

25

 Socket for software upgrade

26

 Battery compartment 

27

 Display protection bar

28

 NFC detection tag

Display

A

 RDS indicator

B

 Battery power

C

 EQ indicator

D

 Loudness On

E

 Stereo indicator

F

 Two Line text display

 Safety information for the internal 

rechargeable Lithium-ion battery

The internal rechargeable lithium-ion battery used in 

this device is able to supply power for a long period of 

time. However, even lithium-ion batteries reach a point 

where they cannot be recharged. If the battery does 

not recharge after several attempts, it may be drained 

(has a low charge), please contact Perfectpro for repair 

information. However, if you do not want us to replace the 

battery, you will need to dispose of used batteries / device 

in accordance to the laws and regulations in your area. In 

addition, you can contact your local electronics retailers or 

recycling center for disposal.

User Safety Precautions


 Ensure that the room temperature range is 5°C–40°C 

(41°-104°Fahrenheit) before charging the battery.


 Do not attempt to disassemble the plastic covering or 

any parts of the device, as the materials inside may be 

toxic and may damage skin and clothes.


 Do not puncture, crush, modify, throw or cause any 

unnecessary shock to your battery, as the battery used 

in this device may present a risk of fire, explosion, or 

chemical burn if mistreated.


 Do not leave, charge or use the battery in a car under 

direct sunlight, near fire or a heated source.


 Do not immerse or throw the battery in water / seawater.


 Do not use or charge the battery if it appears to be 

abnormally hot, discolored, deformed or abnormal 

conditions are detected during use, charge or storage.


 Do not leave a charging battery unattended. Keep the 

battery away from babies and children.


 CAUTION:

 'Risk of explosion if the battery is replaced 

by an incorrect type.'


CAUTION:

 Danger of explosion if battery is incorrectly 

replaced. Replace only with the same or equivalent type.


 The battery combination is stored at room temperature 

(25 degrees), charged to 40%~60% of the power, charge 

once every three months, for the storage of more than a 

year of battery, performance cannot be guaranteed.

AC operation / Charging the radio

The radio can be charged both while the radio is powered 

on and powered off. Before you plug the AC cord into the 

AC socket, be sure the voltage is correct. Connect the 

AC power cord into the AC socket to charge the built-in 

lithium-ion battery. AC cable hook is designed to store the 

cord when the radio is not in use.
When the charge LED indicator lights red indicating 

battery is charging. The battery will be fully charged in 

around 7 hours when the radio is in power off mode. The 

charging time may vary when the radio is turned on or off. 

When charging is complete, the charge LED indicator will 

be steady green.
When charging is abnormal, the charge LED indicator 

will cycle between red and green. Please remove the AC 

power and plug it in again.
 

 IMPORTANT

The mains plug is used as the means of connecting the 

radio to the mains supply. The mains socket used for 

the radio must remain accessible during normal use. In 

order to disconnect the radio from the mains completely, 

the mains plug should be removed from the mains outlet 

completely.

Powered via DC IN socket

The radio can be also powered via the DC IN socket 

which can allow 12 Volt DC, which is designed to be 

powered by the vehicle or the boat so you can take the 

radio with you outdoors or on the boat.
An additional cigarette lighter cable is required (supplied) 

for this device.
 

 NOTE

Never use the 12 Volt socket in rainy or moist conditions 

to prevent moist from entering the radio. Always keep 

the rubber cover on the back well closed under these 

conditions.


 NOTE

The voltage of DC in socket must be higher than the 

13.5V input voltage to ensure that the lithium-ion battery 

is fully charged. If the voltage is too low, the battery 

cannot be fully charged. It is recommended to use the 

AC power cord for charging.

Automatically updating the clock

1. 

 Press the Standby button to switch on your radio.

2. 

 Press and hold the Menu button until the Advanced 

menu of the current mode shows on the display.

3. 

 Rotate the Tuning control until 'System' appears on the 

display. Press the Tuning control to enter the setting menu.

4. 

 Rotate the Tuning control until 'Time' appears on the 

display. Press the Tuning control to enter the setting menu.

Содержание ROCKHART

Страница 1: ... RDS Bluetooth Aux In 1 Aux In 2 GB F Operating instruction 2 11 Gebruiksaanwijzing 12 22 Bedienungsanleitung 23 34 Mode d emploi 35 45 NL D Perfectpro B V Everdenberg 9A Oosterhout The Netherlands 3A81e76L0000A ...

Страница 2: ...1 A B C D E F 1 2 3 4 15 16 17 14 10 11 9 12 6 7 5 8 13 18 20 21 19 22 23 24 26 25 28 27 27 ...

Страница 3: ... all servicing to qualified service personnel Servicing is required when the apparatus has been damaged in any way such as power supply cord or plug is damaged liquid has been spilled or objects have fallen into the apparatus the apparatus has been exposed to rain or moisture does not operate normally or has been dropped 15 To Reduce the Risk of Fire or Electric Shock Do not Expose This Appliance ...

Страница 4: ...40 60 of the power charge once every three months for the storage of more than a year of battery performance cannot be guaranteed AC operation Charging the radio The radio can be charged both while the radio is powered on and powered off Before you plug the AC cord into the AC socket be sure the voltage is correct Connect the AC power cord into the AC socket to charge the built in lithium ion batt...

Страница 5: ...DAB mode The display will show DAB Mode for a few seconds 4 If this is the first time the radio is used a quick scan of the DAB Band III channels may be carried out The display will show Scanning If the radio has been used before the last used station will be selected instead During the scanning process as new stations are detected the station counter will increase and the stations will be added t...

Страница 6: ...ct the desired DAB channel Then press the Tuning control to confirm the selection The open block in the signal strength graph shows the minimum signal strength needed for good DAB reception The signal blocks will go up and down showing the changing signal strength as you adjust the antenna or the radio position Any new radio stations found on the tuned DAB multiplex will be added to the list store...

Страница 7: ...f the waveband 7 Adjust the Volume to the required setting 8 To switch off your radio press the Standby button NOTE If you find that FM reception is poor try repositioning the antenna Manual tuning FM 1 Straighten the antenna 2 Press the Standby button to switch on your radio 3 Press the Source button until the FM band is selected 4 Rotate the Tuning control to tune to a station The frequency will...

Страница 8: ...o two devices can recognize each other Pairing your Bluetooth device for the first time 1 Press the Standby button to switch on the radio 2 Press the Source button to select the Bluetooth mode The Bluetooth status indicator on the panel flashes blue to show the radio is discoverable 3 Activate Bluetooth on your device according to the device s user manual to link to the speaker Locate the Bluetoot...

Страница 9: ...ch the NFC area of your playing device against the NFC area marked on top right panel of your radio The unit will switch to Bluetooth mode and enter automatic pairing If you pair with your radio for the first time your NFC enabled device will be asked the permission to link with the radio Once paired with a device the Bluetooth icon will remain illuminated 3 Use the controls on your device or on y...

Страница 10: ...rol to enter the language adjustment menu 5 Rotate the Tuning control until your desired language appears on the display Then press the Tuning control to confirm your choice The display will change to the chosen language Software version The software display cannot be altered and is just for your reference 1 Press the Standby button to switch on your radio 2 Press and hold the Menu button until th...

Страница 11: ...ded only for charging an iPhone or smart phone and similar devices Charge time may vary and in some cases may take longer to charge than when using the manufacturers charging unit supplied with the smart phone You can use the USB jack charging function by following the procedure below 1 Press the Standby button to switch on your radio 2 Press and hold the Menu button until the Advanced menu of the...

Страница 12: ...ange waterproof Output power 2 x 18W AC IN typical 2 x 22 5W peak level 2 x 12W DC IN 12V 2 x 8W Lithium ion cell battery Rechargeable current of charger 1A Aux In level 250mVrms rated level 1Vrms max Maximum supplying power of USB socket 5V 1A Operating temperature range 5 C to 40 C If at any time in the future you should need to dispose of this product please note that Waste electrical products ...

Страница 13: ...raat voor lange tijd niet wordt gebruikt 14 Laat alle onderhoud over aan gekwalificeerd onderhoudspersoneel Er is onderhoud nodig wanneer het apparaat is beschadigd bijvoorbeeld wanneer het netsnoer is beschadigd er vloeistof is gemorst op of voorwerpen zijn gevallen in het apparaat zijn gevallen het apparaat is blootgesteld aan regen of vocht niet normaal werkt of is gevallen 15 Stel het apparaat...

Страница 14: ...deren LET OP Explosiegevaar indien de accu wordt vervangen door een onjuist type LET OP Explosiegevaar indien de accu onjuist wordt vervangen Alleen vervangen door accu van hetzelfde of een gelijkwaardig type De accucombinatie moet worden opgeslagen bij kamertemperatuur 25 graden opgeladen tot een accuniveau van 40 60 en elke drie maanden worden opgeladen Als de accu meer dan een jaar wordt opgesl...

Страница 15: ... op het 12 uursformaat dan zal er een optie verschijnen voor het instellen van AM of PM 7 De dag knippert op het display Draai aan de Afstemknop om de datum naar wens in te stellen Druk ter bevestiging op de Afstemknop 8 De maand knippert op het display Draai aan de Afstemknop om de maand naar wens in te stellen Druk ter bevestiging op de Afstemknop 9 Het jaar knippert op het display Draai aan de ...

Страница 16: ...rde DAB menu wordt getoond op het display 2 Draai aan de Afstemknop tot Full scan wordt getoond op het display 3 Druk op de Afstemknop om de scan te starten De tekst Scanning wordt getoond op het display en uw radio voert een scan uit op de DAB Band III frequenties Tijdens het scanproces zal de zenderteller worden opgehoogd als er nieuwe zenders worden gevonden en de zenders zullen worden toegevoe...

Страница 17: ...jst 6 Als u niet beschikbare zenders niet wilt verwijderen selecteer dan No in stap 5 en druk op de Afstemknop Het display keert terug naar de voorgaande weergave OPMERKING Als u bent verhuisd naar een ander deel van het land dan moet u ook een scan naar nieuwe zenders uitvoeren zie de paragraaf Nieuwe zenders zoeken hierboven Uw radio bedienen FM auto tune 1 Strek de antenne volledig uit 2 Druk o...

Страница 18: ...over 12 voorkeurszenders 6 voor DAB en 6 voor FM Voorkeurszenders worden door uw radio onthouden in het geval van een stroomstoring De procedure voor het instellen van voorkeurszenders is hetzelfde in de FM en DAB modus en is hieronder beschreven 1 Druk op Standby om uw radio in te schakelen 2 Druk op Source om de DAB of FM band te selecteren 3 Stem zoals eerder geschreven af op de gewenste zender...

Страница 19: ...u het volume naar wens instellen met behulp van de Volumeregeling op uw radio of op uw Bluetooth apparaat 2 Gebruik de bedieningselementen op uw apparaat om het afspelen te starten pauzeren en naar de gewenste track te gaan Als alternatief kunt u het afspelen ook bedienen met de knoppen Play Pause Volgende track Vorige track op de radio 3 Houd Vooruitspoelen Terugspoelen ingedrukt om vooruit of te...

Страница 20: ...nuten 1 Houd Menu ingedrukt tot het geavanceerde menu van de huidige instellen wordt getoond op het display 2 Draai aan de Afstemknop tot Sleep verschijnt op het display Druk daarna op de Afstemknop om het menu te openen 3 Draai aan de Afstemknop om door de volgende opties te bladeren Sleep off 15 30 45 60 90 en 120 minuten gebruik Sleep off om de slaapfunctie te annuleren Druk daarna ter bevestig...

Страница 21: ... 1 Steek het USB apparaat in de USB poort in het batterijvak 2 Druk op Menu om het geavanceerde menu van de huidige modus te openen 3 Draai aan de Afstemknop tot System verschijnt op het display Druk daarna op de Afstemknop om het menu te openen 4 Draai aan de Afstemknop tot Software Upgrade op het display verschijnt Druk daarna op de Afstemknop om het menu te openen 5 Draai aan de Afstemknop tot ...

Страница 22: ...te openen 4 Draai aan de afstemknop tot USB Charge verschijnt op het display Druk daarna op de Afstemknop om het menu te openen 5 Draai aan de Afstemknop om de gewenste waarde te selecteren De opties zijn On Aan en Off Uit Selecteer On als u wilt opladen met de USB poort Selecteer No als u niet wilt opladen met de USB poort Druk daarna ter bevestiging op de Afstemknop De USB poort kan alleen stroo...

Страница 23: ...x 18W AC IN normaal 2 x 22 5W piekniveau 2 x 12W DC IN 12V of alkaline batterijen 2 x 8W lithium ionaccu Oplaadbare stroom oplader 1A Aux in niveau 250mVrms nominale niveau 1Vrms max Maximale stroom geleverd door USB poort 5V 1A Bedrijfstemperatuurbereik 5 C tot 40 C Als u zich op enig moment in de toekomst wenst te ontdoen van dit product houd er dan rekening mee dat elektrische afvalproducten ni...

Страница 24: ...dem Wagen umkippt und Verletzungen verursacht 13 Ziehen Sie bei Gewittern oder bei längerer Nichtbenutzung den Stecker aus der Steckdose 14 Wenden Sie sich im Wartungsfall nur an ausgebildetes Wartungspersonal Das Gerät sollte gewartet bzw repariert werden nachdem es in irgendeiner Weise beschädigt wurde wie z B bei Beschädigung des Netzkabels nachdem Flüssigkeiten über das Gerät gegossen wurden o...

Страница 25: ...uftreten Während der Ladung darf der Akku nicht unbeaufsichtigt gelassen werden Halten Sie den Akku von Babys und Kindern fern VORSICHT Es besteht Explosionsgefahr falls der Akku durch einen inkorrekten Batterietypen ersetzt wird VORSICHT Es besteht Explosionsgefahr falls der Akku unsachgemäß ersetzt wird Ersetzen Sie den Akku nur durch einen Akku des gleichen Typs Die Batterie ist bei Raumtempera...

Страница 26: ...ie Stundenziffern beginnen dann in der Anzeige zu blinken Drehen Sie den Frequenzdrehknopf um die gewünschte Stunde einzustellen Betätigen Sie den Frequenzdrehknopf zur Bestätigung Ihrer Einstellung 6 Die Minutenanzeige beginnt dann in der Anzeige zu blinken Drehen Sie den Frequenzdrehknopf um die gewünschte Minute einzustellen Betätigen Sie den Frequenzdrehknopf zur Bestätigung Ihrer Einstellung ...

Страница 27: ...erpreten Titel Telefonnummer Verkehrsmeldungen etc angezeigt b Signalstärke Anzeige der Signalstärke des Senders der gerade gehört wird Die Signalstärkenanzeige kann zum Ausrichten der Antenne benutzt werden Für einen guten Empfang sollte der Grafikbalken mindestens die Stufe drei oder höher anzeigen c Programmart Zeigt die Art des aktuellen Senders an z B Pop Klassik Nachrichten etc d Multiplex N...

Страница 28: ...r in der Anzeige erscheint 5 Drücken Sie auf den Frequenzdrehknopf um den Sender den Sortiermodus auszuwählen 6 Drehen Sie am Frequenzdrehknopf um zwischen alphanumerisch und Ensemble zu wählen Alphanumerisch Sortiert die Senderliste alphanumerisch nach 0 9 A Z Ensemble sortiert die Sender entsprechend der DAB Multiplex Senderliste Die aktuelle Einstellung wird durch ein Sternchen gekennzeichnet 7...

Страница 29: ...rschiedene Informationen als Lauftext an wie z B Interpret Titel Telefonnummer etc b Programmart Zeigt die Art des aktuellen Senders an z B Pop Klassik Nachrichten etc c Frequenz Anzeige der Frequenz des aktuellen Senders d Audiotyp Zeigt den Audiotyp für den aktuell eingestellten UKW Sender e Signalstärke Zeigt die Signalstärke des aktuellen Senders an f Uhrzeit Zeigt die aktuelle Uhrzeit und Dat...

Страница 30: ...nschalten des Radios 2 Betätigen Sie die SOURCE Taste zur Auswahl des Bluetooth Modus Die Bluetooth Statusanzeige blinkt blau auf dem Bildschirm um anzuzeigen dass das Radio erkennbar ist 3 Aktivieren Sie Bluetooth auf Ihrem Gerät gemäß der Bedienungsanleitung des Geräts mit dem Sie das Radio verbinden Suchen Sie in der Bluetooth Geräteliste und wählen Sie das Gerät mit dem Namen Rockhart BT Besti...

Страница 31: ...ndbar ist Verbindungsaufbau und Wiedergabe über NFC Das ROCKHART ist mit einer drahtlosen NFC Funktion Near Field Communication ausgestattet Sie können damit NFC fähige Geräte verbinden und darüber Musik wiedergeben Für nicht NFC Geräte benutzen Sie bitte die im obigen Abschnitt beschriebene Bluetooth Funktion 1 Schalten Sie die NFC Funktion auf Ihrem Gerät ein Wichtig Bitte stellen Sie sicher das...

Страница 32: ... das 12 Stundenformat mit einer AM PM Anzeige Einstellen des Datumsformats 1 Betätigen Sie die Bereitschaftstaste zum Einschalten des Radios 2 Halten Sie die MENU Taste gedrückt bis das Erweiterte Menü des aktuellen Modus angezeigt wird 3 Drehen Sie am Frequenzdrehknopf bis System in der Anzeige erscheint Drücken Sie auf den Frequenzdrehknopf um das Einstellungsmenü aufzurufen 4 Drehen Sie am Freq...

Страница 33: ...tzen Sie das oben beschriebenen Ve r f a h r e n u m d e n e i n w a n d f r e i e n B e t r i e b wiederherzustellen Unter bestimmten Umständen kann es notwendig sein die Stromverbindung abzutrennen und dann erneut aufzubauen um den normalen Betrieb wieder aufzunehmen Aux Eingang Auf der rechten Seite des Geräts befindet sich ein 3 5 mm AUX Eingang um zu ermöglichen dass Audiosignale von externen...

Страница 34: ...nicht in Benutzung ist bzw nachdem Ihr Gerät vollständig aufgeladen wurde entfernen Sie das USB Kabel und schließen Sie die Abdeckung Verbinden Sie keine Stromquellen an den USB Anschluss Andernfalls besteht Feuergefahr Der USB Anschluss ist nur zum Aufladen von Niederspannungsgeräten geeignet Setzen Sie immer die Abdeckung auf den USB Anschluss wenn Sie keine Niederspannungsgeräte aufladen Führen...

Страница 35: ...b Normalwert 2 x 22 5W Spitzenwert 2 x 12W Batteriebetrieb 12V oder alkalische Batterien 2 x 8W Lithium Ion Zellen Akku Ladestrom des Ladegeräts 1A Aux Eingangspegel 250mVrms Nennwert 1Vrms max Maximaler Versorgungsstrom des USB Anschlusses 5V 1A Betriebstemperaturbereich 5 C bis 40 C Nachfolgend wird der Barcode am Produkt erläutert Seriennummer Herstellungsmonat Herstellungsjahr Produktcode Soll...

Страница 36: ...ment 13 Débranchez cet appareil lors des orages ou lorsqu il est inutilisé pendant une longue période 14 Confiez toute réparation à du personnel de maintenance qualifié La réparation est nécessaire lorsque l appareil a été endommagé de quelque sorte par exemple si le cordon d alimentation ou la prise sont endommagés si du liquide a été répandu ou si des objets sont tombés dans l appareil ou si ce ...

Страница 37: ...rès d un feu ou d une source de chaleur Ne plongez pas ni ne jetez la batterie dans l eau la mer N utilisez pas ni ne chargez la batterie si elle semble anormalement chaude décolorée déformée ou si des réactions anormales sont détectées pendant l utilisation la charge ou le stockage Ne laissez pas une batterie en charge sans surveillance Gardez la batterie hors de portée des bébés et des enfants A...

Страница 38: ...chiffres des heures sur l écran commenceront à clignoter Tournez la molette de réglage pour régler l heure de votre choix Appuyez sur la Molette de réglage pour confirmer votre choix 6 À présent les chiffres des minutes sur l écran commenceront à clignoter Tournez la molette de réglage pour régler les minutes de votre choix Appuyez sur la Molette de réglage pour confirmer votre choix Si la radio a...

Страница 39: ... nouvelles stations DAB De temps à autre de nouvelles stations de radio DAB peuvent devenir disponibles Ou il se peut que vous vous rendiez dans une autre partie du pays Dans ce cas vous devez exécuter une recherche de nouvelles stations avec votre radio 1 Appuyez brièvement sur la touche Menu pour que l écran affiche le menu DAB avancé 2 Tournez la Molette de réglage jusqu à ce que Full scan s af...

Страница 40: ...che sur l écran Appuyez sur la Molette de réglage pour saisir le paramètre 5 Tournez la Molette de réglage pour mettre Yes en surbrillance Appuyez brièvement sur la Molette de réglage pour rafraichir la liste de stations et éliminer les stations non disponibles 6 Si vous ne souhaitez pas rafraichir la liste mettez No en surbrillance lors de l étape 5 et appuyez sur la Molette de réglage La radio r...

Страница 41: ...ver des signaux de moindre intensité lors des recherches 6 Appuyez sur la molette de contrôle pour confirmer votre choix Le paramètre Local ou Distant est sauvegardé dans la radio et reste activé jusqu à ce qu il soit changé ou que le système soit réinitialisé Présélectionner des stations DAB et FM Vous pouvez enregistrer vos stations radio DAB et FM préférées sur les mémoires de stations présélec...

Страница 42: ...us aux fonctionnalités Bluetooth de votre appareil avant de connecter votre radio All Toutes les fonctions ne seront peut être pas compatibles sur certaines appareils Bluetooth REMARQUE Lire des fichiers audio en mode Bluetooth Lorsque vous avez correctement connecté votre radio avec l appareil Bluetooth de votre choix vous pouvez commencer à lire votre musique en utilisant les contrôles sur votre...

Страница 43: ...ure est allumé et déverrouillé pour permettre au NFC de fonctionner Minuteur de mise en veille extinction automatique de la radio Votre radio peut être réglée pour s éteindre après l écoulement d un certain délai Le réglage du minuteur de mise en veille peut être réglé entre Éteint 15 30 45 60 90 120 minutes 1 Appuyez brièvement sur la touche Menu pour que l écran affiche le menu avancé du mode ac...

Страница 44: ... La version du logiciel s affiche sur l écran Appuyez sur la touche Menu pour quitter l affichage de la version du logiciel Mise à jour de logiciel Des mises à jour pour votre radio pourront être disponibles à l avenir Au fur et à mesure que les mises à jour de logiciel sont mises à disposition et les informations sur la manière de mettre à jour votre radio sont disponibles sur www perfectpro eu P...

Страница 45: ...Appuyez sur la touche Veille pour allumer la radio 2 Appuyez brièvement sur la touche Menu jusqu à ce que l écran affiche le menu avancé du mode en cours 3 Tournez la Molette de réglage jusqu à ce que System s affiche sur l écran Puis appuyez sur la Molette de réglage pour entrer dans le menu de paramètres 4 Tournez la molette de réglage jusqu à ce que USB Charge s affiche sur l écran Puis appuyez...

Страница 46: ...c 2 x 12W Entrée CC 12V ou piles alcalines 2 x 8W batterie lithium ion Courant rechargeable du chargeur 1A Niveau des entrées auxiliaires 250mVrms niveau nominal 1Vrms max Puissance d alimentation maximum de la fente USB 5V 1A Plage de température de fonctionnement 5 C à 40 C L étiquette du code barres sur le produit est définie ci dessous Numéro de série Mois de production Année de production Cod...

Отзывы: