7
VisuNet Control Center Manual
Create KVM Profile and Connect to KVM Switch
After the system has rebooted, you need to create a KVM profile and establish a connection to the KVM switch
to setup the proper settings on the switch.
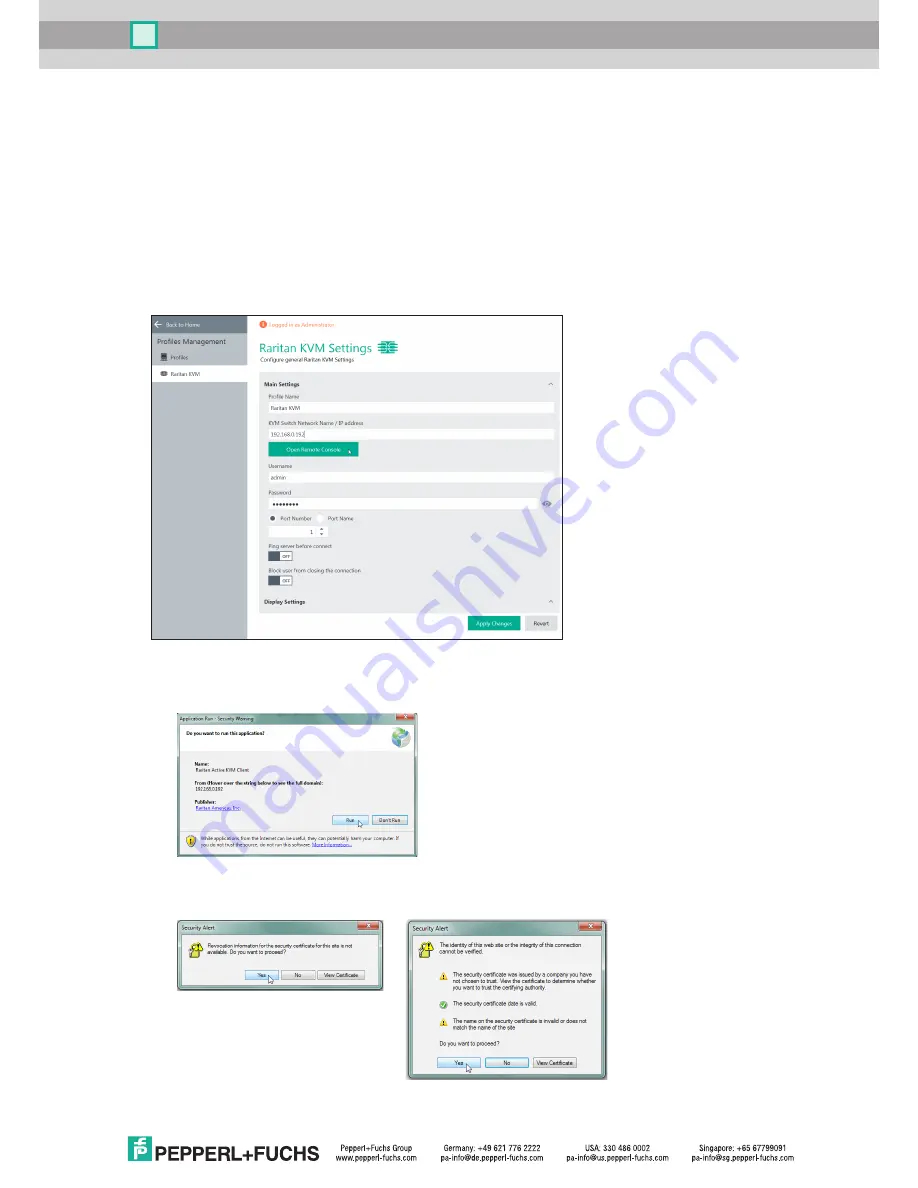
1. Go to "Profile Management" and create a new KVM profile.
2. Configure the new profile with the following parameters:
a. Profile Name: Use a meaningful name for the connection (e.g. Raritan KVM)
b. KVM Switch Network Name / IP address: IP Address of Raritan switch (factory default: 192.168.0.192)
c. Username: Enter username, stored on KVM switch (factory default: admin)
d. Password: Enter password of KVM switch user (factory default: raritan)
e. Port number: Select port of KVM switch you want to use (factory default: 1)
1. Open the connection initially by pressing "Open Remote Console." A connection to the KVM switch will be
established and you will be prompted to choose whether you want to run the client application.
a. Press "Run" to download the KVM client application onto the RM.
b. Two security alerts will pop up that will ask you if you would like to proceed with the following settings.
Press "Yes" to accept.
The connection will finally be established, the KVM switch will be loaded, and the login window will appear.


