5
SandShark
™
Installation and User’s Guide
Optional Installation
WARNING
—
Suction entrapment, injury, and drowning hazard.
If your pool has a dedicated suction port
(“vac port”) for vacuuming or for an automatic pool cleaner, it must be covered when not in use.
Vac Port Installation with Vacuum Regulator in Skimmer
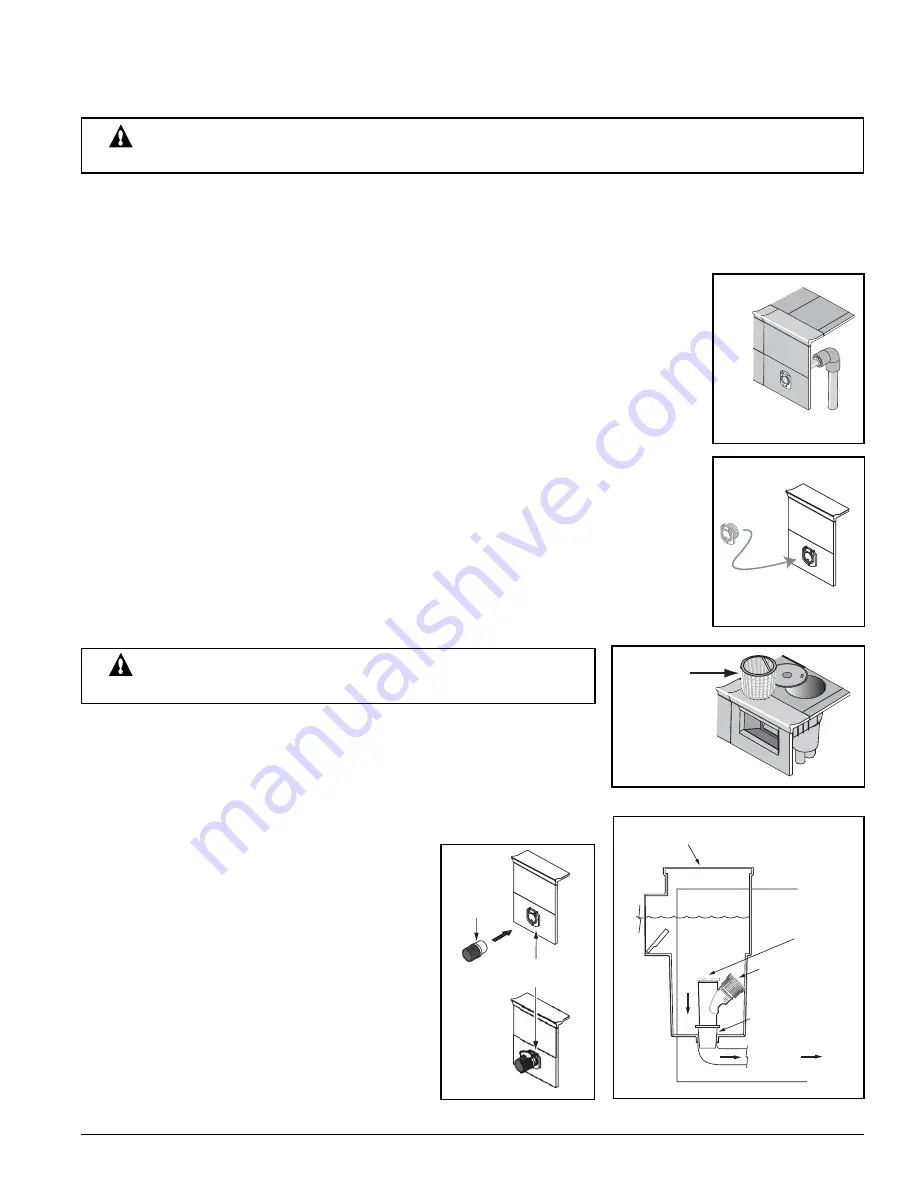
If your pool has a dedicated wall fitting “vac port”, (see Figure 16), you can install the SandShark
™
using the
Optional Installation
.
1. Turn the pool pump off.
2. Adjust valves for vacuuming. Adjust the pump valves (if your system has valves)
to direct all suction to the dedicated vacuum line and the skimmer. Close the main
drain and all remaining suction lines, except the line from the dedicated vacuum line
to which your SandShark
™
cleaner will be connected, and the skimmer where the
vacuum regulator will be installed.
3. A spring loaded safety cover, (“vac port fitting”), is included with this pool cleaner
(see Figure 17). Install it on the dedicated vacuum line to prevent entrapment and
injury. For details please refer to the
Vac Port Instruction sheet
included with your
vac port fitting. To install the included vac port fitting:
a. Screw the vac port fitting into the dedicated vacuum line opening.
b. Orient the vac port fitting so the arrow on the door points up.
c. Secure the cover by tightening the Allen-screw below the door, into the dedicated
vacuum line fitting.
4. Remove the skimmer basket from the skimmer, (see Figure 18).
WARNING
—
Hazardous suction.
Can cause entrapment with severe
personal injury or drowning.
5. Insert the vacuum regulator and reducer cone in the skimmer,
(see Figure 19). To prevent water from flowing through the top of the
vacuum regulator, attach the regulator cap to the vacuum regulator.
6. Attach the end of the hose to the vac port fitting installed in the
dedicated vacuum line, (see Figure 20).
Figure 16.
Vac
Po
r
t
Figure 17.
Skimmer
Ba
ske
t
Figure 18.
Skimmer
Vacuu
m
R
e
gulato
r
R
e
gulato
r
Cap
To Pu
m
p
R
e
duc
er
Con
e
Figure 19.
H
o
se
End
Vac Po
r
t
F
i
tt
i
ng
Figure 20.
Содержание Kreepy Krauly SandShark 7900
Страница 22: ...16 SandShark Installation and User s Guide NOTES...
Страница 23: ...SandShark...
Страница 24: ...P N 39503 6300 Rev A 10 27 08...


