Page 30
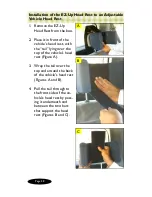
Installation of the EZ-Up Head Rest When there is
not a Vehicle Head Rest
NOTE: If the Support
Harness straps are not
already loose, then
loosen them according to
Steps 1 and 2.
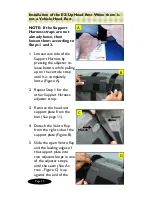
1. Loosen one side of the
Support Harness by
pressing the adjuster re-
lease button, while pulling
up on the verticle strap
until it is completely
loose (Figure A).
2. Repeat Step 1 for the
other Support Harness
adjuster strap.
3. Remove the head rest
support plate from the
box (See page 11).
4. Detach the Velcro flap
from the right side of the
support plate (Figure B).
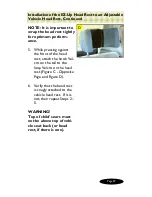
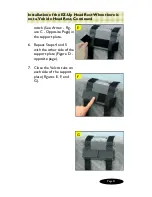
5. Slide the open Velcro flap
and the leading edges of
the support plate into
two adjacent loops in one
of the adjuster straps,
until the seam (See Ar-
row - Figure C) is up
against the end of the
D
C
B
Notch
Seam
A
Page 23
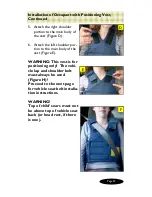
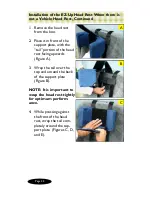
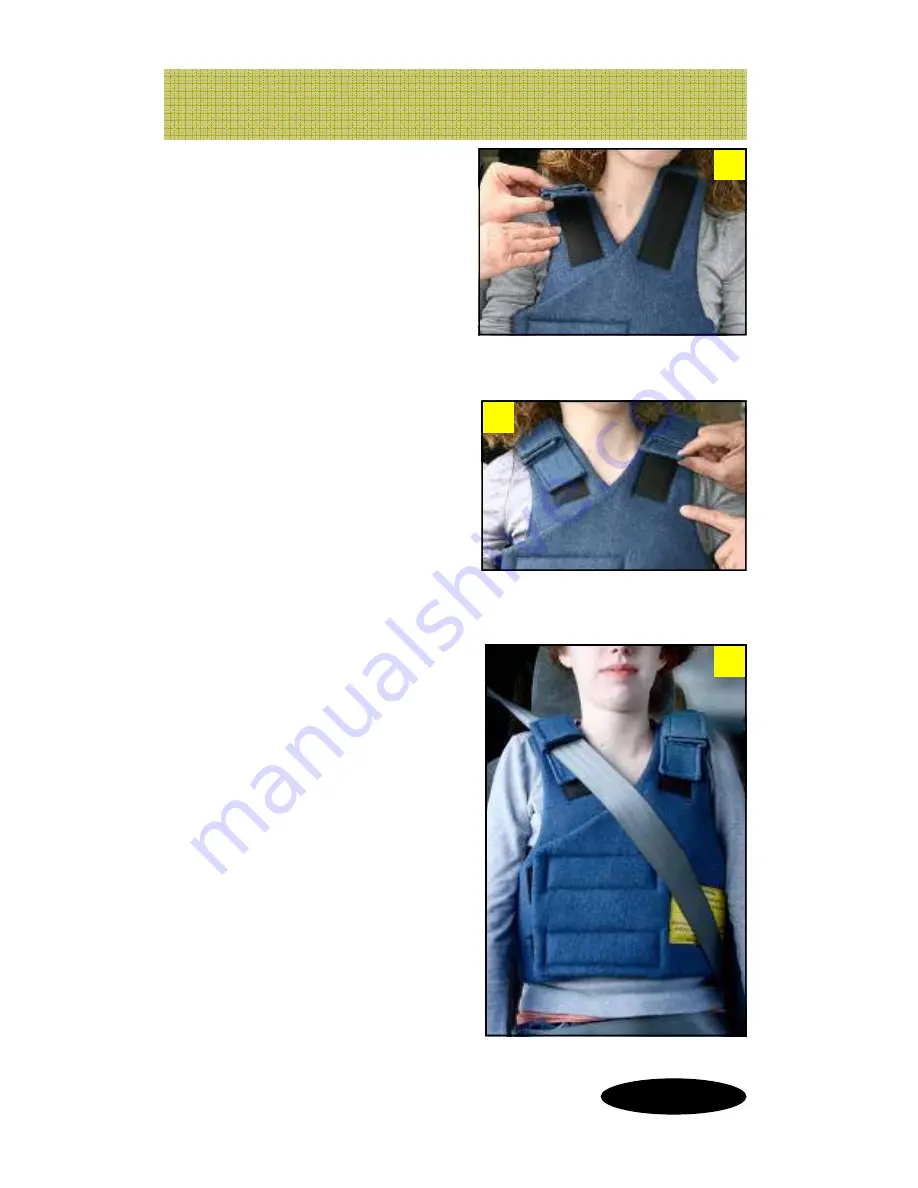
5. Attach the right shoulder
portion to the main body of
the vest (Figure D).
6. Attach the left shoulder por-
tion to the main body of the
vest (Figure E).
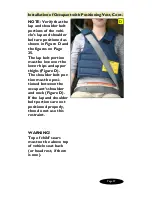
WARNING: This vest is for
positioning only! The vehi-
cle lap and shoulder belt
must always be used
(Figure H)!
Proceed to the next page
for vehicle seat belt installa-
tion instructions.
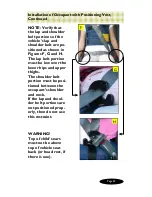
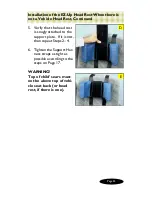
WARNING!
Top of child’s ears must not
be above top of vehicle seat
back (or head rest, if there
is one).
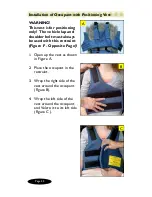
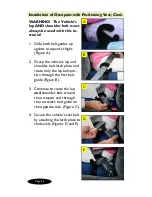
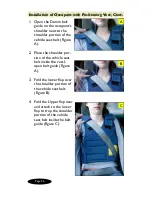
Installation of Occupant with Positioning Vest,
Continued
D
E
F
Содержание CHURCHiLL 2000CS15-D
Страница 1: ...The CHURCHiLL Instructions for Use ...
Страница 7: ...15 Inch Depth Base 18 Inch Depth Base Churchill Base Available in Two Sizes Page 7 Churchill Features ...
Страница 10: ...Hip Inflection Comfort Pommel Stay Put Pommel Pommel Positioning Strap Page 10 Churchill Accessories ...
Страница 11: ...Page 11 Churchill Accessories Continued EZ Up Head Rest EZ Up Head Rest Support Plate Hip Strap ...


