Peco Pro 12 DFS 49621204 Скачать руководство пользователя страница 1

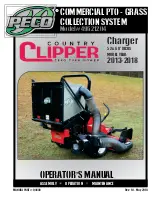
OPERATOR

S MANUAL

COMMERCIAL PTO - GRASS
COLLECTION SYSTEM

Model# 49621204

P

P

PECO

PECO

PECO

PECO

P

P

P

P

P

PECO

R

R

MANUAL PART#: Q0484

Rev: 1.0 - May 2018

ASSEMBLY            OPERATION            MAINTENANCE

52 & 60” DECKS

2013-2018

MODEL YEAR:

Charger

Содержание Pro 12 DFS 49621204

Страница 1: ...RCIAL PTO GRASS COLLECTION SYSTEM Model 49621204 P P P PECO PECO PECO PECO PECO PECO P P P P P P P P PECO PECO R R R MANUAL PART Q0484 Rev 1 0 May 2018 ASSEMBLY OPERATION MAINTENANCE 52 60 DECKS 2013...

Страница 2: ...y foreign objects before mowing Never deliberately run the mower across any foreign object 12 Wear hearing protection 13 Wear eye protection to prevent debris from getting into your eyes 2017 v1 0 SEC...

Страница 3: ...E AND WAITING FOR ALL MOVING PARTS TO COME TO A COMPLETE STOP Set the parking brake Always remove the ignition key before beginning maintenance ALERT YOUR SAFETY IS INVOLVED WARNING For your own perso...

Страница 4: ...is considered Commercial Products designated as Commercial are warrantied for 12 months Call PECO for Return Authorization Damaged or broken parts other than engines or batteries must be returned to...

Страница 5: ...is provided to give you the necessary instructions to properly mount and operate the collection system on your mower Please read this manual thoroughly Understand what each control is for and how to...

Страница 6: ...ide panel using 2 3 8 16 x 1 HHCS Item 5 2 3 8 Ny Flange Lock Nuts Item 6 1 1 2 13 x 1 HHCS Item 2 1 1 2 13 x 2 HHCS Item 3 and 2 1 2 13 Ny Flange Lock Nuts Item 4 Refer to Figure B Next align the mid...

Страница 7: ...nd side panel Refer to Figure A Align the bolt holes of the Left Lower Main Frame Leg Item 1 to those located on the mower s left hand side panel Secure the Lt Lwr Main Frame Leg Item 1 to the left ha...

Страница 8: ...ed from eariler to the bottom 2 bolt holes of the Lt Lwr Main Frame Leg Secure the spring mount plate to the Lt Lwr Main Frame Leg by using 2 1 2 13 x 2 HHCS Item 7 and 2 1 2 13 Ny Flange Lock Nuts It...

Страница 9: ...by loosening and replacing the Ny Flange Lock Nut securing the Rt Lower Main Frame Leg then using 1 1 2 13 x 2 HHCS Item 4 and 1 1 2 13 Ny Flange Lock Nut Item 6 Refer to Figure A Right Lower Main Fra...

Страница 10: ...4 1 4 20 Ny Flange Lock Nuts Refer to Figure A PTO Stop Plate Installation Position the PTO Stop Plate Item 1 in between the Left and the Right PTO Mount Plates Align the bolt holes of the PTO Stop P...

Страница 11: ...ward and insert the PTO Mount Pin P B0274 through the hole in the top of the Right PTO Mount Plate Assembly Secure the PTO Mount Pin using 1 1 8 Hair Pin Clip P K0086 as shown below Note Remove the ge...

Страница 12: ...the adjustment bolt clockwise Figure E until there is 1 of deflection with 10 11 lbs of pressure at the center of the belt between the engine pulley and the gear box pulley Once the correct tension o...

Страница 13: ...oss Blower Cone Tab Figure C 1st Tighten Bolt 2nd Tighten Jam Nut Figure D Blower Cone Figure E Cam Assembly Adjustment The tension rod may then be screwed out to tighten the belt or screwed in to loo...

Страница 14: ...tem 1 to the Lt Lwr Main Frame Leg and the Rt Lwr Main Frame Leg Secure the Main Frame Assembly by using 4 3 8 16 x 1 1 4 HHCS Item 2 and 4 3 8 16 Ny Flange Lock Nuts Item 3 Refer to Figure A Main Fra...

Страница 15: ...ghten the Ball Joint to approximately half way down the threads on the Latch Rod Attach the Ball Joint to the Latch Hook as shown in Figure D using 1 5 16 24 Hex Nut P K1444 and 1 5 16 Lock Washer P K...

Страница 16: ...the functionality of the dump mechanism pull the Lift Handle away from the unit and lift upward The Door of the Box Assembly should open and the Box should pivot clockwise towards the ground Dump Mec...

Страница 17: ...een attached to the mower deck Refer to Figure A and B for reference Remove the hardware from the grass deflector and insert 1 Boot Rod P B4331 into the grass deflector mounting holes as shown in Figu...

Страница 18: ...Blower Outlet See Figure below for details Secure opposite end of the 6 Upper Hose to the Inlet Make sure both ends are securely fastened by tightening the Hose Clamp and rotating the Inlet Snap Fast...

Страница 19: ...ler blade 1 between each vein 12 with a rubber mallet to loosen the taper lock bushing hold 2 Spray break free lubricant into the surrounding areas of the taper lock bushing 9 and repeat Tip 1 To Remo...

Страница 20: ...Weight Bracket Base Item 1 Loosely fasten the Weight Bracket Clamp Item 2 to the Weight Bracket Base Item 1 using 4 5 16 18 x 3 Bolts Item 4 4 5 16 18 Ny Flange Lock Nuts Item 5 Position the Quad Wei...

Страница 21: ...ubing w opening towards caster fork Next position the Weight Bracket Clamp Item 2 on top of caster tubing w opening towards caster fork NOTE This Assembly Installation is intended for the Right Caster...

Страница 22: ...22 A0794 ALUMINUM GRASS CONTAINER EXPLODED VIEW...

Страница 23: ...23 A1841_01 PTO Arm Assembly PTO Parts Exploded View List...

Страница 24: ...24 Exploded Parts View A1941_01 PTO Base Assembly...

Страница 25: ...25 PTO Parts View List A1941_01 PTO Base Assembly...

Страница 26: ...26 PTO Parts View List A0623 PTO Assembly...

Страница 27: ...27 A1950 PTO Assembly w Heat Guard PTO Parts Exploded View List...

Страница 28: ...28...

Страница 29: ...ry with grass moisture content amount of leaves whether the terrain is flat or hilly etc A To disengage the PTO assembly move Bagger PTO switch to the off position Disengagement Of The PTO Assembly NO...

Страница 30: ...arbox should cover the gears If not 3 Every 100 hours of use Change oil contain maintenance free bearings and are without Lubrication a greasable fitting Blower Assembly 2 First 60 hours of use Change...

Страница 31: ...R1070 PECO Logo Part R1083 Engage Disengage Part R1069 Warning Turn Off Blower Part R4008 Caution Rotating Blades R2008 R2007 Part R1057 Red Reflector Label TO DUMP GRASS PUSH HANDLE OUT AND LIFT R105...

Страница 32: ...32...

Страница 33: ...33 NOTES...

Страница 34: ...34 100 AIRPORT ROAD 800 438 5823 OR 828 684 1234 FAX 828 684 0858 EMAIL peco lawnvac com WEBSITE www lawnvac com ARDEN NORTH CAROLINA 28704 P PECO PECO P P P P PECO PECO PECO...

Отзывы: