background image

30 

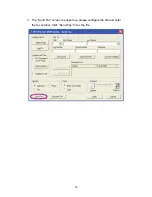
3.  The “Send Fax” screen is popped up, please configure the file and enter 

the fax number. Click “Send Fax” to fax the file.   


Содержание mini-102mg

Страница 1: ...User s Manual Version Mini 102MG_QIG_EU A_V1 Quick Installation Guide Mini 102MG MFP Server ...

Страница 2: ...Vista scanning utility and MFP vendors scanning utilities When you want to scan in the Windows XP or Vista you can choose one of the utilities Not only be a MFP Server this MFP Server can also be a traditional print server It supports TCP IP network protocol and LPR and IPP printing protocols It can share print function in the various common network operating systems including Windows 2000 XP Vist...

Страница 3: ...nna One Power Adapter One CD ROM Including all the software utilities drivers Quick Installation Guide and User s Manual One LAN cable One Double faced tape One Safety Instructions Warranty Card 2 2 Part names and functions The part name of this product is described below Front view USB port USB cable is connected ...

Страница 4: ... keeping the Reset button depressed for 10 seconds or more with the state of that this product is turned on Antenna connector Attached wireless antenna is mounted Side view LED WLAN Lighting or blinking when the wireless LAN function is enabled Status Lighting or blinking while printing LAN It lights up when the link of LAN port is established It blinks while communicating ...

Страница 5: ... MFP or printer that you want to share on the network 3 Connect the MFP Server to your network by attached the network cable to the network port of the MFP server 4 Connect the power adapter to the MFP Server The MFP Server will perform the Power On Self Test POST after it is powered on When the Status LED is unlighted the MFP Server is ready Note 1 You must use the power adapter shipped along wit...

Страница 6: ...ows XP for Windows 2000 and Windows Vista the procedures are similar Tip You have to uninstall all the MFP server drivers and utilities if you have installed the previous version 1 Insert the CD shipped along with the MFP Server into your CD ROM drive The Autorun exe program should be executed automatically If not run AutoLoader exe manually from CD ROM drive s root directory 2 The following scree...

Страница 7: ...6 3 The MFP Server Utilities InstallShield Wizard is displayed click Next ...

Страница 8: ...7 4 Click Next to install the MFP Server utilities in the default folder or click Change to specify the destination folder where you would like to install the MFP Server utilities ...

Страница 9: ...8 5 The system starts installing the MFP Server Utilities ...

Страница 10: ...en is displayed If you want to configure the MFP Server please click Next directly Or you can select No I will configure the MFP Server later and click Next to complete the installation The following steps are for MFP Server Configuration ...

Страница 11: ...e MFP Servers in the network Select the MFP Server you want to setup and click Next to continue 8 Enter the User Name and Password of the MFP Server you have selected to login the MFP Server The default User Name is admin default Password is 0000 ...

Страница 12: ...et the Alias Name and the Server Description to the MFP Server here Click on Next Note You can define the location or other information of the MFP Server for easy to find the MFP by filling Server Description ...

Страница 13: ... in the IP Address fields If no DHCP Server is present within the network please assign the network settings of the MFP Server manually Please click Next once you have found appropriate network settings for the MFP Server Note The MFP Server IP Address should be in the same network segment with the connected computer If the network settings are incorrect a message will be prompted to remind you af...

Страница 14: ...13 11 Please follow the procedure below 1 Select the same name as the one of your wireless device from SSID 2 Select Infrastructure Mode 3 Click Next If any SSID is not displayed click Refresh ...

Страница 15: ...n Key Format The encryption key consists of 10 characters Select 64 bits in Key Length and select Hexadecimal in Key Format The encryption key consists of 13 characters Select 128 bits in Key Length and select ASCII in Key Format The encryption key consists of 26 characters Select 128 bits in Key Length and select Hexadecimal in Key Format 4 Enter the setting content in the right hand blank of the...

Страница 16: ...IP is set on your wireless devices change the setting to WEP WPA PSK or WPA2 PSK AES 1 Select the setting contents in Security Mode 2 Enter the setting contents in Key 3 Click Next For more information about the security settings please refer to the Section 6 4 2 2 in the manual ...

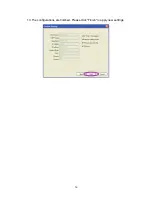
Страница 17: ...16 13 The configurations are finished Please click Finish to apply new settings ...

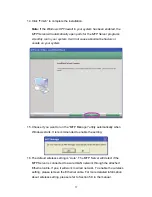
Страница 18: ...5 Choose if you want to run the MFP Manager utility automatically when Windows starts It is recommended to enable the setting 16 The default wireless setting is Auto The MFP Server will detect if the MFP Server is connected to a wired LAN network through the attached Ethernet cable If yes it will work in wired network To enable the wireless setting please remove the Ethernet cable For more detaile...

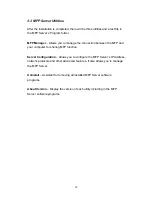
Страница 19: ... between the MFP and your computer for sharing MFP function Server Configuration Allows you to configure the MFP Server s IP Address network protocols and other advanced features It also allows you to manage the MFP Server Uninstall Assistant for removing all installed MFP Server software programs About Version Display the version of each utility including in the MFP Server software programs ...

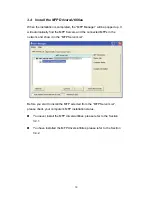
Страница 20: ... and the connected MFPs in the network and show it in the MFP Server List Before you start to install the MFP selected from the MFP Server List please check your computer s MFP installation status You never install the MFP drivers utilities please refer to the Section 3 4 1 You have installed the MFP drivers utilities please refer to the Section 3 4 2 ...

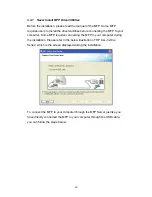
Страница 21: ...to your computer Some MFP requires connecting the MFP to your computer during the installation Please refer to the below illustration of HP ALL In One Series which is the screen displayed during the installation To connect the MFP to your computer through the MFP Server just like you have directly connected the MFP to your computer through the USB cable you can follow the steps below ...

Страница 22: ...driver please insert the installation CD of the MFP and designated to find drivers in the CD Note If the MFP you have connected is a composite device the system will install the driver for composite device at first The following screen will be popped up please click Continue Anyway When the system stops prompting the drivers are all installed If the system can t find the MFP driver please insert t...

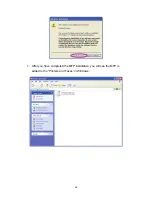
Страница 23: ...22 3 After you have completed the MFP installation you will see the MFP is added to the Printers and Faxes in Windows ...

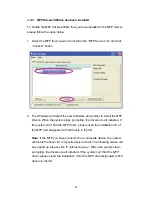
Страница 24: ...tops prompting the drivers are all installed If the system can t find the MFP driver please insert the installation CD of the MFP and designated to find drivers in the CD Note If the MFP you have connected is a composite device the system will install the driver for composite device at first The following screen will be popped up please click Continue Anyway When the system stops prompting the dri...

Страница 25: ...llation a copy of the MFP will be added to the Printers and Faxes in Windows Tip The new copy of the MFP is bundled to the MFP Server Please use the MFP to share print scan card reader or fax functions through the network ...

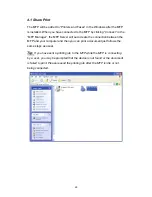
Страница 26: ...inished using the MFP please click Disconnect to release the MFP Another users can t use the MFP until the MFP is released Tip 2 It is recommended to enable Idle Timeout setting The MFP Server will auto release your connection to the MFP after a period of idle time that you have assigned So the MFP will not be occupied too long and other users can share the MFP frequently Please refer to Section 6...

Страница 27: ...Server will auto create the connection between the MFP and your computer and then you can print a document just follows the same steps as usual Tip If you have sent a printing job to the MFP while the MFP is connecting by a user you may be prompted that the device is not found or the document is failed to print Please resend the printing job after the MFP is idle or not being connected ...

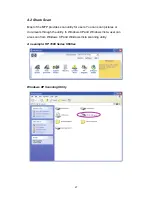
Страница 28: ... scan utility for users You can scan pictures or documents through the utility In Windows XP and Windows Vista user can also scan from Windows XP and Windows Vista scanning utility An example HP 1600 Series Utilities Windows XP Scanning Utility ...

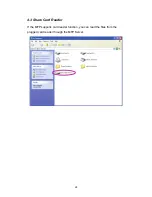
Страница 29: ...28 4 3 Share Card Reader If the MFP supports card reader function you can read the files from the plugged card reader through the MFP Server ...

Страница 30: ...ed there is a fax device will be added to Printers and Faxes in the Windows When you have connected to the MFP by clicking Connect in the MFP Manager you can fax a file through the MFP Server to the fax device Procedures to fax a file 1 In the Microsoft Office or other programs select Print from the File menu 2 The following screen will be popped up select the fax device and then click Print ...

Страница 31: ...30 3 The Send Fax screen is popped up please configure the file and enter the fax number Click Send Fax to fax the file ...

Страница 32: ......
Отзывы: