


6
7
5. Print self-test page
A. Turn off the printer.
B. Make sure the paper roll is installed correctly and the printer top cover is
closed.
C. Press and hold on the FEED button and turn on the printer. When the red
indicator is OFF, then release the FEED button. printer will print out a page.
6. Hexadecimal mode
A.
Turn off the printer.
B.
Make sure the paper roll is installed correctly and the printer top cover is
closed.
C.
Press and hold on the FEED button and turn on the printer. After 10
seconds, please release the FEED button, then printer will be entered
the Hexadecimal mode.
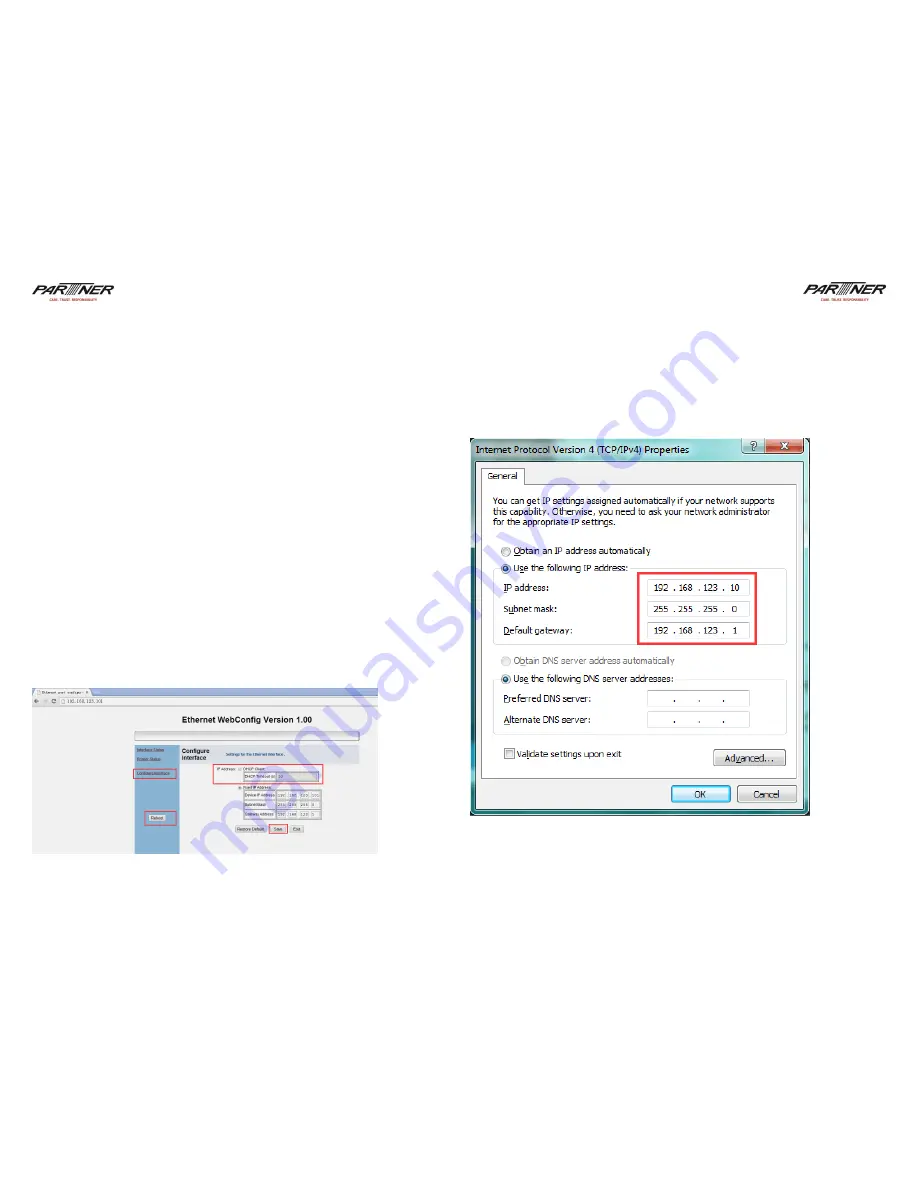
7. Start the DHCP function
A. Set from web browser.
1) Open the web browser through IP address shown on the self-test page.
2) Click “ DHCP Client, set the time of getting the IP (shortest is 14s)
3) Click “save” and then “Reboot”.
4) Print the self-test page with new IP address. If the printer can’t get the new
IP successfully, it will print out the previous IP.
8. LAN port connection setting
A. Connect printer to PC via LAN cable.
Please make sure PC’s IP should be on the same network segment with the
printer’s IP .
For example: Printer default IP address
:
192.168.123.100. So PC’s IP address
should be set 192.168.123.* network segment, but can not the same as the
printer IP, otherwise printer will not be connected with the PC.
B. Connect with server
Make sure the printer and PC are in the same segment, if not, please revise
the printer’s IP as below method:
Содержание RP-100-300II
Страница 6: ...10 11 2 Create a new port...


