58
C H A P T E R 5 R E P L A C I N G F I E L D R E P L A C E A B L E U N I T S ( F R U s )
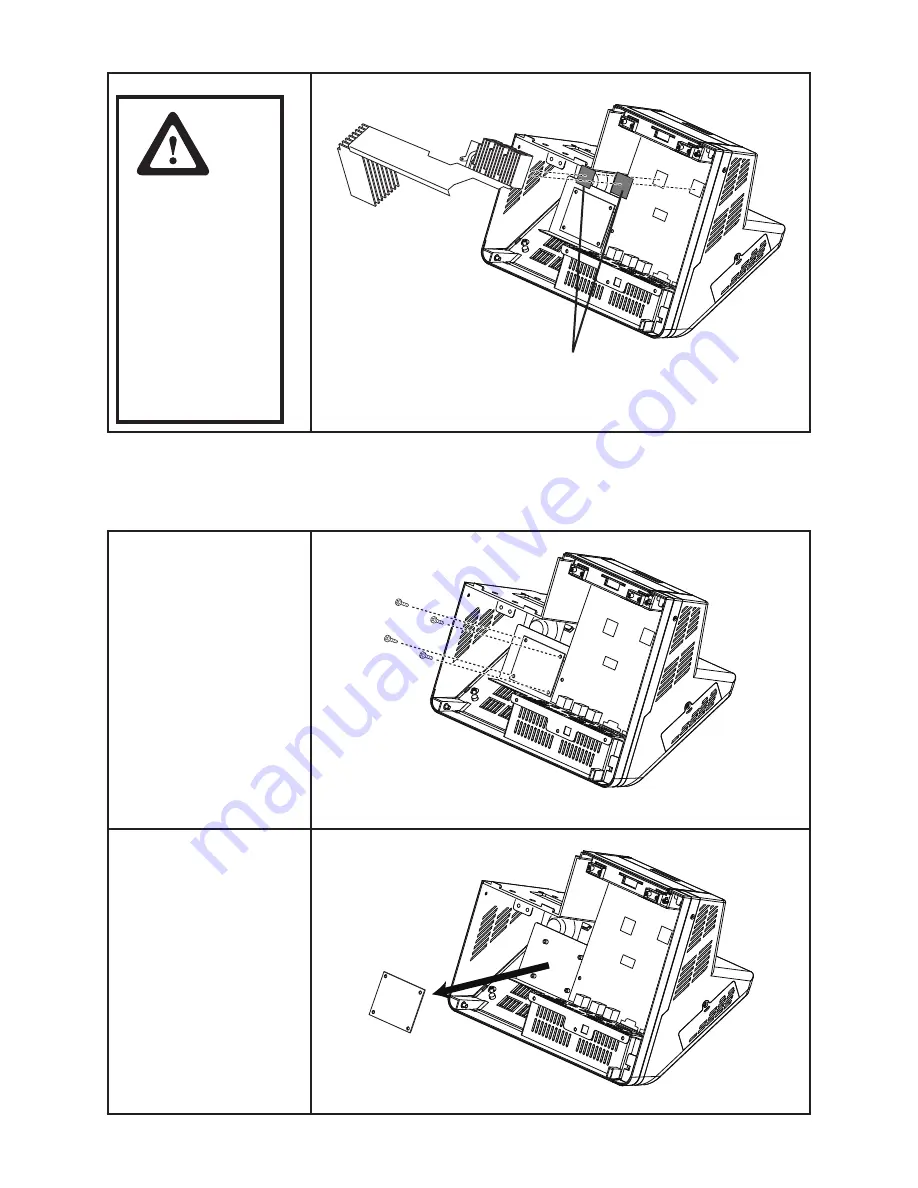
5. Remove the heatsink.
CAUTION
To avoid the heat
sink clearance
issue. When you
replace the heat
sink, check the
thermal pads
should be stuck
between the
contact surface of
the heat sink and
chips.
Thermal pads
Thermal printer control board
Before proceeding, remove
the following FRUs.
•
“Front Panel” on page 55.
1. Disconnect the cables on
the thermal printer control
board.
2. Remove the four screws
from the control board.
3. Remove the thermal
printer control board.
Содержание PT-6212-EB
Страница 1: ...All in one POS Terminal PT 6212 EB Service Manual...
Страница 2: ......
Страница 8: ...vi...
Страница 45: ...37 4 When installation is completed click Finish...
Страница 60: ...52 C H A P T E R 4 L O C AT I N G T H E P R O B L E M...
Страница 72: ...64 C H A P T E R 5 R E P L A C I N G F I E L D R E P L A C E A B L E U N I T S F R U s...
Страница 73: ...65 APPENDIX PART LIST AND SPECIFICATION Figure 6 1 Exploded diagram main parts...
Страница 75: ...67 Figure 6 2 Exploded diagram printer parts...


