background image

10 

C H A P T E R   2   B I O S   S E T U P

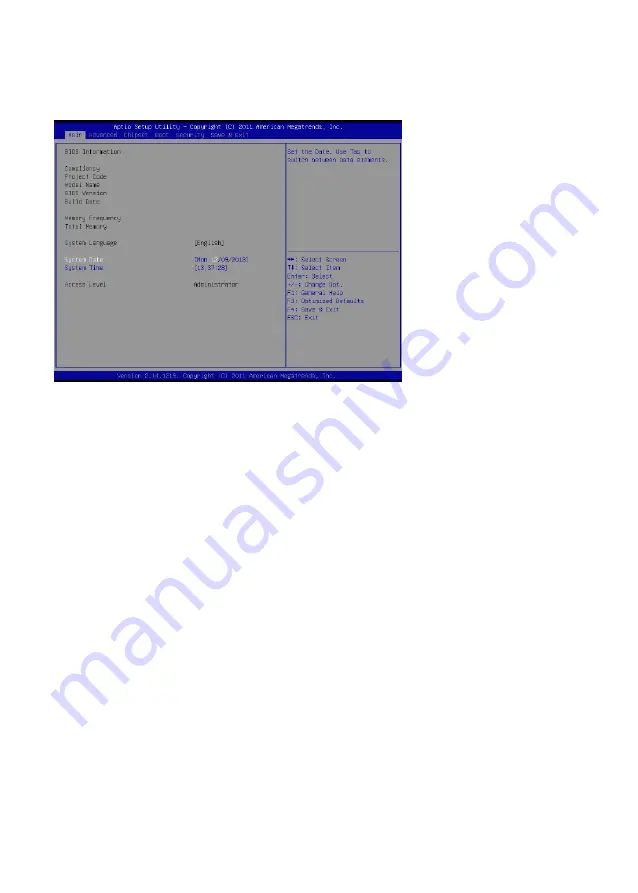
Main Screen

Once you enter AMI UEFI BIOS Setup Utility, the Main Menu will appear on the screen providing an 

overview of the basic system information.

System Overview

This screen displays System BIOS Information, Processor, System memory, System Time and System Date.

BIOS Information

Shows system information including UEFI BIOS version, model name, marketing name, built date, etc.

Memory Frequency

Shows the system memory frequency.

Total Memory

Shows system memory size, VGA shard memory will be excluded.

System Date

Set the system date. Note that the ‘Day’ automatically changes when you set the date.

System Time

Set the system internal clock.

Access Level

Shows the access level of current user.

Figure 2.2 Main Screen

Содержание PT-1630

Страница 1: ...POS Terminal PT 1630 Sevice Manual...

Страница 2: ......

Страница 3: ...t this manual The service manual provides service information for the PT 1630 This manual is designed to help train service personnel to locate and fix failing parts on the machine This manual consist...

Страница 4: ...o http www dtsc ca gov hazardouswaste perchlorate Vermont Mercury Management Rules LCD display lamps contain mercury Dispose of them properly CE Mark This device complies with the requirements of the...

Страница 5: ...Configuration 16 USB Configuration 17 Super IO Configuration 18 Serial Port 1 5 Configuration 18 H W Monitor 19 Smart Fan Mode Configuration 20 Chipset Menu 21 PCH IO Configuration 21 PCI Express Con...

Страница 6: ...8 Mainboard connectors 40 CHAPTER 5 REPLACING FIELD REPLACEABLE UNITS FRUs 41 Safety and precautions 41 Before you begin 42 Replacing parts 42 Chassis Cover 43 Hard Disk Drive 44 Memory 45 Battery 45...

Страница 7: ...3 Figure 2 6 ACPI Settings 14 Figure 2 7 CPU Configuration 15 Figure 2 8 SATA Configuration 16 Figure 2 9 USB Configuration 17 Figure 2 10 Super IO Configuration 18 Figure 2 11 H W Monitor 19 Figure 2...

Страница 8: ...vi...

Страница 9: ...llowing topics are described Identifying components on page 1 1 2 3 4 Identifying components This section describes the parts and connectors on the machine Front view Figure 1 1 Front view Component D...

Страница 10: ...M5 port 6 USB24V optional 7 USB12V optional 8 USB12V optional 9 COM6 port 10 24V 1A output 11 12V 3 5A output 12 PS 2 port 13 USB 2 0 ports Connector Description 14 USB 2 0 ports 15 RJ 45 LAN port 16...

Страница 11: ...SB 2 0 connector pin define Pin Signal Pin Signal 1 DCD 6 DSR 2 SIN 7 RTS 3 SOUT 8 CTS 4 DTR 9 RI 5 GND 1 5 6 10 11 15 Pin Signal Pin Signal Pin Signal 1 Red 6 AGND 11 N A 2 Green 7 AGND 12 DDC DAT 3...

Страница 12: ...efine 1 6 1 8 Pin Signal 1 CASEOPEN2 2 CASH1 3 CASEOPEN1 4 24V 5 CASH2 6 GND Pin Signal Pin Signal 1 TXA 5 TXC 2 TXA 6 TXB 3 TXB 7 TXD 4 TXC 8 TXD USB 3 0 connector pin define 1 5 4 9 Pin Signal Pin S...

Страница 13: ...TA connector pin define Pin Signal 1 12V 2 GND 7 1 Pin Signal Pin Signal 1 GND 5 SATA_RX 2 SATA_TX 6 SATA_RX 3 SATA_TX 7 GND 4 GND 1 2 PS 2 connector pin define 1 3 4 5 6 2 Pin Signal 1 Keyboard Data...

Страница 14: ...C I N G USB 12V connector pin define USB 24V connector pin define 1 5 4 8 1 5 4 8 Pin Signal Pin Signal 1 GND 5 GND 2 12V 6 USB 3 12V 7 USB 4 GND 8 USB Vcc Pin Signal Pin Signal 1 GND 5 GND 2 24V 6 U...

Страница 15: ...n page 24 Security Menu on page 25 Exit Menu on page 26 About the Setup Utility The BIOS Setup Utility enables you to configure the following items Hard drives diskette drives and peripherals Video di...

Страница 16: ...DEL to run Setup Press the delete key Delete to access the BIOS Setup Utility BIOS navigation keys The BIOS navigation keys are listed below Key Function Moves between the available menus Moves the cu...

Страница 17: ...the highlight to other options When an option is highlighted execute the option by pressing Enter Some options lead to pop up dialog boxes that prompt you to verify that you wish to execute that optio...

Страница 18: ...ystem Time and System Date BIOS Information Shows system information including UEFI BIOS version model name marketing name built date etc Memory Frequency Shows the system memory frequency Total Memor...

Страница 19: ...y network devices with option ROM Options Disabled Default Enabled Launch Storage OpROM This item enables or disables boot Options for legacy mass storage devices with option ROM Options Enabled Defau...

Страница 20: ...t Enabled PCI Latency Timer This item sets the value to be programmed into PCI Latency Timer Register Options 32 PCI Bus Clocks Default 64 PCI Bus Clocks 96 PCI Bus Clocks 128 PCI Bus Clocks 160 PCI B...

Страница 21: ...2 Bytes 1024 Bytes 2048 Bytes 4096 Bytes ASPM This item sets the ASPM Active State Power Management Settings Level Force L0 Force all links to LO State Auto BIOS auto configures Disabled Disables ASPM...

Страница 22: ...urces This item enables or disables lock of legacy resources Options Disabled Default Enabled PME Wake up from S5 This item enables the system to wake from S5 using PEM event Options Disabled Default...

Страница 23: ...when combined with a supporting OS Windows Server 2003 SP1 Windows XP SP2 SuSE Linux 9 2 RedHat Enterprise 3 Update 3 Options Enabled Default Disabled Intel Virtualization Technology Virtualization T...

Страница 24: ...llow for primary plane Options 120 Default IGFX Max Current limit value Amp The maximum instantaneous current allow for secondary plane Options 35 Default SATA Configuration SATA Controller s This ite...

Страница 25: ...d by XHCI driver Options Enabled Default Disabled EHCI Hand Off This is a workaround for OSes without EHCI hand off support The EHCI ownership change should be claimed by EHCI driver Options Disabled...

Страница 26: ...IO 2F8h IRQ 3 IO 3F8h IRQ 3 4 5 10 11 IO 2F8h IRQ 3 4 5 10 11 IO 3E8h IRQ 3 4 5 10 11 IO 2E8h IRQ 3 4 5 10 11 Serial Port1 Voltage select This item selects COM1 port pin 9 function Options No extrn V...

Страница 27: ...shutdown Temperature Options Disabled Default 60 C 140 F 65 C 149 F 70 C 158 F 75 C 167 F 80 C 176 F 85 C 185 F 90 C 194 F Smart Fan Function This item enables or disables Smart Fan Options Enabled De...

Страница 28: ...follow different temperature by different duty cycle 1 100 Duty Cycle 1 4 Auto fan speed control Fan speed will follow different temperature by different duty cycle 1 100 Temperature 1 4 Auto fan spee...

Страница 29: ...the CPU itself uses when communicating with its own special components Figure 2 12 Chipset Menu PCH IO Configuration Onboard Lan This item controls the PCI Express Root Port Options Enabled Default Di...

Страница 30: ...ult Disabled XHCI Mode This item sets the mode of operation of XHCI controller Options Smart Auto Default Auto Enabled Disabled EHCI1 2 This item controls the USB EHCI USB2 0 functions If set disabled...

Страница 31: ...Graphics Device Options 64M Default 32M 96M 128M 160M 192M 224M 256M 288M 320M 352M 384M 416M 448M 480M 512M 1024M DVMT Total Gfx Mem This item selects DVMT5 0 Total Graphic Memory size used by the In...

Страница 32: ...board NumLock state Options On Default Off Full Logo Screen Display This item allows you to enable disable Full Screen LOGO Show function Options Disabled Default Enabled Option ROM Messages This item...

Страница 33: ...25 Security Menu Administrator Password This item sets Administrator Password User Password This item sets User Password Figure 2 14 Security Menu...

Страница 34: ...card Changes and Exit Abandon all changes made during the current session and exit setup Save Changes and Reset Reset the system after saving the changes Restore Defaults This selection allows you to...

Страница 35: ...et Driver on the page 28 Intel Chipset Graphics Driver on the page 30 LAN Driver on the page 32 Driver auto installation Use an external CD ROM drive to install the drivers or copy the drivers to a US...

Страница 36: ...Software updates the Windows XP 7 INF files so that the Intel chipset is correctly configured Follow these instructions to install the chipset software 1 Browse to the DRIVER chipset Intel Inf folder...

Страница 37: ...ReadMe Information then click Next 5 The Intel Chipset Software Utility files are installed to the system When prompted to restart select Yes I want to restart my computer now Then click Finish to res...

Страница 38: ...Graphics Driver This utility installs the Intel Extreme Graphics 2 drivers for Windows XP 2000 To install the drivers 1 Browse to the DRIVER VGA intel folder 2 Double click the executable file The fol...

Страница 39: ...31 4 Browse the ReadMe Information then click Next 5 When installation is completed select Yes I want to restart my computer now Then click Finish to restart the system...

Страница 40: ...R E LAN Driver The network driver support Windows XP 2000 Refer to the following to install the drivers 1 Browse to the DRIVER LAN RealTek folder 2 Double click the executable file The following scree...

Страница 41: ...33 4 When installation is completed click Finish...

Страница 42: ...34 C H A P T E R 3 I N S TA L L I N G D R I V E R S A N D S O F T W A R E...

Страница 43: ...checkout guidelines Use the following procedure to troubleshoot problems Identify as many symptoms as possible in detail Verify symptoms by recreating them Follow the corrective procedures in order If...

Страница 44: ...lways detecting the drawer as open Cashdrawer B Control port 50CH 6 High 1 Close Low 0 Open Cashdrawer A Status port 548H 7 High 1 Close Low 0 Open Cashdrawer A Status port 548H 6 High 1 Close Low 0 O...

Страница 45: ...ice does not function 1 Check that the USB device is detected in Windows Device Manager 2 Reinstall the USB device driver 3 Replace the mainboard Peripheral device symptoms Symptom Corrective Procedur...

Страница 46: ...ATX JCMOS1 Figure 4 2 PT 1630 mainboard jumper Jumper Setting Description JCMOS1 Clear CMOS Jumper 1 2 Closed Normal Operation Default 2 3 Closed Clear CMOS data JAT ATX AT ATX Power Select Jumper 1 2...

Страница 47: ...39 Jumper Setting Description JPC1 COM5 Power Select Jumper 1 2 Closed 5V 3 4 Closed RING Default 5 6 Closed 12V JPC2 COM6 Power Select Jumper 1 2 Closed 5V 3 4 Closed RING Default 5 6 Closed 12V...

Страница 48: ...E M Figure 4 3 PT 1630 mainboard connectors Mainboard connectors connector to SATA HDD connector to power supply connector to CPU fan connector to COM6 connector to USB PCB connector to PCI PCB conne...

Страница 49: ...he warranty Safety and precautions Computer components and electronic circuit boards can be damaged by discharges of static electricity Working on computers that are still connected to a power supply...

Страница 50: ...omponents and may cause malfunction Adequate lighting and proper tools can prevent you from accidentally damaging the internal components Most of the electrical and mechanical connections can be disco...

Страница 51: ...43 Chassis Cover 1 Remove the three screws securing the chassis cover to the chassis 2 Slide the cover towards the rear and lift up to remove the cover...

Страница 52: ...L A C E A B L E U N I T S F R U s Hard Disk Drive Before proceeding remove the following FRUs Chassis Cover on page 43 1 Remove the screws from the HDD compartment 2 Pull the HDD out 3 Remove four scr...

Страница 53: ...ceeding remove the following FRUs Chassis Cover on page 43 1 Open the clips 2 Pull out the memory module Battery Before proceeding remove the following FRUs Chassis Cover on page 43 1 Open the hock 2...

Страница 54: ...e the following FRUs Chassis Cover on page 43 1 Remove all cables from the PCI PCB 2 Remove two screws 3 Pull up the PCI PCB with bracket Mainboard Before proceeding remove the following FRUs Chassis...

Страница 55: ...Before proceeding remove the following FRUs Chassis Cover on page 43 1 Remove all cables from the PSU 2 Remove two screws from the PSU bracket 3 Remove the PSU bracket 4 Remove three screws from the...

Страница 56: ...U s CPU Before proceeding remove the following FRUs Chassis Cover on page 43 1 Remove fan cable from the cooler 2 Remove four screws 3 Remove the cooler 4 Press and hold the lever and move it away fro...

Страница 57: ...or the card carefully If the card is not Plug_and_play you may have to manually configure the card before installation The following illustration shows add on card installation components Blanking pla...

Страница 58: ...ate or optional COM ports blacket from the chassis 3 Slide the PCI card into place as shown Line up the PCI card bracket with the bracket slot Insert the edge connector of the PCI card into the expans...

Страница 59: ...To add on the cable management box on your PT 1630 POS terminal refer to the following Components Required Cable management box 1 Place the cable management box on the rear of the chassis 2 Use two s...

Страница 60: ...B L E U N I T S F R U s Install the tray To install the tray on your PT 1630 POS terminal refer to the following Components Required Cable management box Tray 1 Place the tray on the chassis and cable...

Страница 61: ...all the LCD monitor on your PT 1630 POS terminal refer to the following Before Proceeding Install the cable management box Install the tray 1 Place the LCD monitor stand into the groove of the tray 2...

Страница 62: ...54 C H A P T E R 5 R E P L A C I N G F I E L D R E P L A C E A B L E U N I T S F R U s...

Страница 63: ...t Keyboard or Mouse 1 x RJ 11 supports 2 cash drawer DC 24v 1 x DC 12V out Option 1 x 2nd 2 5 HDD or SSD HDD 1 x PCI Power USB 12Vx2 24Vx1 Power Supply 270W 90 264V W DC 12V out W DC 24V out for Print...

Отзывы: