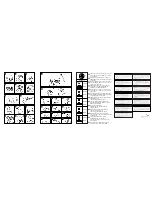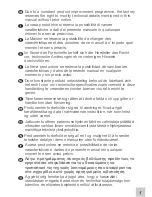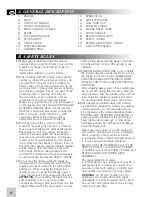
F. BLADE AND NYLON STRING HEAD ASSEMBLY
Assemble the correct guard to suit the kind of
blade or nylon string head to be used (See
section: SAFETY GUARD ASSEMBLY).
1)
Assemble blade as illustrated:
a) Flange guard - b) Upper cap with blade
centering - c) Blade with text and directional
arrow facing upwards - d) Lower washer - e)
Fixed mower gauge - f) Blade locking screw.
2)
Make sure that the blade bore opening fits
perfectly around the centering collar on the
upper cap.
Tighten counterclockwise.
While tightening, the blade assembly can be
held fast by inserting the wrench or the
screwdriver supplied into the cap and
gearcase holes.
To do this, rotate the cap intil the two holes
coincide.
3)
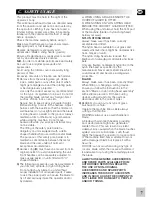
Assemble nylon string head as illustrated:
a) Flange guard - b) Upper cap - c) Guard d)
Nylon string head
Tighten counterclockwise.
4)
While tightening, the head assembly can be
held fast by inserting the wrench or the
screwdriver supplied into the holes as already
shown for blade assembly.
WARNING: Please do not use the accessory
nylon string head guard (item C Fig. 3 F)
together with metal blades.
Use only fuel recommended by this manual.
This product is fitted with a 2-stroke engine and
therefore requires a 2-stroke petrol and oil mix.
Use leaded (4 Star) or unleaded petrol with a
minimum octane rating of 90.
Only use oil from sealed containers. In order to
obtain a good fuel mix, put the oil into the
container before the petrol.
The use of sub-standard petrol or oil may reduce
performance or reduce the life of certain
components.
Leaded Petrol
If using leaded petrol, the correct fuel mix is
achieved by either using 5% (20:1) of a well
known brand of 2-stroke engine oil, or else 2.5%
(40:1) of special engine oil.
Unleaded Petrol
If using unleaded petrol, you must use a
totally
synthetic
2-stroke engine oil or branded 2-stroke
engine oil. In either case use 2.5% (40:1) of oil.
IMPORTANT
Always shake the fuel mix container thoroughly
before pouring any fuel mix.
Fuel mix properties may deteriorate with time and
should be used up within 2 months.
We recommend that you prepare fuel mix
according to your immediate requirements only.
Never use fuel mix more than 2 months old so as
to avoid possible engine damage.
WARNING
Do not smoke when re-fuelling.
Always open the fuel cap slowly, to release any
pressure build up in the tank.
Re-fuel in open spaces only, keeping away from
naked flames or sparks.
Safe Storage of Fuel
Petrol fuel mix is highly inflammable. Put out all
cigarettes, pipes and cigars before working with
fuel. Avoid spilling fuel.
Store fuel in a cool, well ventilated place, in an
approved container specifically designed for the
purpose. Never store engine with fuel in the tank in
enclosed, poorly ventilated areas, where fuel fumes
may reach an open flame, spark or pilot light such
as in a furnace, water heater, clothes dryer etc.
Petrol fumes can cause an explosion or a fire.
Never store large amounts of fuel.
To prevent possible restarting problems avoid
running the fuel tank dry. This also helps to
extend engine life.
D. FUEL MIX
E. SAFETY GUARD ASSEMBLY
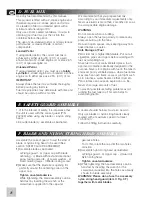
1,2) In the interest of safety, it is imperative that
the unit is used with the correct guard (P/N
242043) when using any blade or a nylon string
head.
Line cutter blade (L): assemble as illustrated.
A double shoulder harness must also be worn.
Only use blades or nylon string heads clearly
marked with a maximum speed of at least
10,500 min
-1
.
Follow the fitting instructions carefully.
A
8


