


HX-2-6NF-ZLIND
17
Technical Speci
fic
a
ti
on
Cooking Hob
Cooking
Z
ones
4
Z
ones
Supply
V
oltage
220
-
240
V
~ 50H
z
Power
Product S
ize
L×W×H
(mm)
590x
52
0x77mm
Cut
O
ut
Dim
ensions
A×
B
(mm)
560x
4
9
0
mm
D
i
m
ensions are appro
x
i
ma
te. Because we con
ti
nually strive to
im
prove our products we
ma
y
change speci
ficati
ons and designs without prior no
ti
ce.
Installa
tion
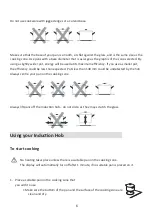
Selec
ti
on of installa
ti
on equipment
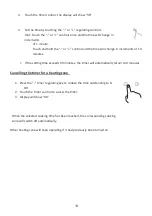
Cut out the work surface according to the si
z
es shown in the drawing.
For the purpose of installa
ti
on and use
,
a
m
ini
m
u
m
o
f 50mm
space shall be preserved
around the hole.
Be sure the thickness of the work surface is at least 40
-
50
mm
. Please select
heat
-
resistant work surface
mat
erial to avoid larger defo
rmati
on caused by the heat
radia
ti
on fro
m t
he hotplate.
When installing the hob over drawers
,
a board
m
ust be installed 1
0mm u
nderneath the
hob. The board
m
ust be
m
ade of suitable heat resistan
t mat
erials.
Cau
ti
ons
1.
The induc
ti
on hotplate
m
ust be installed by
qu
ali
fi
ed personnel or technicians.
N
ever conduct
the installa
ti
on by yourself.
2.
The hob
m
ust not be installed directly above a dishwashe
r,
fridge
,
free
z
e
r,
washing
ma
chine or
clothes drye
r, as t
he hu
m
idi
ty m
ay d
am
age the hob electronics.
3.
The wall and induced hea
ti
ng
zo
ne above the tabletop
m
ust be able to withstand heat.
4.
To avoid any d
am
age
,
the sandwich layer and adhesive
m
ust be resistant to heat.
Dear Installer:
Please a
ffi
x data label provided on the adjacent cupboard near
the appliance for future reference. Thank you.
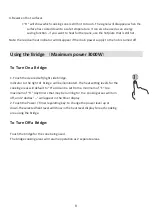
•
•
•
•
rear left (180mm):1500W
front right (180mm):1500W
front left (180mm):2000W
rear right (180mm):2000W
Содержание HX-2-6NF-ZLIND
Страница 2: ...727626112018...