9
GB
Note:
Charge the product at least once a month, if
it is to remain unused for an extended period of time.
Note:
If the product has not been charged for an
extended period of time (approx. 2 months), you
could find that the integral rechargeable battery
has entered a dormant state. Charge and discharge
the product a number of times in succession to
reactivate the integral rechargeable battery.
Note:
You can choose to charge the product directly
via the mains adaptor
12
or via the charging station.
Before charging, switch
the product off (press
ON / OFF switch
3
).
To charge the product via mains adaptor
12
directly, remove the red rubber cover at the back
of the product, connect the USB cable
11
with
the USB connector of the mains adaptor
12
and then connect the USB (type C) connector
on the USB cable
11
to the USB (type C) input
socket
6
of the LED torch.
To charge the product via the charging station,
connect the USB cable
11
with the USB connec-
tor of the mains adaptor
12
and then connect
the USB (type C) connector on the USB cable
11
to the USB (type C) input socket of the
charging station
10
. Then place the product
into the charging station to charge the product
(see fig. B).
Note:
The power indicator of the charging
station
9
will turn to red light when electrical
power is connected. It will light up red contin-
uously until the power is disconnected.
Note:
The product is fitted with an overcharge
protection circuit. Despite this, you should dis-
connect the LED inspection lamp from the power
supply after the charging process is complete.
Note:
The green charging indicators (LED torch)
4
will light up and flash during charging. There
are 4 indicator lights showing the charging
progress (approx. 25 % / 50 % / 75 % / 100 %).
When the indicator continually light on mean
the represented charging progress was finished.
When charging is complete, all indicator light
out of the socket. Disconnect the mains adaptor
12
from the product to prevent the rechargeable
battery from discharging.
Use
CAUTION! RISK OF ACCIDENT!
Always
store and secure the product in such a way that there
is no risk of injury from or damage to the product.
Note:
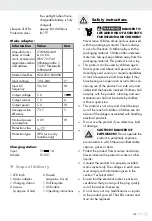
The product may be secured with the fold-
out hook
5
or by securing it to a flat, ferromagnetic
surface using the magnetic base
8
or the magnet
7
at the back. You can tilt the product up to 180 °
on the magnetic base
8
.
CAUTION!
Please note the position of your hands
whilst turning the magnetic base
8
to prevent
pinching your fingers (see Fig. D).
Using the product without
a power connection
Fully charge the product as described in the
section “Charging the product“.
The product can be operated in 4 different
modes, select these by:
Repeatedly pressing the ON / OFF switch
3
.
Press once:
The side light
2
lights up
with white light.
Press twice:
The side light
2
turns to
UV light mode.
Press three times: Switches the side light
2
off and switches on the
spotlight
1
.
Press four times: Switches off the product.
Corded use of the product
Use the included mains adaptor
12
for this pur-
pose. Using the respective mains adaptor
12
,
connect the product to a suitable power supply.
Then proceed as described under “Using the
product without a power connection“ (starting
with step 2).
Note:
The product can only be charged
whilst off!
Содержание 364690 2101
Страница 3: ...B A 8 9 5 C 14 15 1 10 2 6 3 7 4 13 11 12...
Страница 4: ...D...


