12
4.2.3 Plate Number and Video Stamp
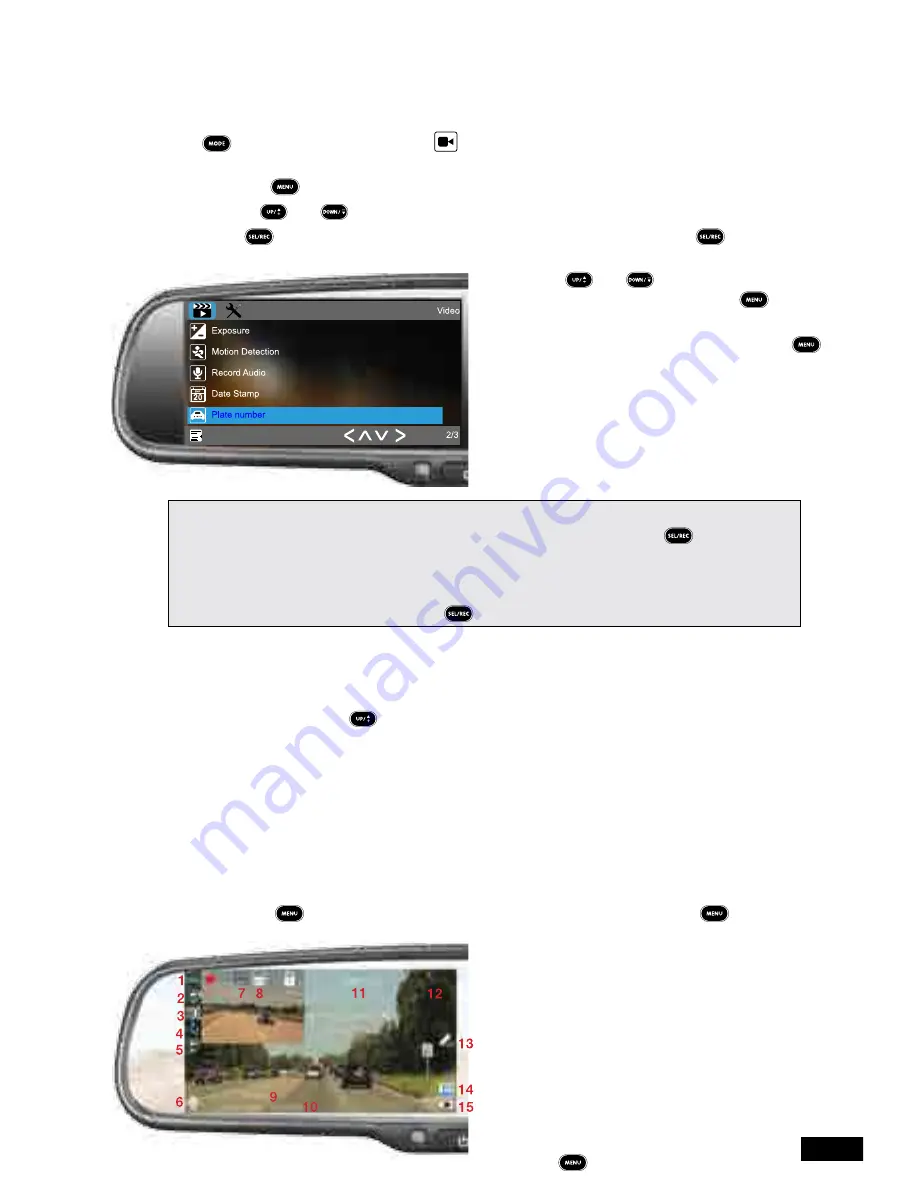
To set your vehicles’ number plate and have it appear on your recorded videos please follow
the instructions below.
1. Ensure that your rear-view mirror monitor is in video mode. To select video mode use the
button the
VIDEO
mode (the
VIDEO
icon will be displayed in the top left corner)
and make sure the
RVM-045DVRHD
is not currently recording.
2. Press the button to enter the
VIDEO
menu.
3. Use the and buttons to highlight the
PLATE NUMBER
setting.
4. Press to enter the
PLATE NUMBER
menu. Highlight ON and press to enter the
plate entry screen.
5. Use the and buttons to cycle
through the characters and press to
confirm and move to the next character.
6. After entering the final character pressing
one last time will return you to the
VIDEO
menu
Please Note:
• When entering your plate number you can exit the entry screen by pressing the button.
• If you decide that you no longer want to have your plate number stamped into your footage you can
remove this by entering the
PLATE NUMBER
menu and selecting OFF.
• The
RVM-045DVRHD
will not let you enter the menu while the device is recording. Please make
sure recording is stopped by pressing the button before attempting to enter the
VIDEO
menu.
4.3 Video Screen
The
VIDEO
Screen is the default screen when starting up your
RVM-045DVRHD
and
displays the footage being recorded while driving.
While in this screen the button on the remote control is used to cycle through the
display modes of the DVR image and the image from an optional installed reverse camera
(not included).
The available modes are:
• Picture in picture (DVR large image, Reverse camera small image).
• DVR full screen.
• Picture in picture (Reverse camera large image, DVR small image).
• Reverse camera full screen.
While recording the current recording file can be protected from being recorded over by
pressing the button. When the
RVM-045DVRHD
is not recording the button can
be used to enter the
VIDEO
menu.
1.
Mode (VIDEO)
9.
Number Plate
2.
Loop Duration
10.
Recording Time/Date
3.
Exposure
11.
Resolution
4.
Motion Detection
12.
Recording Duration
5.
Time Lapse
13.
Parking Monitor
6.
Mute/Un-mute Recording
14.
Micro SD Card
7.
High Dynamic Range
15.
Power
8.
Gravity Sensor
To cycle through
PHOTO
, and
PLAYBACK
mode ensure that you are not recording and
press the button on the remote control.


