HY10-1632-M2.1/US
Parker Hannifin Corporation
Accumulator & Cooler Division
United States
Installation & Disassembly
Bladder Accumulators
11
Assembly & Disassembly
10
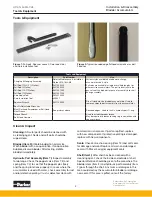
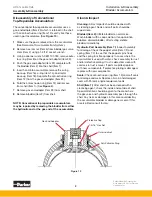
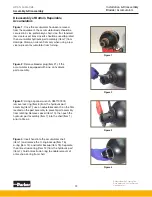
Figure 20
: Thread bleeder plug (Item 21) into the
hydraulic port assembly (Item 7).
11
Position accumulator so that fluid (same fluid as
used in system) can be poured into the accumulator
(add approximately 10% of the accumulator
capacity). This fluid will act as a cushion when the
accumulator is pre-charged with gas.
12
Pre-charge accumulator to desired pressure.
See pre-charge instructions.
13
Install accumulator on machine.
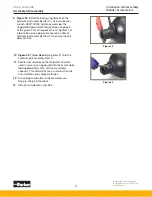
9
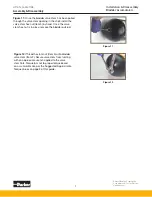
Figure 19
: Install the locking ring (Item 8) on the
hydraulic port assembly (Item 7). Using a spanner
wrench, 0851100000, tighten securely per the
Suggested Approximate Torque Values on page 3
of this guide. This will squeeze the O-ring (Item 14)
into position. Use appropriate wrench on flats of
hydraulic port assembly (Item 7) to ensure the unit
does not turn.
Figure 19
Figure 20


