57
Installing
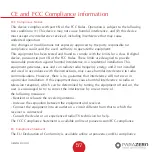
CE and FCC Compliance information
FCC Compliance Notice
This device complies with part 15 of the FCC Rules. Operation is subject to the following
two conditions: (1) This device may not cause harmful interference, and (2) this device
must accept any interference received, including interference that may cause
undesired operation.
Any changes or modifications not expressly approved by the party responsible for
compliance could void the user’s authority to operate the equipment.
This equipment has been tested and found to comply with the limits for a class B digital
device, pursuant to part 15 of the FCC Rules. These limits are designed to provide
reasonable protection against harmful interference in a residential installation. This
equipment generates, uses and can radiate radio frequency energy and if not installed
and used in accordance with the instructions, may cause harmful interference to radio
communications. However, there is no guarantee that interference will not occur in
a particular installation. If this equipment does cause harmful interference to radio or
television reception, which can be determined by turning the equipment off and on, the
user is encouraged to try to correct the interference by one or more of
the following measures:
- Reorient or relocate the receiving antenna.
- Increase the separation between the equipment and receiver.
- Connect the equipment into an outlet on a circuit different from that to which the
receiver is connected.
- Consult the dealer or an experienced radio/TV technician for help.
The FCC Compliance Statement is available online at parazero.com/FCC-compliance
EU Compliance Statement
The EU Declaration of Conformity is available online at parazero.com/EU-compliance
GRIZIM STUDIO
Содержание SAFEAIR Phantom ASTM
Страница 1: ...Phantom Parachute Manual ASTM Version...
Страница 8: ...8 SafeAir System Ports Switches LED USB C port System button Power switch ASTM port...
Страница 9: ...9 RC System Ports Switches LED Trigger switch Belt clip Lanyard hole Power switch Charging port...
Страница 12: ...12 Step Installation Remove the sticker cover from the placement stamp 3...
Страница 15: ...15 Step Installation Unbox your ASTM package and place it next to the drone together with the SafeAir Phantom 6...
Страница 17: ...17 Step Installation Remove the sticker cover from the Dual Lock placement stamp 8...
Страница 22: ...22 Match plugs to sockets Installation...
Страница 26: ...26 Step Installation Verify that the cord is not overlapping the placement stamp 16...
Страница 27: ...27 Step Installation Unhook the elastic band on the Add on device 17...
Страница 29: ...29 Step Installation Fasten the elastic band to keep the receiver unit in place verify it is secured 19...
Страница 30: ...30 Step Installation Connect the RC cable the smaller connector to the receiver s socket 20...
Страница 32: ...32 Step Installation ASTM cable connected 22...
Страница 33: ...33 Step Installation Firmly attach the Add on device to the placement stamp 23...
Страница 34: ...34 Step Installation Reconnect the rotors and verify that they can rotate freely 24...
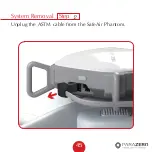
Страница 45: ...System Removal 45 Step Unplug the ASTM cable from the SafeAir Phantom 2...
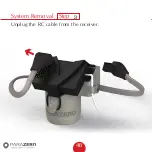
Страница 46: ...System Removal 46 Step Unplug the RC cable from the receiver 3...
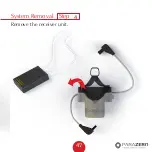
Страница 47: ...System Removal 47 Step Remove the receiver unit 4...
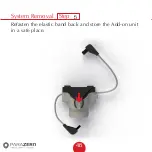
Страница 48: ...System Removal 48 Step Refasten the elastic band back and store the Add on unit in a safe place 5...
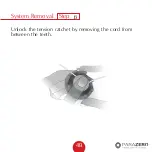
Страница 49: ...System Removal 49 Step Unlock the tension ratchet by removing the cord from between the teeth 6...
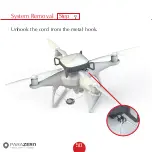
Страница 50: ...System Removal 50 Step Unhook the cord from the metal hook 7...
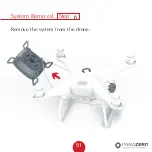
Страница 51: ...System Removal 51 Step Remove the system from the drone 8...
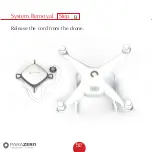
Страница 52: ...System Removal 52 Step Release the cord from the drone 9...
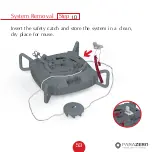
Страница 53: ...System Removal 53 Step Insert the safety catch and store the system in a clean dry place for reuse 10...

