


42
Deployment
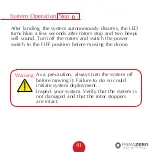
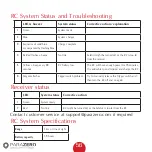
The SafeAir Mavic includes an Autonomous Triggering
System (ATS) that identifies most of the known critical
failures and triggers the system autonomously. Should
an emergency situation occur, the system deploys the
parachute, stops the rotors and sounds an audio-warning
buzzer to alert bystanders of the falling drone.
In addition to the ATS, the SafeAir system may also be
triggered manually by the RC signal through the receiver
unit installed on the Add-on device. In order to manually
trigger the system, press and hold the RC Trigger switch
until the RC LED turns solid red accompanied by 3 short
repeating beeps. The RC keeps sending a trigger signal for
3 seconds after the release of the Trigger switch.
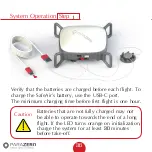
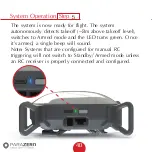
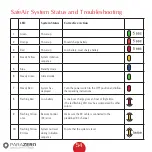
The system can only deploy when it is in Armed mode
(green LED). Following a deployment, the LED turns red.
To switch to Standby mode, reset the system by turning
the power switch OFF and then ON again. The LED
should turn blue after approximately 20 seconds.
Содержание SAFEAIR Phantom ASTM
Страница 1: ...Phantom Parachute Manual ASTM Version...
Страница 8: ...8 SafeAir System Ports Switches LED USB C port System button Power switch ASTM port...
Страница 9: ...9 RC System Ports Switches LED Trigger switch Belt clip Lanyard hole Power switch Charging port...
Страница 12: ...12 Step Installation Remove the sticker cover from the placement stamp 3...
Страница 15: ...15 Step Installation Unbox your ASTM package and place it next to the drone together with the SafeAir Phantom 6...
Страница 17: ...17 Step Installation Remove the sticker cover from the Dual Lock placement stamp 8...
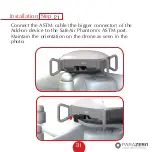
Страница 22: ...22 Match plugs to sockets Installation...
Страница 26: ...26 Step Installation Verify that the cord is not overlapping the placement stamp 16...
Страница 27: ...27 Step Installation Unhook the elastic band on the Add on device 17...
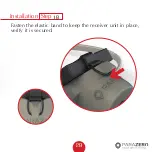
Страница 29: ...29 Step Installation Fasten the elastic band to keep the receiver unit in place verify it is secured 19...
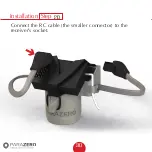
Страница 30: ...30 Step Installation Connect the RC cable the smaller connector to the receiver s socket 20...
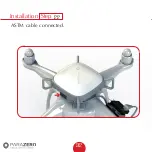
Страница 32: ...32 Step Installation ASTM cable connected 22...
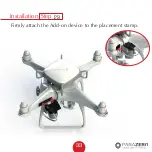
Страница 33: ...33 Step Installation Firmly attach the Add on device to the placement stamp 23...
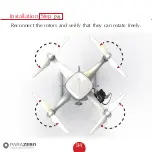
Страница 34: ...34 Step Installation Reconnect the rotors and verify that they can rotate freely 24...
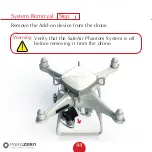
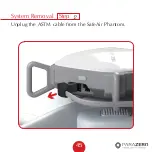
Страница 45: ...System Removal 45 Step Unplug the ASTM cable from the SafeAir Phantom 2...
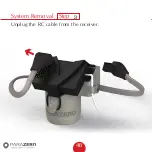
Страница 46: ...System Removal 46 Step Unplug the RC cable from the receiver 3...
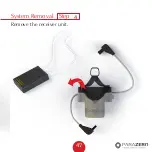
Страница 47: ...System Removal 47 Step Remove the receiver unit 4...
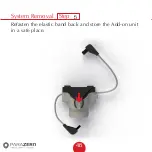
Страница 48: ...System Removal 48 Step Refasten the elastic band back and store the Add on unit in a safe place 5...
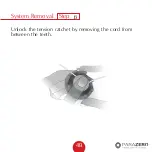
Страница 49: ...System Removal 49 Step Unlock the tension ratchet by removing the cord from between the teeth 6...
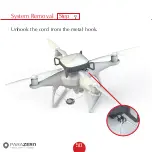
Страница 50: ...System Removal 50 Step Unhook the cord from the metal hook 7...
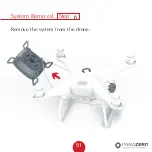
Страница 51: ...System Removal 51 Step Remove the system from the drone 8...
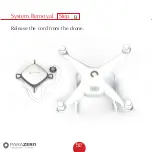
Страница 52: ...System Removal 52 Step Release the cord from the drone 9...
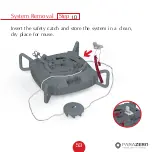
Страница 53: ...System Removal 53 Step Insert the safety catch and store the system in a clean dry place for reuse 10...


