background image


Page 44 


incommunicable.  If you have changed the IP Address of the Bridge, make 
sure that your Management/iSCSI Host computer is on the same subnet as 
the modified IP Address.  If you do not remember what settings you’ve 
modified on your Bridge, you can always return to factory default settings 
by pressing and holding the reset button down for 15 seconds. 


D.


Factory Defaults.   
 
The iS5xx iSCSI Bridge is initially sent out with factory default settings for your 
Web-based utility.  When you press and hold the reset button down for 15 
seconds, the factory default settings below are programmed back into your unit. 
 

a.


Login page. 

I.


Username: admin 

II.


Password: password 

III.


MAC Address:  

<unique MAC address programmed at


factory>


b.


Web Port page. 

I.


Use iSCSI Port Settings:  No 

II.


IP Address:  192.168.1.200 

III.


Subnet Mask:  255.255.255.0 

IV.


Gateway:  <

None

V.


Web Port:  4443 

c.


SCSI Bus page. 

I.


ID (00-15):  7 

II.


Termination:  On 

III.


Termination Power:  On 

IV.


Force Single Ended SCSI:  Off 

V.


Force Ultra SCSI:  Off 

d.


ISCSI Target page. 

I.


Obtain IP Automatically:  No 

II.


IP Address:  192.168.0.200 

III.


Subnet Mask:  255.255.255.0 

IV.


Gateway:  <

None

V.


iSCSI Name Prefix:  iqn.1995-10.com.paralan-<

last 4 digits 

of serial number

>: 

VI.


iSCSI Protocol Port:  3260 

VII.


Max Connections:  16 

VIII.


Authentication Method:  None 


Содержание iS520

Страница 1: ...Page 1 iS520 iS521 and iS550 User s Manual Version 1 3...

Страница 2: ...shall repair or replace the defective parts at Purchaser s cost and deliver the defective parts to Purchaser Abuse or Misuse This limited warranty shall not apply if the Product has been misused care...

Страница 3: ...he equipment is operated in a commercial environment This equipment generates uses and can radiate radio frequency energy and if not installed and used in accordance with the instruction manual may ca...

Страница 4: ...AR PURPOSE Paralan Corporation shall not be liable for errors contained herein or for incidental or consequential damages in connection with the furnishing performance or use of this material This doc...

Страница 5: ...figuring the iSCSI Bridge Directions on how to connect SCSI Ethernet devices to the iSCSI Bridge are also included herein Typographic Conventions When italic text is placed between less than and great...

Страница 6: ...n Table of Contents 1 2 2 16 06 35 36 42 Add description of power requirements for iS520 iS521 Change EMI RFI Certification to Class A Add how to order replacement power supply for iS520 1 3 2 21 06 A...

Страница 7: ...ral 23 4 7 Ethernet Cables 24 4 8 Connecting to the Ethernet Network 24 4 9 Power On Sequence 24 4 10 LEDs 25 4 11 Accessing Paralan s Web based Utility 26 5 CONFIGURING THROUGH WEB BASED UTILITY 28 5...

Страница 8: ...l the Status LED Light Emitting Diode on the bridge turns solid green A solid green on the Status LED indicates that the unit has fully booted and is ready for Ethernet communication If the Status LED...

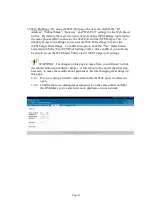
Страница 9: ...192 168 1 200 4443 enter php as the URL see Glossary and press enter The following Login page should appear 1 9 Enter the default Username and Password and click on the Login tab 1 9 1 Username admin...

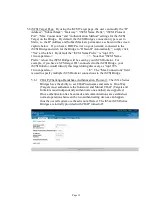
Страница 10: ...16 Figure B Modify the iSCSI Target Port settings accordingly Ensure that the iSCSI Host computer and the iS5xx iSCSI Bridge are on the same subnet This subnet must match the iSCSI Host machine wishin...

Страница 11: ...Page 11 1 12 Confirm changes 1 13 Once you ve confirmed changes the iSCSI Target page will renew with your updated settings...

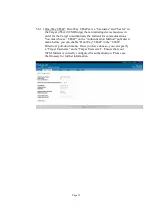
Страница 12: ...en you have successfully configured your iS5xx iSCSI Bridge If the SCSI bus settings see section 5 5 or the Web Port interface access see section 5 4 is to be changed you will need to re login See ste...

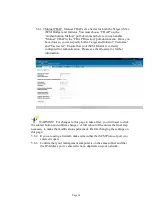
Страница 13: ...lt 1 18 Connect the iS5xx iSCSI Bridge s Ethernet port to your iSCSI Host computer via a CAT 5e or CAT 6 cable If your management computer is functioning as your iSCSI Host computer this step can be s...

Страница 14: ...Page 14 1 22 Power on your iSCSI Host computer Open the Microsoft Initiator Click on the Initiator Settings tab Modify your initiator node name accordingly...

Страница 15: ...Page 15 1 23 Click on the Target Portals tab Add an available portal...

Страница 16: ...Page 16 1 24 Enter an Address that matches the IP Address you entered in step 1 11 Enter the Socket port that matches the iSCSI Protocol Port you entered in step 1 11 Click OK...

Страница 17: ...Page 17 1 25 Your Target Portal is now configured...

Страница 18: ...d You will need to Log On to each one before your iSCSI Host computer is able to fully communicate with the SCSI targets If a target drive is to be permanently located use the Persistent Targets tab t...

Страница 19: ...llers DVD MO and CD jukeboxes 3 1 3 Allows full SCSI cable lengths on the SCSI side of the Bridge 3 1 4 SCSI LVD operation up to 160 MBYTES SEC using 68 pin high density P connector and conforms to th...

Страница 20: ...100MB sec throughput 3 1 26 The iS520 Stand Alone Box version provides a lockable 5 pin DIN power connector for added reliability 3 1 27 Supports One way and Mutual CHAP security 3 1 28 Ambient Tempe...

Страница 21: ...HOST COMPUTER Figure C T On Board Terminator 10 100 1000 ETHERNET If you are placing the iSCSI Bridge in the middle of the SCSI bus you must disable the terminators on the iS5xx see Figure D To disabl...

Страница 22: ...ally SCSI correct Also contact Paralan for our SCSI Quiet Cable data sheet Note the maximum number of devices allowed on the SCSI bus and the maximum bus cable length are determined by the bus speed a...

Страница 23: ...han 7 Each device should have a unique ID The iSCSI Bridge is set to ID 7 by default To change the default ID refer to section 5 5 4 5 5 Make sure that the last device on the bus e g the SCSI RAID dev...

Страница 24: ...4 8 Connecting to the Ethernet Network Simply connect your iSCSI Bridge to your management computer switch router or gateway For further Ethernet configuration instruction refer to section 4 11 4 9 Po...

Страница 25: ...he LED will return to a solid green state Please refer to table 3 below Description Color State Boot Loader OFF OFF Operating System N A SOLID Network Interface RED 5 BLINKS Web based Utility RED 3 BL...

Страница 26: ...ge has never been configured use steps 1 4 through 1 10 in the Quick Installation Guide section to access the utility For general access 4 11 1 If you are using a firewall ensure that the Web port is...

Страница 27: ...d appear Enter your Username and Password and click on the Login tab The default Username is admin and the default Password is password 4 11 6 You should now be at the Home page You are now ready to c...

Страница 28: ...1 3 FOR ANY CHANGE TO TAKE EFFECT THE UNIT MUST BE REBOOTED 5 2 Admin Page The first thing you should do after you ve accessed the Web based Utility is click on the Admin page and change your User Nam...

Страница 29: ...e Troubleshooting Appendix E of this book 5 3 2 The current firmware your unit is running is also displayed on this page 5 3 3 Finally you can reset your unit by clicking on the Reboot Device button O...

Страница 30: ...e Yes radial button associated with the Use iSCSI Port Settings label Once enabled you will only be able to access the Web based Utility via the iSCSI Target port settings WARNING For changes to this...

Страница 31: ...and the Bridge is in the middle of the SCSI bus i e your system has the topology of section 4 3 Figure D make sure that the ends of the bus are properly terminated 5 5 3 Terminator Power Paralan s iSC...

Страница 32: ...idge will be seen by your iSCSI Initiator For example if you have a SCSI target ID 3 connected to the iSCSI Bridge your iSCSI Initiator would identify this target during discovery as iqn 1995 10 com p...

Страница 33: ...e the Initiator for communications You must choose CHAP on the Authentication Method pull down menu before you can enable One Way CHAP in the CHAP Direction pull down menu Once you have done so you ca...

Страница 34: ...s correctly configured for authentication Please see the Glossary for further information WARNING For changes to this page to take affect you will need to click the submit button and confirm changes A...

Страница 35: ...using the Browse button and then click the Upgrade button Once you click the Upgrade button the Status LED will turn solid red during burning All files must be img files and are case sensitive Current...

Страница 36: ...o a solid green state before continuing to the next file you wish to update If you wish to update an additional file repeat steps 5 7 1 through 5 7 3 5 7 4 Once all uploads are complete reboot the uni...

Страница 37: ...uency 50 60 Hz b iS550 Rack Mountable version Input Voltage 100 240 VAC Input Current 1 2 A AC Input Frequency 50 60 Hz c iS521 Board version The iS521 board level unit requires a source of 5 Vdc 5 10...

Страница 38: ...hysical Dimensions a iS520 Stand Alone Box version Height 1 6 in 41 mm Width 5 6 in 142 mm Depth 9 25 in 235 mm b iS550 Rack Mountable version Height 1 72 in 43 7 mm Width 16 75 in 425 5 mm Depth 10 0...

Страница 39: ...Page 39 d iS521 Board version Dimensions are in inches...

Страница 40: ...Internet Protocol that serializes SCSI commands and converts them to TCP IP Ethernet iSCSI Host Computer Computer that contains your iSCSI Initiator iSCSI Target For the purpose of this document the i...

Страница 41: ...has three defined methods of parallel signal communications Low Voltage Differential LVD Single Ended SE and High Voltage Differential HVD Most LVD SCSI devices are Multimode which allows them to be b...

Страница 42: ...Page 42 URL Uniform Resource Locator The address that defines the route to a file on an Internet server URLs are typed into a Web browser to access Web pages and files...

Страница 43: ...SCSI cables are connected and the termination is properly placed If a problem is found resolve the issue and power the SCSI devices first and wait for them to be ready Then power the iS5xx iSCSI Brid...

Страница 44: ...econds the factory default settings below are programmed back into your unit a Login page I Username admin II Password password III MAC Address unique MAC address programmed at factory b Web Port page...

Страница 45: ...assistance contact Direktronik AB Box 234 149 23 Nyn shamn Sweden Phone 46 0 8 524 00 700 Fax 46 0 8 520 12 181 www direktronik se E Mail info direktronik se A replacement power supply for the iS520 c...

Отзывы: