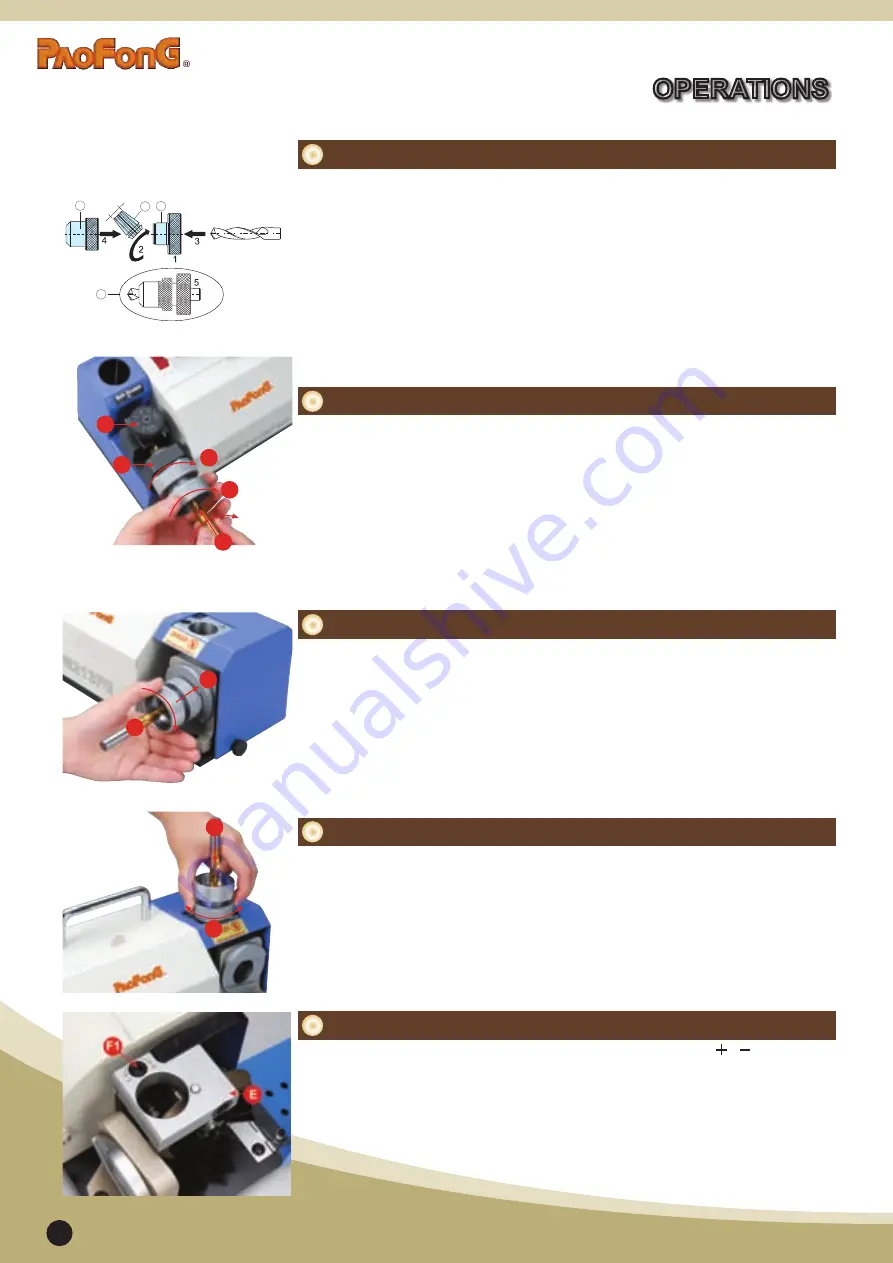
A
B
H
C
Φ
A
Procedures for changing the grinding wheel
1. Choose the collect accordingly to the drill diameter.
2. Slot the chosen collet Holder (B) at an appropriate angle.
3. Insert the drill into the connected collet and collet holder set, leave a 35mm extension
of the drill’s original body length, but do not tightened the drill too tight.
4. Connect the Collet Nut (A) to the unit of Collet (C) which is locked to the Collet holder
(B), and tighten the set, yet make aure the drill is not firmly tightened, but still able to
be tumed.
5. Complete the above steps, so the Collet Chuck Set (H) is ready for drilling.
B
Setting the drill length and position its movement for drilling
1. Reset the Scale Ring (C1): tum the ring all the way clockwise, and then turn it anti-
clockwise to the required drilling size indicated on C1.
2. Insert Collet Chuck Set (see 1) into Preset Length Bracket (C2) and make sure the pin
is locked to the slot.
3. Turn the Collet Chuck Set clockwise until it touches against the pin (see 2), and turn
the drill clockwise till it touches against the drill cutting edge.
4. Screw the ER Collet Holser (see 3) clockwise to tighten the drill.
5. Take out the Collet Chuck Set to check if the drill cutting edge is parallel to the slot of
ER clamping nut. If it’s not parallel, please repeat the above steps.
6.Attention
: For used drill, with less than 3/4 (three quarters) of its original length left, it is
advisable to adiust the 1~2mm scale up on the Scale Ring.
C
Point Angle Grinding for Drill
1. Insert the Collet Chuck Ser into Point Angle Bracket (see 1), and set the slot into the
pin.
2. Make the Collet Chuck Set touching the wheel lightly (see 2 ), turn clockwise and
reverse until the grinding sound disappears.
3. Take out the Collet Chuck Set, rotate it 180 degree, and repeat Step 1 and 2 to finish
the grinding for the two drill chisel edge angles.
D
Center Poinr Trimming Grinding for Drill
1. Insert Collet Chuck Ser (see 1) into the grinding unit and insert the slot into the pin (see
2).
2. Place Collet Chuck Set (see 1) upright and insert it into the top bracket to lightly touch
the wheel. Turn it clockwise and reverse until grinding noise disappears.
3. Take out Collet Chuck Set, rotate it 180 degree and repeat Step 1 and 2 to finish up
the grinding.
E
Adjustment for Trimming Angle
1. To obtain a larger trimming angle-turn the F1 Screw anti-clockwise ( ),( ).
OPERATIONS
2
1
Turn clockwise and
reverse
To obtain a larger trimming angle,
turn the screw clockwise.
Make it touching the wheel lightly
2
1
Turn clockwise and reverse until the
grinding sound disappears.
Push forward lightly.
C1
C2
1
3
2
Push forward to
the end, then turn
right to touch the
stopper.
Push forward to the top, then turn right to
the edge of the drill touch the block.
Turn it right
tightly.
9
Содержание PF-1225
Страница 2: ...ACCURRACY FAST EASY FAST END MILL RE SHARPENING MACHINE 4 flutes 3 flutes 2 flutes 1...
Страница 11: ...MEMO 10...


