2-6
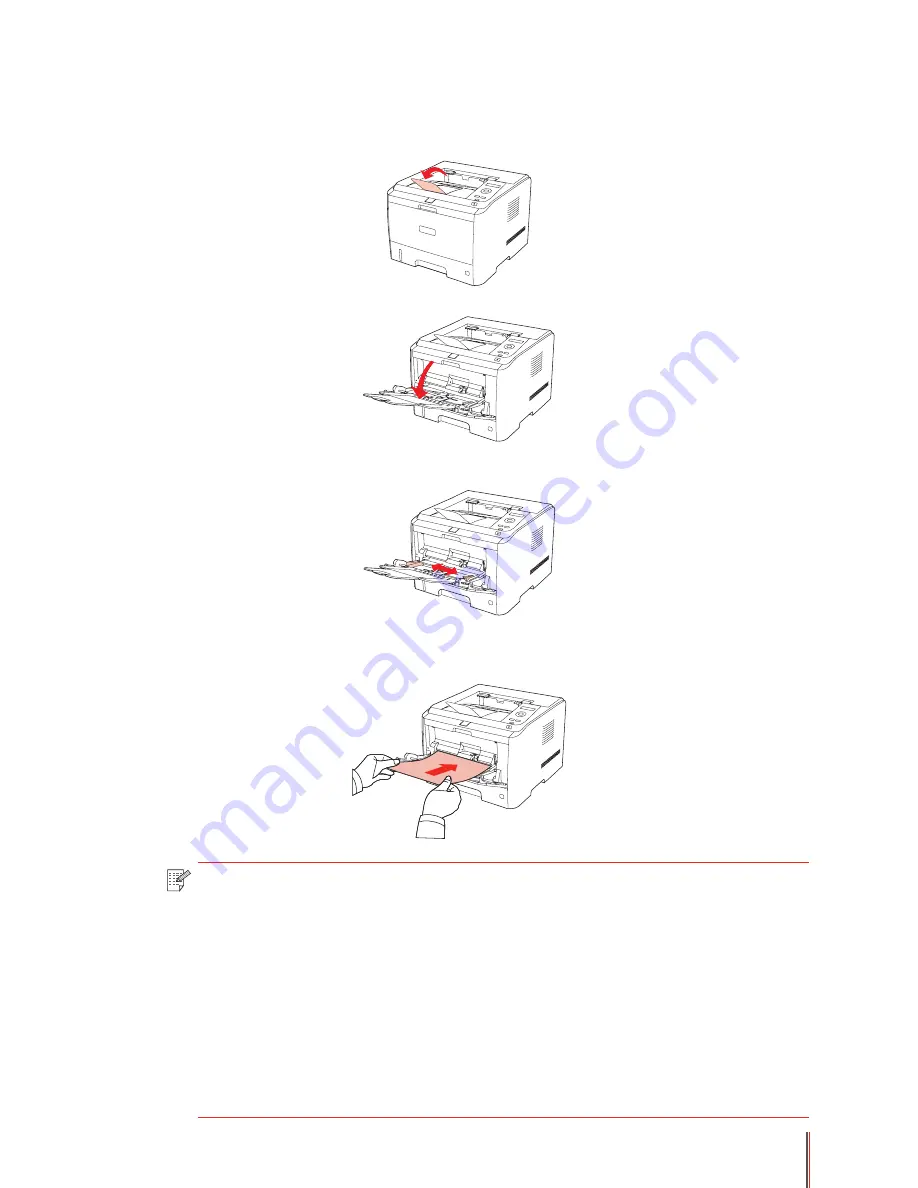
2.2.2. Loading into Multipurpose Input Tray
1. Raise the output tray to avoid the printed paper from slipping and falling, or immediately
remove the printed document after the printing is completed.
2. Open the Multipurpose Input Tray
3. Slide the paper guides of the multipurpose input tray to match both sides of the paper. Do
not exert too much force, otherwise it will cause paper jam or paper skew.
4. Put the print media (such as an envelope or transparency) into the multipurpose input tray
with two hands until the front end of the envelope or transparency contacts the correction
roller.
Note:
• When loading paper into the multipurpose input tray, and the paper source is
set up as Auto-select or Multipurpose Input Tray as specified, the printing will be
performed with the paper from the Multipurpose Input Tray as priority.
• 60 pieces of print media can be loaded into the multipurpose input tray each
time at maximum.
• Load the print media into the multipurpose input tray with the print-side up.
When loading, the top of the paper first enters into the multipurpose input tray.
• When using printed paper, please make the side to be printed (the blank side)
up.
• After printing, please immediately remove the paper, envelopes and
transparencies. Stacking paper or envelopes may cause a paper jam or the paper
curling.


