


33
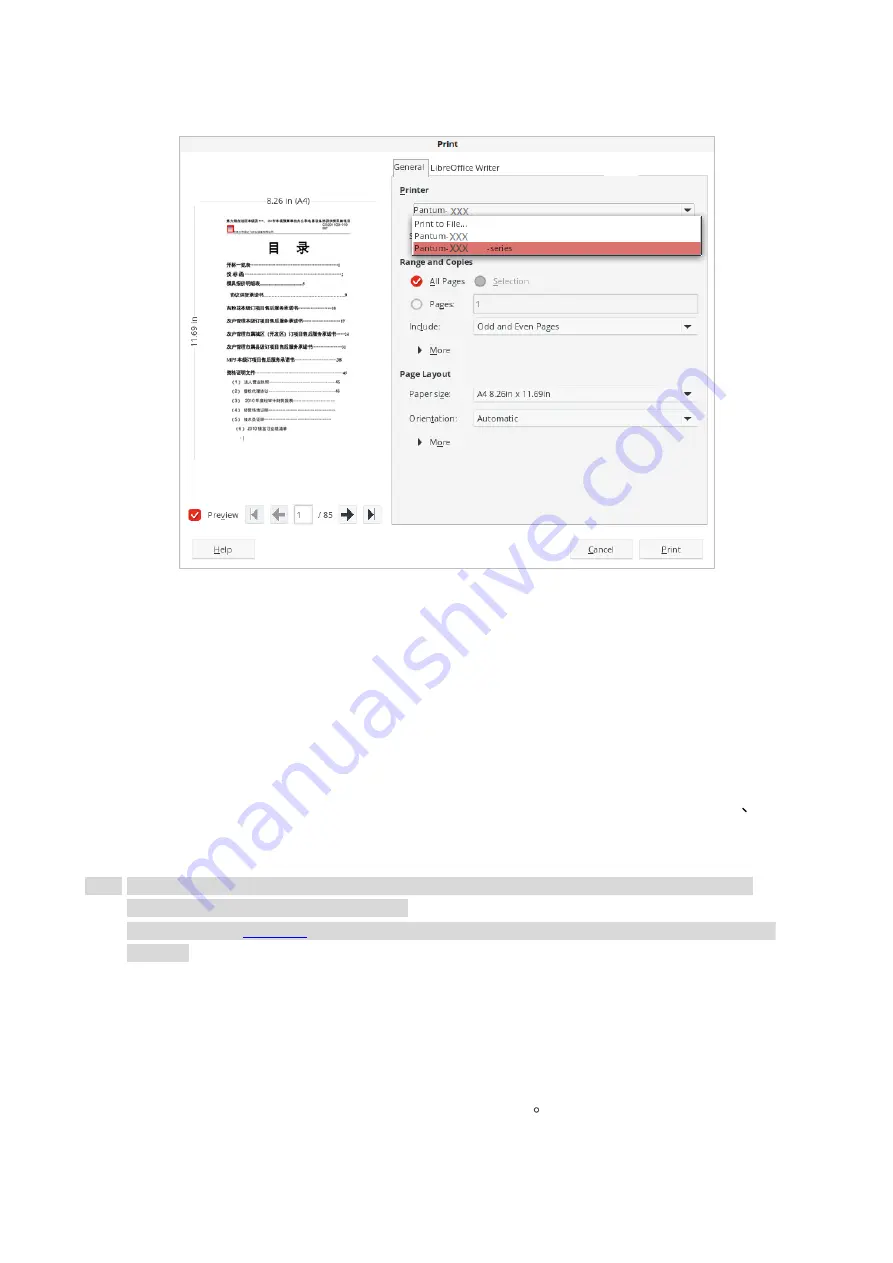
2. Select printer of the corresponding model.
3. Make the print settings according to your needs under the respective tabs such as “General”,
“Page Setup”, “Page Processing”, “Tasks”, “Color” and “Advanced”.
4. Single click “OK” to finish printing setup.
Automatic Two-Sided Printing
his machine supports automatic duplex printing of plain paper, thick paper 1, thick paper 2, thick
paper 3 and thick paper 4. Paper sizes supported for automatic duplex printing are as follows:
A3,
A4short side, A4-Long Side, A5-SHORT SIDE, A5-Long Side, A6 short side, JIS B5short side JIS
B5-Long Side, Executiveshort side, Executive-Long Side, Legal.
Note:
• Trying the automatic two-sided printing may damage the printer if some paper media are not
suitable for automatic two-sided printing.
• Please refer to
for paper loading and type of mediums that can be printed via auto
feed tray.
1. Open the file to be printed, click the “File” menu in the upper left corner, and select “Print” to
enable the print driver.
2. Select printer of the corresponding model.
3. Click the printer’s “Properties” and select “Duplex”.
4. Check the box to select the desired print effect as required.
Содержание CM9106 Series
Страница 1: ...Pantum CM9106 CM9706 Series Color Multifunction Printer...
Страница 82: ...67 ADF glass mat Scanner glass Scanner glass mat...
Страница 83: ...68...
Страница 84: ...69 3 Open the door B1 4 Wipe the following areas ADF glass in door B1...
Страница 88: ...73 2 Remove and then empty the punching box 3 Insert the punching box 4 Close the cover...
Страница 89: ...74 Replacing parts and consumables Replace the toner cartridge 1 Open the door A 2 Remove the toner cartridge...
Страница 90: ...75 3 Unpack the new toner cartridge 4 Shake the toner cartridge three times 5 Insert a new toner cartridge...
Страница 92: ...77 9 Insert the waste toner bottle and close the door...
Страница 97: ...82 5 Unpack the new waste toner bottle 6 Insert a new waste toner bottle and close the door...
Страница 103: ...88 3 Remove the door stop with the screwdriver stored inside the door A 4 Loosen the screws that hold the transfer belt...
Страница 107: ...92 Replace the ADF separation roller 1 Power off the printer 2 Remove the ADF separation pad...
Страница 108: ...93 3 Remove the ADF separation roller 4 Unpack the new separation roller 5 Insert a new separation roller...
Страница 110: ...95 2 Open the door B 3 Remove the ADF pick up and feed rollers 4 Unpack the new paper pickup and feed rollers...
Страница 113: ...98 Replace the staple box in booklet finisher 1 Open the door H and pull out the booklet maker 2 Remove the staple box...
Страница 117: ...102 7 Connect the tray connector to the printer 8 Open the feed tray 2 3 and 4...
Страница 121: ...106 Rear 7 Close the tray 8 Use the side handles to remove the printer from the 2 x 500 sheet tray...
Страница 122: ...107 9 Remove the stabilizers from the tray 10 Remove the rubber cover...
Страница 125: ...110 16 Align the 3000 sheet tray with the printer and then install the fixing column 17 Attach the tray cable with clips...
Страница 126: ...111 18 Connect the tray cable to the printer 19 Install the tray cable cover...
Страница 127: ...112 20 Slide the tray until it clicks into place 21 Install the stabilizers to the printer...
Страница 148: ...133 2 Open the door J 3 Open the door H...
Страница 151: ...136 Area H8 Area H9...
Страница 153: ...138 2 Remove the staple box holder 3 Remove the loose staples...
Страница 155: ...140 2 Remove the staple box holder 3 Remove the loose staples...
Страница 168: ...153...


