


22
Add Printer
Note:
• The following installation methods are provided for reference only due to variations in systems
• When a printer is added, the operating system will recognize and search for the printer in relation to its
own properties. The process may take a long time. Please be patient.
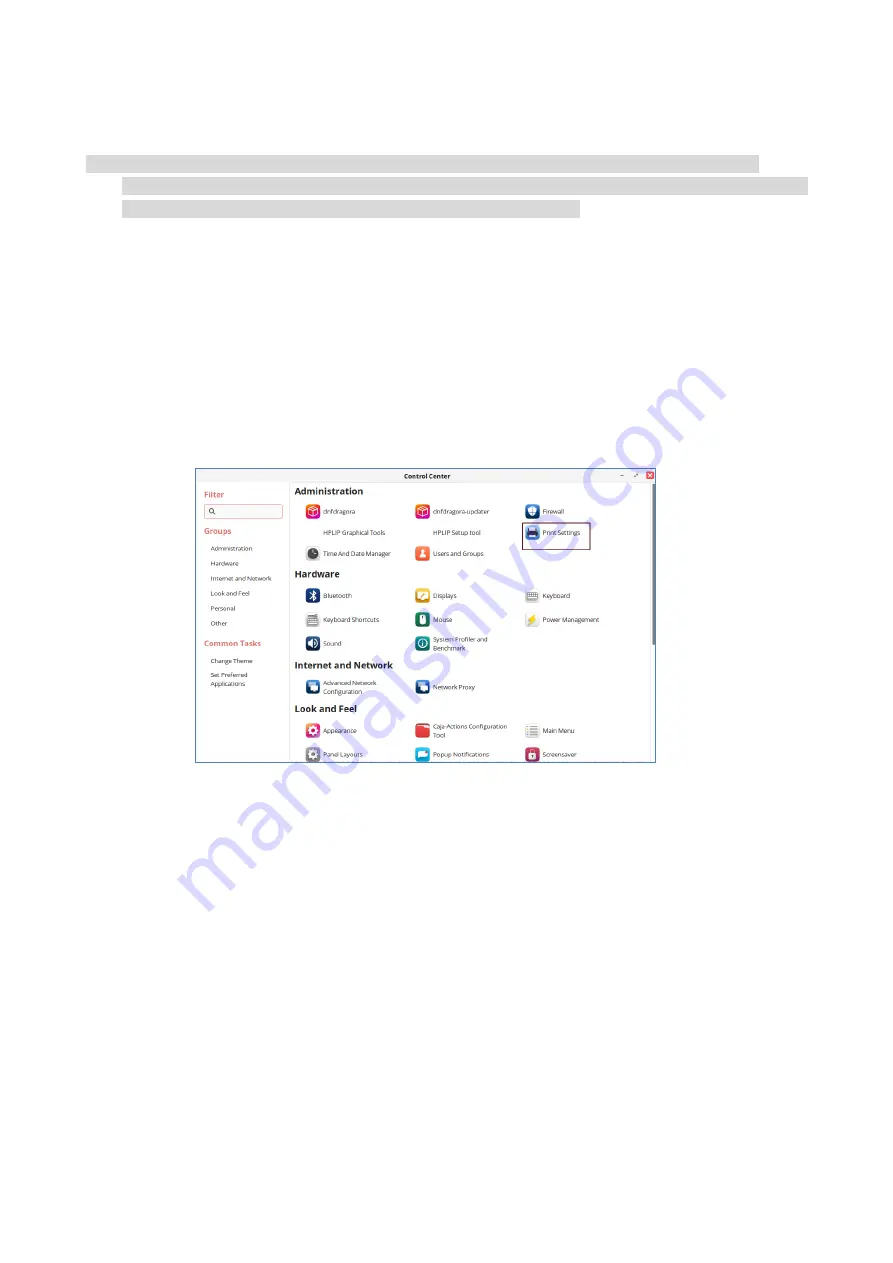
Install a USB printer
1. Upon successful installation of the driver, the printer is connected to the computer via a USB
cable. The system will automatically generate the USB printer icon for users to print.
2. If the USB printer icon is not automatically generated, you can also add a printer manually
according to the following steps:
1) Click “Start” and select “Control Panel” to enter the control panel interface.
2) On the control panel interface, select “Printer” to enter the printer settings interface.
Содержание CM9106 Series
Страница 1: ...Pantum CM9106 CM9706 Series Color Multifunction Printer...
Страница 82: ...67 ADF glass mat Scanner glass Scanner glass mat...
Страница 83: ...68...
Страница 84: ...69 3 Open the door B1 4 Wipe the following areas ADF glass in door B1...
Страница 88: ...73 2 Remove and then empty the punching box 3 Insert the punching box 4 Close the cover...
Страница 89: ...74 Replacing parts and consumables Replace the toner cartridge 1 Open the door A 2 Remove the toner cartridge...
Страница 90: ...75 3 Unpack the new toner cartridge 4 Shake the toner cartridge three times 5 Insert a new toner cartridge...
Страница 92: ...77 9 Insert the waste toner bottle and close the door...
Страница 97: ...82 5 Unpack the new waste toner bottle 6 Insert a new waste toner bottle and close the door...
Страница 103: ...88 3 Remove the door stop with the screwdriver stored inside the door A 4 Loosen the screws that hold the transfer belt...
Страница 107: ...92 Replace the ADF separation roller 1 Power off the printer 2 Remove the ADF separation pad...
Страница 108: ...93 3 Remove the ADF separation roller 4 Unpack the new separation roller 5 Insert a new separation roller...
Страница 110: ...95 2 Open the door B 3 Remove the ADF pick up and feed rollers 4 Unpack the new paper pickup and feed rollers...
Страница 113: ...98 Replace the staple box in booklet finisher 1 Open the door H and pull out the booklet maker 2 Remove the staple box...
Страница 117: ...102 7 Connect the tray connector to the printer 8 Open the feed tray 2 3 and 4...
Страница 121: ...106 Rear 7 Close the tray 8 Use the side handles to remove the printer from the 2 x 500 sheet tray...
Страница 122: ...107 9 Remove the stabilizers from the tray 10 Remove the rubber cover...
Страница 125: ...110 16 Align the 3000 sheet tray with the printer and then install the fixing column 17 Attach the tray cable with clips...
Страница 126: ...111 18 Connect the tray cable to the printer 19 Install the tray cable cover...
Страница 127: ...112 20 Slide the tray until it clicks into place 21 Install the stabilizers to the printer...
Страница 148: ...133 2 Open the door J 3 Open the door H...
Страница 151: ...136 Area H8 Area H9...
Страница 153: ...138 2 Remove the staple box holder 3 Remove the loose staples...
Страница 155: ...140 2 Remove the staple box holder 3 Remove the loose staples...
Страница 168: ...153...


