


Installation Guide
AT-VCC-IR3-KIT
3
6
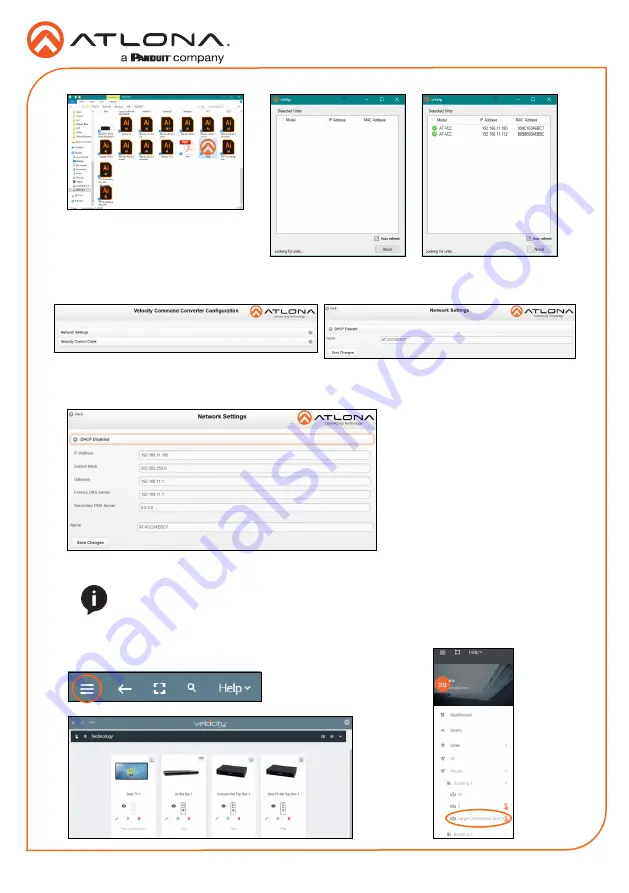
Double click on the VCC (to determine the correct one, look on the bottom of the VCC for
the MAC address). The PC default browser will open to the AT-VCC webGUI.
7
Select Network Settings to open the IP configuration page.
8
Select the DHCP Enabled header, this will disable DHCP and allows IP settings to be edited.
10 Press the Save Changes button.
9
Type in the IP details to
match the network details
of the Gateway. e.g. If the
Velocity gateway is located at
the IP of 192.168.12.15, then
the VCC should be set to an
IP within the 192.168.12.XXX
range that has not already
been used.
11 Open any browser on the network and type in the IP address of Velocity.
12 Select the
=
button from the top left corner and select
Sites
.
NOTE:
Connecting the VCC to Velocity can only be done once Velocity has been set
up. View the Velocity Manual for instructions.


