


Installation Guide
AT-VCC-IR3-KIT
2
2
3 4
1
5
6
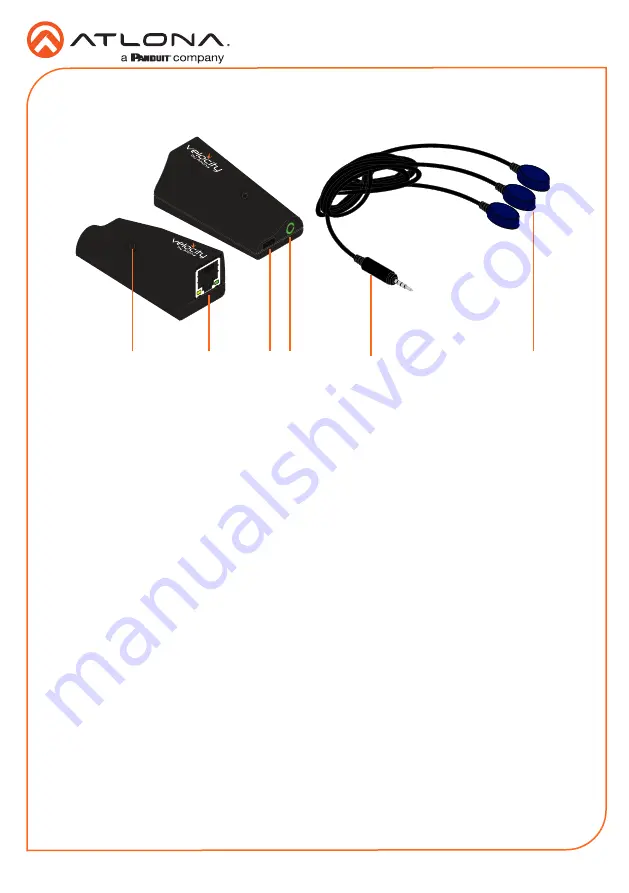
1
IR Window
Use to learn IR commands from a device’s
IR remote control.
2
Ethernet
Connect an Ethernet cable from this
port to the same network as the Velocity
Gateway.
3
USB
Can be used to power the VCC when PoE
is unavailable. Requires 5V DC @ 250mA
(not supplied).
4
3.5mm Port
Connect the included VCC-IR3 into this
port.
5
3.5mm Connector
Connect the 3.5mm connector to the
3.5mm port of the VCC.
6
3 x IR Emitters
Connect up to three 3.5mm IR receivers to
the 3-3.5mm ports.
Panel Description
IP
The AT-VCC is set to DHCP by default. If the network does not support DHCP, it will
automatically set the AT-VCC to the static IP of
192.168.1.70
after 30 seconds.
VHelp and webGUI
Velocity will find the VCC when scan network is used, but if the VCC needs to be set up off site
first, the software VHelp can be used.
1
Connect the IR three emitter cable into the 3.5mm port on the unit.
2
Connect the AT-VCC to a network switch (PoE is best if a PoE switch is not available, a
power injector or mini USB to USB cable may be used).
3
Download VHelp from the resource tab of https://atlona.com/product/AT-VCC-IR3-KIT.
4
Unzip the file to the local PC
5
Double-click the VHelp executable to open the program. Vhelp will start discovery as soon
as the program is opened.


