


Pluto User Manual v1.38
Page 55 of 66
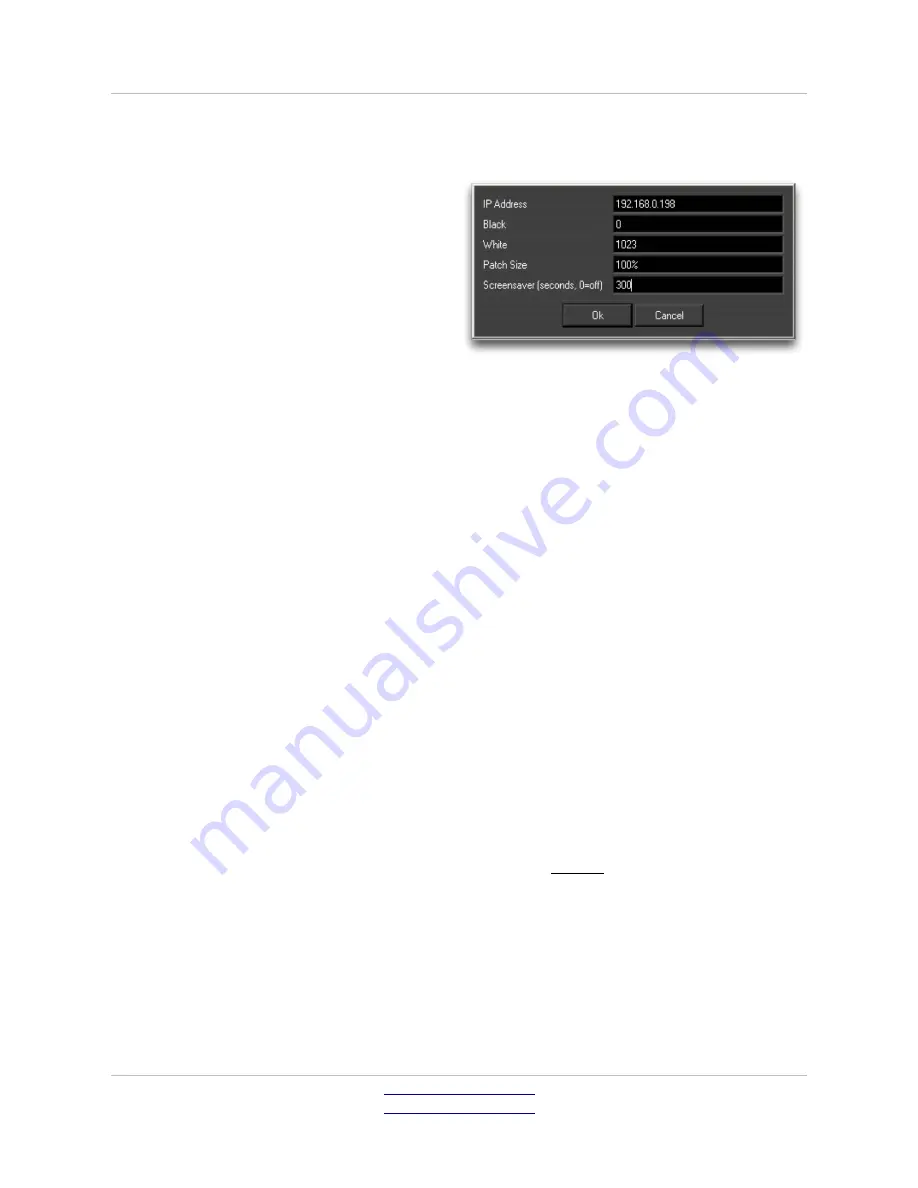
Click on the
Pluto Calibration
check box to bring up the Pluto Plugin parameter
box.
IP Address –
enter the IP address of
the Pluto required to generate patches.
Black and White –
Set the black and
white points in terms of 10bit
numbering in accordance with the
monitors capabilities. Generally Black
will be 0 or 64, White will be 1023 or
940. Luminance values of the Patches
will be scaled between these 2 values.
Patch Size –
Used to generate less than full screen patches. Particularly useful
on Plasma's where luminance values can vary widely depending on screen size.
Screensaver –
Pluto will automatically send
Black
to the monitor if it does not
receive a command to send another patch within the given period period in
seconds. This useful feature will protect the screen from Burn-ins in the event of
OS crash during profiling, or can enable the engineer to leave the profile
unattended overnight. If set to 0 the feature is disabled.
Once profiling commences, several things happen automatically to the Pluto:
1) Local (front panel) and remote (software) control are locked out. This is done
to prevent accidental interference of the procedure.
2) Black and White Legalisers are turned off
3) Linus Cages are turned off
4) Patches are generated in accordance with the size set in CineProfiler plugin
and sent to all outputs.
To regain control of the Pluto, CineProfiler must be closed. Once closed, the Pluto
resumes its original state and settings.
Note: if the Pluto is in Dual-head mode, profiling can only be carried out using
head A.
Pandora Technology
United Kingdom
www.pandora-int.com
October 2013


