background image

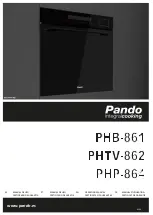
INOXPAN S.L. Pando


ES 


ES           MANUAL DE USO  
               CERTIFICADO DE GARANTÍA 


www.pando.es 

V23.1


PT 

MANUAL DE USO 
CERTIFICADO DE GARATIA 

EN 

OPERATING MANUAL  
CERTIFICATE OF GUARANTEE 

FR        MANUEL D'UTILISATION  
            CERTIFICAT DE GARANTIE 


Содержание PHB-861

Страница 1: ...S L Pando ES 1 ES MANUAL DE USO CERTIFICADO DE GARANT A www pando es V23 1 PT MANUAL DE USO CERTIFICADO DE GARATIA EN OPERATING MANUAL CERTIFICATE OF GUARANTEE FR MANUEL D UTILISATION CERTIFICAT DE G...

Страница 2: ...INOXPAN S L Pando ES 2...

Страница 3: ...talaci n que nos permiten adaptarnos a cualquier clase de cocina seg n las necesidades que se nos presenten Tambi n le mostramos nuestra colecci n de electrodom sticos imprescindibles en cualquier hog...

Страница 4: ...O DEL HORNO 19 Display touch control PHB 861 19 FUNCIONAMIENTO DEL HORNO 20 Display touch control PHTV 862 20 FUNCIONAMIENTO DEL HORNO 21 Display touch control PHB 864 21 TIPOS DE CALENTAMIENTO PHB 86...

Страница 5: ...ENIMIENTO DE SU HORNO 40 C mo limpiar su horno seg n la superficie 41 FUNCI N DE AUTOLIMPIEZA PIROL TICA 43 Antes de iniciar el modo pirol tico 44 Ajuste del modo de autolimpieza pirol tica 44 Se al d...

Страница 6: ...o ES 6 Cambio de l mpara 56 CONSEJOS Y TRUCOS 58 RECETAS COM NES 60 EFICIENCIA ENERG TICA EN 60350 1 63 COCINAR EN MODO ECO 65 SERVICIO AL CLIENTE 69 CONDICIONES GARANTIA PANDO 70 EXCLUSIONES DE LA GA...

Страница 7: ...INOXPAN S L Pando ES 7...

Страница 8: ...es El horno solo debe utilizarse para preparar alimentos y bebidas El horno debe ser supervisado durante su funcionamiento Este horno puede ser utilizado por ni os mayores de 8 a os y por personas con...

Страница 9: ...do conforme a la directiva Europea 2012 19 EU sobre los residuos de aparatos el ctricos y electr nicos WEEE DEL MEDIOAMBIENTE Y TRATAMIENTO DEL RESIDUO ELIMINACI N DEL EMBALAJE El embalaje est marcado...

Страница 10: ...n da ados solo deben ser realizadas por uno de nuestros t cnicos de postventa cualificados Si el horno est defectuoso desench felo de la red o desconecte el disyuntor de la caja de fusibles P ngase e...

Страница 11: ...GO DE INCENDIO 1 Los objetos combustibles almacenados en la cavidad pueden incendiarse No guarde nunca objetos combustibles en la cavidad No abra nunca la puerta del aparato si hay humo en su interior...

Страница 12: ...s No almacene alimentos en la cavidad 6 No enfriar el horno con la puerta abierta tras el funcionamiento a altas temperaturas deje que el horno se enfr e solo con la puerta cerrada Evite que cualquier...

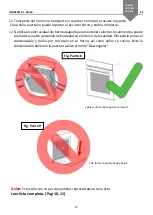
Страница 13: ...ntes los alimentos puede producirse un alto contenido de humedad en el interior de la cavidad Ello podr a provocar condensaci n y da os por corrosi n en su horno as como da ar su cocina Evite la conde...

Страница 14: ...NES DEL PRODUCTO Las dimensiones descritas est n en mm PHP 864 NO realizar las aperturas N O fa a as aberturas DO NOT drill any holes NE PAS r aliser d overture PHB 861 PHTV 862 PHP 864 AGUJEROS REQUE...

Страница 15: ...ruebe si el horno presenta da os antes de instalarlo y no lo conecte en caso afirmativo Antes de encender el horno elimine todo el material de embalaje y la pel cula adhesiva del horno Es necesario te...

Страница 16: ...que puedan provocar riesgo de incendio 5 Limpie las superficies lisas de la cavidad y la puerta con un pa o suave y h medo 6 Para eliminar el olor a nuevo caliente el horno estando vac o y con la puer...

Страница 17: ...illas laterales Ajuste de la hora Antes de utilizar el horno debe ajustarse la hora 1 Despu s de conectar el ctricamente el horno toque el s mbolo del reloj y a continuaci n podr ajustar el tiempo en...

Страница 18: ...s laterales Ajuste de la hora Antes de utilizar el horno debe ajustarse la hora 1 Despu s de conectar el ctricamente el horno toque el s mbolo del reloj y a continuaci n podr ajustar el tiempo en hora...

Страница 19: ...m s r pidamente 5 Selecci n de programas Pulse este s mbolo para cambiar el modo de calentamiento mant ngalo pulsado 3 s para cambiarlo r pidamente 6 Deslizador Desl celo para cambiar los valores de a...

Страница 20: ...lo pulsado 3s para cambiarlo r pidamente 4 Selecci n de programas autom ticos Ver p gina 66 5 Programas de cocci n al vapor Ver p gina 28 apartado Vapor 6 Precalentamiento r pido Util celo para precal...

Страница 21: ...pidamente 5 Selecci n de programas Pulse este s mbolo para cambiar el modo de calentamiento mant ngalo pulsado 3 s para cambiarlo r pidamente 6 Deslizador Desl celo para cambiar los valores de ajuste...

Страница 22: ...istribuye el calor uniformemente alrededor de la cavidad Calor radiante 150 250 Para asar peque as cantidades de comida y para dorar alimentos Coloque los alimentos en la parte central debajo del radi...

Страница 23: ...tos del proceso de calentamiento para garantizar el mejor rendimiento posible Ventilador de refrigeraci n El ventilador de refrigeraci n se conecta y desconecta seg n sea necesario El aire caliente sa...

Страница 24: ...horno se calentar seg n a lo que usted haya cambiado Si desea cambiar el tiempo de cocci n durante el proceso de cocci n toque y modif quelo mediante el control deslizante o el s mbolo Despu s del ca...

Страница 25: ...orno est funcionando o no Realizando una pulsaci n larga durante 3 segundos en el s mbolo podr activar y desactivar el bloqueo Cuando el bloqueo est activado aparecer el simbolo de candado en la panta...

Страница 26: ...dedor de la cavidad Calor radiante 150 250 Para asar peque as cantidades de comida y para dorar alimentos Coloque los alimentos en la parte central debajo del radiador del grill Grill doble y ventilad...

Страница 27: ...garantizar el mejor rendimiento posible Ventilador de refrigeraci n El ventilador de refrigeraci n se conecta y desconecta seg n sea necesario El aire caliente sale por encima de la puerta PRECAUCI N...

Страница 28: ...o y encienda el horno pulsando Antes de empezar aseg rese de que todo est bien preparado En este modo el icono se utiliza para cambiar la temperatura de la sonda de carne Y puede cambiar el ajuste tam...

Страница 29: ...ni los elementos calefactores Utilice guantes de cocina para retirar accesorios o utensilios de la cavidad y deje que el horno se enfr e Mantenga a los ni os a una distancia segura para evitar quemadu...

Страница 30: ...LIMPIAR LA CAJA DE AGUA Presione la caja de agua y s quela Presione la caja de agua y s quela Saque la junta de sellado y a ada agua Saque la junta de sellado y a ada agua Saque la tapa y limpie la c...

Страница 31: ...lcificaci n autom tica Para obtener los mejores resultados de limpieza y descalcificaci n del horno de vapor recomendamos utilizar detergente con citrato de sodio Siga las instrucciones del fabricante...

Страница 32: ...etiene antes de finalizar deber iniciarse todo el programa desde el paso 3 Saque la tapa de la caja de agua y a ada media bolsa de cido c trico Pulse el bot n de selecci n de programas autom ticos y s...

Страница 33: ...s alimentos en la parte central debajo del radiador del grill Grill doble y ventilador 50 250 Para asar alimentos planos y para dorar comida El ventilador distribuye el calor uniformemente alrededor d...

Страница 34: ...e caliente 4 Para que la distribuci n del calor en la cavidad sea lo m s uniforme posible durante Calentar con ventilador el ventilador funcionar en determinados momentos del proceso de calentamiento...

Страница 35: ...slizante Despu s del cambio si no hay ninguna otra acci n despu s de 6 segundo el horno se calentar seg n a lo que usted haya cambiado Si desea cambiar el tiempo de cocci n durante el proceso de cocci...

Страница 36: ...o el horno est funcionando o no Realizando una pulsaci n larga durante 3 segundos en el s mbolo podr activar y desactivar el bloqueo Cuando el bloqueo est activado aparecer un en la barra de estado DE...

Страница 37: ...introducidos directamente en los estantes pueden extraerse aproximadamente hasta la mitad sin peligro de que se vuelquen Los accesorios introducidos en los estantes con las gu as telesc picas pueden e...

Страница 38: ...sta la mitad hasta que se bloquean en su sitio La funci n de bloqueo impide que los accesorios se inclinen por la gravedad de los alimentos y de los propios accesorios mientras se extraen Los accesori...

Страница 39: ...de alcanzar la temperatura seleccionada se sabe que se ha alcanzado dicha temperatura ya que la luz se apaga autom ticamente en el primer encendido No utilice papel reflectante como papel de aluminio...

Страница 40: ...artimento de cocci n despu s de cada uso De este modo se evitar que se incruste suciedad 2 Elimine siempre inmediatamente los restos de cal grasa almid n y alb mina p ej clara de huevo 3 Elimine inmed...

Страница 41: ...ntrol Agua jabonosa caliente Limpiar con un pa o de cocina y a continuaci n secar con un pa o suave No utilice limpiacristales ni raspa vidrios Paneles de las puertas Agua jabonosa caliente Limpiar co...

Страница 42: ...No quitar Agua jabonosa caliente Limpiar con un pa o de cocina No restregar Cubierta de la puerta de acero inoxidable Limpiador de acero inoxidable Observe las instrucciones del fabricante No utilice...

Страница 43: ...za No toque la puerta del horno Deje que el horno se enfr e Mantenga a los ni os discapacitados y ancianos sin capacidad de autocuidado alejados del aparato Riesgo de da os para la salud El modo pirol...

Страница 44: ...la puerta del horno bordes del compartimento de cocci n en y la 3 Antes de iniciar la funci n de limpieza elimine manualmente los restos de comida 2 puedan cumplir una larga vida til conseguir unos b...

Страница 45: ...Una vez finalizado el modo pir lisis Una vez que el compartimento de cocci n se haya enfriado utilice un pa o h medo para limpiar la ceniza que haya quedado en el compartimento de cocci n y alrededor...

Страница 46: ...do las palancas de bloqueo de bisagra est n abiertas la puerta del horno se puede desmontar mediante un movimiento angular Tal y como se puede ver en el video de desmontaje de puerta ATENCI N Cuando e...

Страница 47: ...1 Abra completamente la puerta del horno 2 Abra las dos palancas de bloqueo a la izquierda y a la derecha 3 Sujete la puerta con ambas manos por el lado izquierdo y derecho y mediante un movimiento a...

Страница 48: ...in resistencia Si nota alguna resistencia compruebe que las bisagras est n bien introducidas en los orificios 3 Abra completamente la puerta del horno Mientras abre la puerta del horno puede volver a...

Страница 49: ...ta que encaje de forma audible 4 Coloque la puerta del horno y ci rrela PRECAUCI N Al quitar la tapa de la puerta se liberan los cristales interiores de la puerta del horno que pueden moverse f cilmen...

Страница 50: ...la parte delantera de las gu as horizontalmente hacia el interior del horno siguiendo la direcci n de la flecha hasta que salga el elemento posteriormente podr sacar los ra les como en la imagen 2 Par...

Страница 51: ...las gu as telesc picas horizontalmente sobre el carril exterior 2 Gire las gu as telesc picas 90 grados en el sentido contrario al de las agujas del reloj para el lado derecho 3 Empuje hacia delante...

Страница 52: ...INOXPAN S L Pando ES 52 PHB 861 PHTV 862 PHP 864...

Страница 53: ...as gu as telesc picas Tome el lado izquierdo por ejemplo lo mismo para el lado derecho 1 Levante con fuerza un extremo de las gu as telesc picas 2 Levante todas las gu as telesc picas y ret relas haci...

Страница 54: ...e a trav s de un interruptor omnipolar adecuado a la intensidad a soportar y con una apertura m nima entre contactos de 3 mm parala desconexi n en casos de emergencia limpieza o cambio de la l mpara E...

Страница 55: ...trol El ventilador de enfriamiento sigue funcionando para evitar condiciones de alta humedad en la cavidad y enfriar el horno para su comodidad El ventilador de refrigeraci n se apagar autom ticamente...

Страница 56: ...horno de la red el ctrica o desconecte otro disyuntor de la caja de fusibles RIESGO DE QUEMADURAS El horno se calienta mucho No toque nunca las superficies interiores del horno ni los elementos calefa...

Страница 57: ...ando ES 57 Tapa de cristal Si la tapa de cristal de la l mpara hal gena est da ada debe cambiarse Puede obtener una tapa de cristal nueva en el servicio postventa LAMPARA DE ESQUINA LAMPARA LATERAL PH...

Страница 58: ...el est demasiado seco Aumente la temperatura 10 C ello puede reducir el tiempo de cocci n La comida tiene buen aspecto pero la humedad interior es demasiado alta Ajuste una temperatura 10 C m s baja e...

Страница 59: ...uncionamiento normal y depende del ajuste de la temperatura C mo calcular los ajustes del horno cuando el peso de un asado no viene dado por una receta Elija los ajustes junto al peso del asado y camb...

Страница 60: ...eja 1 Convencional 150 t d p 11 00 t h 60 00 Magdalenas Bandeja para magdalenas 1 Convencional 160 t d p 8 30 t h 30 00 Magdalenas Bandeja para magdalenas 1 Convencional con ventilador 150 t d p 8 30...

Страница 61: ...ja 2 Convencional 160 t d p 8 00 t h 10 00 Galletas de vainilla Bandeja 2 4 Convencional con ventilador 150 t d p 8 00 t h 14 00 PAN RECIPIENTE NIVEL MODO T C TIEMPO min Pan blanco 1 kg de harina Form...

Страница 62: ...0 1 80 85 No Tarta de manzana Forma de resorte 20 cm 160 1 70 80 No Pan 1 bandeja 210 1 30 35 S Pan 1 bandeja 190 1 30 35 S CARNE RECIPIENTE NIVEL MODO T C TIEMPO min Solomillo de ternera 1 6 KG Bande...

Страница 63: ...ecesario para la medici n cerrar la puerta como en el hogar incluso cuando el cable perturbe la funci n de sellado de la junta durante la medici n 6 Para asegurarse de que los datos energ ticos no afe...

Страница 64: ...200 13 Pan de croissant A02 4 Convecci n 180 11 Galletas A03 5 Convecci n 160 15 Carne asada A04 6 Grill doble ventilador 250 20 Bizcocho A05 7 Convencional 175 35 Bacalao A06 8 Convecci n 250 17 Milh...

Страница 65: ...LENTAR Jal 1 band ja 180 1 45 50 No Asado de cerdo 1 bandeja 200 1 80 85 No Clafoutis de cereza Forma redonda 200 1 55 60 No Carne asada 1 3 kg 1 bandeja 200 1 80 85 No Brownies Rejilla y placa de vid...

Страница 66: ...Energy Efficiency Index EEI ndice de Eficiencia energ tica EEI 81 9 Energy Efficiency Class Clase de Eficiencia energ tica A ACCESSORIES ACCESORIOS Flat tray 30 Bandeja plana 30 Deep tray 50 Bandeja...

Страница 67: ...Energy Efficiency Class Clase de Eficiencia energ tica A ACCESSORIES ACCESORIOS Flat tray 30 Bandeja plana 30 Deep tray 50 Bandeja profunda 50 Reinforced Grid Parrilla Reforzada FEATURES PRESTACIONES...

Страница 68: ...y Index EEI ndice de Eficiencia energ tica EEI 81 9 Energy Efficiency Class Clase de Eficiencia energ tica A ACCESSORIES ACCESORIOS Flat tray 30 Bandeja plana 30 Deep tray 50 Bandeja profunda 50 Reinf...

Страница 69: ...ervicio postventa por si fuera necesario ATENCI N Este horno debe instalarse de acuerdo con la normativa vigente y debe utilizarse nicamente en un espacio bien ventilado Lea las instrucciones antes de...

Страница 70: ...y recomendaciones indicadas en los manuales del aparato Aver as o problemas producidos por una inadecuada instalaci n o por no disponer en el mobiliario de los espacios libres requeridos e indicados...

Страница 71: ...INOXPAN S L Pando PT 2...

Страница 72: ...s de instala o que nos permitem adaptar nos a qualquer tipo de cozinha de acordo com as necessidades que surjam Tamb m lhe mostramos a nossa colec o de aparelhos essenciais em qualquer casa Aparelhos...

Страница 73: ...rar controlo t ctil PHB 861 19 FUNCIONAMENTO DA FORNALHA 20 Ecr de controlo t ctil PHTV 862 20 FUNCIONAMENTO DA FORNALHA 21 Mostrar controlo t ctil PHB 864 21 TIPOS DE AQUECIMENTO PHB 861 22 UTILIZA O...

Страница 74: ...SA DE 39 MANUTEN O DO SEU FORNO 40 Como limpar o seu forno de acordo com a sua superf cie 41 FUN O DE AUTOLIMPEZA PIROL TICA 43 Antes de iniciar o modo pirol tico 44 Defini o do modo de auto limpeza p...

Страница 75: ...PT 6 Substitui o de l mpadas 56 DICAS E TRUQUES 58 RECEITAS COMUNS 60 EFICI NCIA ENERG TICA EN 60350 1 63 COZINHAR EM MODO ECOL GICO 65 SERVI O AO CLIENTE 71 PANDO CONDI ES DE GARANTIA 72 EXCLUS ES DA...

Страница 76: ...INOXPAN S L Pando PT 7...

Страница 77: ...forno s deve ser utilizado para a prepara o de alimentos e bebidas O forno deve ser supervisionado durante o funcionamento Este forno pode ser utilizado por crian as com mais de 8 anos de idade e por...

Страница 78: ...arelho marcado de acordo com a Directiva Europeia 2012 19 UE relativa aos res duos de equipamentos el ctricos e electr nicos REEE AMBIENTE E TRATAMENTO DE RES DUOS ELIMINA O DA EMBALAGEM A embalagem m...

Страница 79: ...r efectuada apenas por um dos nossos t cnicos p s venda qualificados Se o forno estiver defeituoso deslig lo da rede ou desligar o disjuntor na caixa de fus veis Por favor contacte o nosso servi o p s...

Страница 80: ...ade podem pegar fogo Nunca armazenar objectos combust veis na cavidade Nunca abrir a porta do aparelho se houver fumo no interior Desligar o aparelho e deslig lo da rede el ctrica ou desligar o disjun...

Страница 81: ...sua utiliza o N o armazenar alimentos h midos na cavidade fechada por per odos prolongados N o armazenar alimentos na cavidade 6 N o arrefecer o forno com a porta aberta ap s opera o a altas temperat...

Страница 82: ...eso do forno e pode partir se 12 Se utilizar o calor residual do forno desligado para manter os alimentos quentes pode ocorrer um elevado teor de humidade no interior da cavidade Isto pode causar dano...

Страница 83: ...DIMENS ES DO PRODUTO As dimens es descritas est o em mm PHP 864 N O fazer aberturas O N O faz como aberturas N O fa a buracos NE PAS r aliser d overture PHB 861 PHTV 862 PHP 864 FUROS NECESS RIOS PAR...

Страница 84: ...o forno quanto a danos antes da instala o e n o o ligar se estiver danificado Antes de ligar o forno remover todo o material de embalagem e pel cula adesiva do forno necess rio ter a tomada acess vel...

Страница 85: ...am causar um risco de inc ndio 5 Limpar as superf cies lisas da cavidade e da porta com um pano macio e h mido 6 Para eliminar o cheiro de novos alimentos aquecer o forno quando este estiver vazio e a...

Страница 86: ...talar as grelhas laterais Acertar o tempo Antes de utilizar o forno a hora deve ser definida 1 Ap s ligar o forno electricamente tocar no s mbolo do rel gio e depois pode acertar a hora em horas utili...

Страница 87: ...grelhas laterais Acertar o tempo Antes de utilizar o forno a hora deve ser definida 1 Ap s o forno ter sido ligado electricamente tocar no s mbolo do rel gio e depois pode definir o tempo em horas uti...

Страница 88: ...r o forno mais rapidamente 5 Selec o do programa Prima este s mbolo para alterar o modo de aquecimento mantenha premido durante 3 segundos para o alterar rapidamente 6 Deslizador Deslize para alterar...

Страница 89: ...antenha premido durante 3s para o alterar rapidamente 4 Selec o de programas autom ticos Ver p gina 66 5 Programas de vaporiza o Ver p gina 28 sec o Vapor 6 Pr aquecimento r pido Utilize o para pr aqu...

Страница 90: ...5 Selec o do programa Prima este s mbolo para alterar o modo de aquecimento mantenha premido durante 3 segundos para o alterar rapidamente 6 Deslizador Deslize para alterar os valores de configura o...

Страница 91: ...calor uniformemente volta da cavidade Calor radiante 150 250 Para grelhar pequenas quantidades de alimentos e para dourar os alimentos Colocar os alimentos na parte central debaixo do radiador da grel...

Страница 92: ...ante o Aquecimento com ventilador o ventilador funcionar em determinados momentos durante o processo de aquecimento para assegurar o melhor desempenho poss vel Ventilador de arrefecimento O ventilador...

Страница 93: ...ou o controlo deslizante Ap s a mudan a se n o houver mais ac o ap s 6 segundos o forno aquecer de acordo com o que mudou Se quiser alterar o tempo de cozedura durante o processo de cozedura toque e...

Страница 94: ...ctivar e desactivar a fun o de bloqueio quando o forno est ou n o em funcionamento poss vel activar e desactivar a fun o de bloqueio premindo durante 3 segundos o s mbolo Quando o cadeado activado o s...

Страница 95: ...alor radiante 150 250 Para grelhar pequenas quantidades de alimentos e para dourar os alimentos Colocar os alimentos na parte central debaixo do radiador da grelha Grelhador duplo e ventilador 50 250...

Страница 96: ...lador o ventilador funcionar em determinados momentos durante o processo de aquecimento para assegurar o melhor desempenho poss vel Ventilador de arrefecimento O ventilador de arrefecimento ligado e d...

Страница 97: ...nfigura o Depois prima a fun o defina a temperatura da mesma forma e ligue o forno premindo Antes de come ar certifique se de que tudo est bem preparado Neste modo o cone utilizado para alterar a temp...

Страница 98: ...ess rios ou utens lios da cavidade e permitir que o forno arrefe a Manter as crian as a uma dist ncia segura para evitar queimaduras Temporizador Pode utilizar a fun o temporizador tocando em Quando c...

Страница 99: ...ara fora Pressione a caixa de gua e puxe a para fora Retirar a junta de veda o e adicionar gua Retirar a junta de veda o e adicionar gua Retirar a tampa e limpar a caixa Colocar a tampa e a junta de v...

Страница 100: ...ica o autom tica Para melhores resultados na limpeza e descalcifica o do vaporizador recomendamos a utiliza o de detergente com citrato de s dio Seguir as instru es do fabricante indicadas na embalage...

Страница 101: ...cifica o parar antes da conclus o todo o programa deve ser reiniciado a partir do passo 3 Retirar a tampa da caixa da gua e adicionar meio saco de cido c trico Premir o bot o de selec o autom tica do...

Страница 102: ...car os alimentos na parte central debaixo do radiador da grelha Grelhador duplo e ventilador 50 250 Para grelhar alimentos planos e para dourar os alimentos O ventilador distribui o calor uniformement...

Страница 103: ...cavidade deve ser utilizado Grelhar ao ar quente 8 A fim de assegurar que a distribui o de calor na cavidade seja a mais uniforme poss vel durante o Aquecimento com ventilador o ventilador funcionar e...

Страница 104: ...o tipo de cozedura e a temperatura utilizando a fun o de forno ou o controlo deslizante Ap s a mudan a se n o houver mais ac o ap s 6 segundos o forno aquecer de acordo com o que mudou Se quiser alte...

Страница 105: ...e activar e desactivar a fun o de bloqueio quando o forno est ou n o em funcionamento poss vel activar e desactivar a fun o de bloqueio premindo durante 3 segundos o s mbolo Quando a fechadura activad...

Страница 106: ...ateleiras podem ser puxados para fora cerca de meio caminho sem o risco de tombar Os acess rios inseridos nas prateleiras com as calhas telesc picas podem ser retirados completamente sem o risco de to...

Страница 107: ...aminho at se trancarem no lugar A fun o de bloqueio impede a inclina o dos acess rios devido gravidade dos alimentos e dos pr prios acess rios enquanto est o a ser retirados Os acess rios devem ser in...

Страница 108: ...estiver vazio se n o for necess rio se necess rio coloque os alimentos no forno imediatamente ap s atingir a temperatura seleccionada sabe que a temperatura foi atingida porque a luz se apaga automat...

Страница 109: ...IDADO RISCO DE DANOS DA SUPERF CIE Aconselhamento 1 Limpar o compartimento de cozedura ap s cada utiliza o Isto evitar a acumula o de sujidade 2 Remover sempre imediatamente os res duos de cal gordura...

Страница 110: ...macio Painel de controlo gua com sab o quente Limpar com uma toalha de ch e depois secar com um pano macio N o utilizar produtos de limpeza para vidros ou raspadores de vidros Pain is das portas gua...

Страница 111: ...r gua com sab o quente Limpar com uma toalha de ch N o esfregar Cobertura da porta em a o inoxid vel Produto de limpeza para a o inoxid vel Observar as instru es do fabricante N o utilizar produtos de...

Страница 112: ...rta do forno Deixar arrefecer o forno Manter crian as deficientes e idosos sem capacidades de autocuidado afastados do aparelho Risco de danos para a sa de O modo pirol tico aquece o compartimento de...

Страница 113: ...de limpeza como tamb m garantir que os acess rios tenham uma longa vida til 2 Antes de iniciar a fun o de limpeza remover manualmente os res duos alimentares 3 Limpar o interior das bordas da porta d...

Страница 114: ...pto pausar e parar Ap s o modo de pir lise ter terminado Quando o compartimento de cozedura tiver arrefecido utilizar um pano h mido para limpar quaisquer cinzas deixadas no compartimento de cozedura...

Страница 115: ...ma das dobradi as da porta do forno tem uma alavanca de fecho Quando as alavancas da fechadura da dobradi a est o abertas a porta do forno pode ser desmontada por meio de um movimento angular Como pod...

Страница 116: ...se de que as alavancas de bloqueio est o sempre totalmente fechadas Desmontar a porta do forno 1 Abrir completamente a porta do forno 2 Abrir as duas alavancas de bloqueio esquerda e direita 3 Segura...

Страница 117: ...em resist ncia Se sentir alguma resist ncia verifique se as dobradi as est o correctamente inseridas nos orif cios 3 Abrir completamente a porta do forno Ao abrir a porta do forno pode verificar novam...

Страница 118: ...eu lugar at que encaixe de forma aud vel 4 Posicionar a porta do forno e fech la CUIDADO A remo o da tampa da porta liberta as placas de vidro interiores da porta do forno que podem facilmente mover s...

Страница 119: ...az lo da seguinte forma 1 Puxe a parte frontal das calhas horizontalmente em direc o ao interior do forno seguindo a direc o da seta at que o elemento saia os carris podem ent o ser puxados para fora...

Страница 120: ...A e B das corredi as telesc picas na horizontal sobre o carril exterior 2 Rodar as l minas telesc picas 90 graus no sentido contr rio ao dos ponteiros do rel gio para o lado direito 3 Empurrar os esc...

Страница 121: ...INOXPAN S L Pando PT 52 PHB 861 PHTV 862 PHP 864...

Страница 122: ...nas telesc picas Veja se o lado esquerdo por exemplo o mesmo para o lado direito 1 Levantar com for a uma das extremidades dos escorregas telesc picos 2 Levantar todos os escorregas telesc picos e pux...

Страница 123: ...rruptor omnipolar adequado para suportar a corrente e com uma abertura m nima entre contactos de 3 mm para desconex o em casos de emerg ncia limpeza ou substitui o da l mpada Em nenhuma circunst ncia...

Страница 124: ...esliga se automaticamente Os alimentos n o foram suficientemente cozinhados no tempo indicado na receita Tem sido utilizada uma temperatura diferente da temperatura da receita Verificar novamente as t...

Страница 125: ...Deixar sempre o forno arrefecer e manter as crian as a uma dist ncia segura 1 Colocar uma toalha na cavidade fria para evitar danos 2 Rodar a tampa de vidro no sentido contr rio ao dos ponteiros do re...

Страница 126: ...PT 57 Ta pa de cristal Se a tampa de vidro da l mpada de halog neo estiver danificada esta deve ser substitu da Uma nova cobertura de vidro pode ser obtida no servi o p s venda L MPADA CORNER LADO LAM...

Страница 127: ...do seco Aumentar a temperatura em 10 C isto pode reduzir o tempo de cozedura A comida tem bom aspecto mas a humidade no interior demasiado elevada Regular a temperatura 10 C mais baixa o que pode prol...

Страница 128: ...nde do ajuste da temperatura Como calcular as configura es do forno quando o peso de um assado n o dado por uma receita Escolher as configura es junto ao peso do assado e alterar ligeiramente a hora U...

Страница 129: ...1 00 t h 60 00 Cupcakes Tabuleiro para bolos 1 Convencional 160 p d t 8 30 a m t h 30 00 Cupcakes Tabuleiro para bolos 1 Convencional com ventilador 150 p d t 8 30 a m t h 30 00 Tarte de ma e levedura...

Страница 130: ...t 8 00 a m t h 41 00 P o Bandeja 1 Convencional 190 t d p 9 00 a m t h 30 00 CAKES CONTINUAD OR N VEL MODE T C TEMPO min Bolos pequenos 20 gr Bandeja Convencional 150 Bolos pequenos 40 gr Bandeja 2 4...

Страница 131: ...orco 1 2 kg Bandeja 1 Convencional 160 82 Galinha 1 7 kg Bandeja L2 prateleira L1 bandeja Convencional 78 TESTES ALIMENTARES DE ACORDO COM EN 60350 1 RECEITAS ACESS RIOS F N VEL TEMPO MIN PREHEAT Bolo...

Страница 132: ...do arm rio 5 necess rio que a medi o feche a porta como em casa mesmo que o cabo perturbe a fun o de veda o do selo durante a medi o 6 Para assegurar que os dados energ ticos n o afectam negativamente...

Страница 133: ...o 10 Pizza A01 Convec o 200 P o croissant A02 Convec o Bolachas A03 5 Convec o 160 Carne assada A04 Grelha dupla ventilador Bolo A05 Convencional 175 35 Bacalhau A06 8 Convec o Millefeuille de batata...

Страница 134: ...REHEAT Challah 1 banda ja 1 45 50 N o Carne de porco assada 1 bandeja 200 1 80 85 N o Clafoutis de cerejeira Forma redonda 200 1 55 60 N o Carne assada 1 3 kg 1 bandeja 200 1 80 85 N o Brownies Grelha...

Страница 135: ...watt x unidades Halog neo Poder de Ilumina o W 25 x 2 Fun o mais eficiente Fun o mais eficiente ECO ndice de Efici ncia Energ tica EEI ndice de Efici ncia Energ tica EEI 81 9 Classe de Efici ncia Ener...

Страница 136: ...inal W 3150 L mpada de Ilumina o watt x unidades Halog neo Poder de Ilumina o W 2 x 2 led Fun o mais eficiente Fun o mais eficiente ECO ndice de Efici ncia Energ tica EEI ndice de Efici ncia Energ tic...

Страница 137: ...do PT 68 Calor Inferior W Peitoril W 1070 Descongelar W Descongelar W 84 Fermenta o W Fermenta o W 1970 Programa com adi o de vapor indicado com Programa com adi o de vapor aqueles marcados com 3 prog...

Страница 138: ...NICOS e EST TICAS Pot ncia m xima nominal W Pot ncia m xima nominal W 3200 L mpada de Ilumina o watt x unidades Halog neo Poder de Ilumina o W 25 x 2 Fun o mais eficiente Fun o mais eficiente ECO ndic...

Страница 139: ...elhador duplo ventilador W Grelhador duplo ventilador W 2304 Grelhador Duplo W Grelhador Duplo W 2270 Pizza W Pizza W 2900 Calor Inferior W Peitoril W 1070 Descongelar W Descongelar W 84 Fermenta o W...

Страница 140: ...a no espa o abaixo se necess rio ATEN O Este forno deve ser instalado de acordo com os regulamentos em vigor e s deve ser utilizado num espa o bem arejado Ler as instru es antes de instalar ou utiliza...

Страница 141: ...menda es indicadas nos manuais do aparelho Avarias ou problemas causados por uma instala o inadequada ou por n o dispor dos espa os livres necess rios no mobili rio e indicados no manual de instala o...

Страница 142: ...INOXPAN S L Pando FR 2...

Страница 143: ...d installation qui nous permettent de nous adapter tout type de cuisine en fonction des besoins qui se pr sentent Nous vous pr sentons galement notre collection d appareils lectrom nagers essentiels...

Страница 144: ...e l cran PHB 861 19 FONCTIONNEMENT DU FOUR 20 cran de contr le tactile PHTV 862 20 FONCTIONNEMENT DU FOUR 21 Contr le tactile de l cran PHB 864 21 TYPES DE CHAUFFAGE PHB 861 22 USE OF THE PHB 861 OVEN...

Страница 145: ...ent nettoyer votre four en fonction de sa surface 41 FONCTION D AUTO NETTOYAGE PYROLYTIQUE 43 Avant de d marrer le mode pyrolytique 44 R glage du mode d autonettoyage pyrolytique 44 Signal de fin de m...

Страница 146: ...INOXPAN S L Pando FR 6 RECETTES COMMUNES 60 EFFICACIT NERG TIQUE EN 60350 1 63 CUISSON EN MODE CO 65 SERVICE LA CLIENT LE 69 CONDITIONS DE GARANTIE PANDO 70 EXCLUSIONS DE LA GARANTIE PANDO 70...

Страница 147: ...INOXPAN S L Pando FR 7...

Страница 148: ...uement l int rieur Le four ne doit tre utilis que pour la pr paration d aliments et de boissons Le four doit tre surveill pendant son fonctionnement Ce four peut tre utilis par des enfants de plus de...

Страница 149: ...est marqu conform ment la directive europ enne 2012 19 UE relative aux d chets d quipements lectriques et lectroniques DEEE ENVIRONNEMENT ET TRAITEMENT DES D CHETS L LIMINATION DE L EMBALLAGE L embal...

Страница 150: ...doivent tre effectu s uniquement par l un de nos techniciens apr s vente qualifi s Si le four est d fectueux d branchez le du secteur ou coupez le disjoncteur dans la bo te fusibles Veuillez contacte...

Страница 151: ...res RISQUE D INCENDIE 1 Les objets combustibles stock s dans la cavit peuvent prendre feu Ne stockez jamais d objets combustibles dans la cavit N ouvrez jamais la porte de l appareil s il y a de la f...

Страница 152: ...a cavit ferm e pendant des p riodes prolong es Ne conservez pas d aliments dans la cavit 6 Ne pas laisser refroidir le four avec la porte ouverte apr s un fonctionnement des temp ratures lev es laisse...

Страница 153: ...our et risque de se briser 12 Si vous utilisez la chaleur r siduelle du four teint pour maintenir les aliments au chaud un taux d humidit lev peut se produire l int rieur de la cavit Cela pourrait pro...

Страница 154: ...ONS DU PRODUIT Les dimensions d crites sont en mm PHP 864 Ne faites PAS d ouvertures N O fa a as aberturas NE PAS percer de trous NE PAS r aliser d ouverture PHB 861 PHTV 862 PHP 864 TROUS N CESSAIRES...

Страница 155: ...rifiez que le four n est pas endommag avant de l installer et ne le branchez pas s il est endommag Avant d allumer le four retirez tous les mat riaux d emballage et le film adh sif du four Il est n c...

Страница 156: ...enter un risque d incendie 5 Nettoyez les surfaces lisses de la cavit et de la porte avec un chiffon doux et humide 6 Pour liminer l odeur des aliments neufs chauffez le four lorsqu il est vide et que...

Страница 157: ...r les grilles lat rales R glage de l heure Avant d utiliser le four l heure doit tre r gl e 1 Apr s avoir allum le four lectriquement touchez le symbole de l horloge puis vous pouvez r gler l heure en...

Страница 158: ...s grilles lat rales R glage de l heure Avant d utiliser le four l heure doit tre r gl e 1 Apr s avoir mis le four sous tension touchez le symbole de l horloge et vous pouvez ensuite r gler le temps en...

Страница 159: ...auffer le four plus rapidement 5 S lection du programme Appuyez sur ce symbole pour changer le mode de chauffage appuyez et maintenez pendant 3 secondes pour le changer rapidement 6 Glissi re Faites g...

Страница 160: ...e de chauffage appuyez et maintenez pendant 3s pour le changer rapidement 4 S lection des programmes automatiques Voir page 66 5 Programmes de cuisson la vapeur Voir page 28 section Vapeur 6 Pr chauff...

Страница 161: ...ement 5 S lection du programme Appuyez sur ce symbole pour changer le mode de chauffage appuyez et maintenez pendant 3 secondes pour le changer rapidement 6 Glissi re Faites glisser pour modifier les...

Страница 162: ...ne dans la cavit Chaleur rayonnante 150 250 Pour griller de petites quantit s d aliments et pour faire dorer les aliments Placez les aliments dans la partie centrale sous le radiateur du gril Double g...

Страница 163: ...s de la porte Le ventilateur de refroidissement est mis en marche et arr t selon les besoins L air chaud Ventilateur de refroidissement pendant le processus de chauffage pour assurer les meilleures pe...

Страница 164: ...fonction de ce que vous avez modifi Si vous voulez modifier le temps de cuisson pendant le processus de cuisson touchez et modifiez le l aide du curseur ou du symbole Apr s la modification si aucune...

Страница 165: ...fonction de verrouillage lorsque le four est en service ou non Vous pouvez activer et d sactiver la fonction de verrouillage en appuyant longuement sur le symbole pendant 3 secondes Lorsque le verroui...

Страница 166: ...0 Pour griller de petites quantit s d aliments et pour faire dorer les aliments Placez les aliments dans la partie centrale sous le radiateur du gril Double gril et ventilateur 50 250 Pour griller les...

Страница 167: ...auffage pour assurer les meilleures performances possibles Ventilateur de refroidissement Le ventilateur de refroidissement est mis en marche et arr t selon les besoins L air chaud est souffl au dessu...

Страница 168: ...e et allumez le four en appuyant sur Avant de commencer assurez vous que tout est bien pr par Dans ce mode l ic ne permet de modifier la temp rature de la sonde viande Et vous pouvez modifier le r gla...

Страница 169: ...ts de cuisine lorsque vous retirez des accessoires ou des ustensiles de la cavit et laissez le four refroidir Gardez les enfants une distance s re pour viter les br lures Minuterie Vous pouvez utilise...

Страница 170: ...uyez sur la bo te eau et retirez la Retirez le joint d tanch it et ajoutez de l eau Retirez le joint d tanch it et ajoutez de l eau Retirer le couvercle et nettoyer la bo te Mettez en place le couverc...

Страница 171: ...omatique Pour obtenir les meilleurs r sultats lors du nettoyage et du d tartrage du steamer nous vous recommandons d utiliser un d tergent contenant du citrate de sodium Suivez les instructions du fab...

Страница 172: ...rr te avant la fin il faut recommencer tout le programme de l tape 3 Retirez le couvercle de la bo te eau et ajoutez un demi sac d acide citrique Appuyez sur le bouton de s lection automatique des pro...

Страница 173: ...trale sous le radiateur du gril Double gril et ventilateur 50 250 Pour griller les aliments plats et pour faire dorer les aliments Le ventilateur distribue la chaleur de mani re homog ne dans la cavit...

Страница 174: ...rillage air chaud 4 Afin de garantir une r partition aussi homog ne que possible de la chaleur dans la cavit pendant le Chauffage avec ventilateur le ventilateur fonctionnera certains moments pendant...

Страница 175: ...r s la modification si aucune autre action n est effectu e apr s 6 secondes le four chauffera en fonction de ce que vous avez modifi Si vous voulez modifier le temps de cuisson pendant le processus de...

Страница 176: ...ction de verrouillage lorsque le four est en service ou non Vous pouvez activer et d sactiver la fonction de verrouillage en appuyant longuement sur le symbole pendant 3 secondes Lorsque le verrouilla...

Страница 177: ...moiti sans risque de basculement Les accessoires ins r s dans les tag res avec les rails t lescopiques peuvent tre sortis compl tement sans risque de basculement condition que le poids du r cipient de...

Страница 178: ...on de verrouillage emp che les accessoires de basculer sous l effet de la gravit des aliments et des accessoires eux m mes pendant qu on les retire Les accessoires doivent tre ins r s correctement dan...

Страница 179: ...four lorsqu il est vide si ce n est pas n cessaire si n cessaire mettez les aliments dans le four imm diatement apr s avoir atteint la temp rature s lectionn e vous savez que la temp rature a t attein...

Страница 180: ...u tableau ATTENTION RISQUE DE DOMMAGES LA SURFACE Conseil 1 Nettoyez le compartiment de cuisson apr s chaque utilisation Cela permet d viter l accumulation de salet s 2 Il faut toujours liminer imm di...

Страница 181: ...au chaude savonneuse Nettoyez avec un torchon puis s chez avec un chiffon doux N utilisez pas de nettoyant pour vitres ou de grattoir pour vitres Panneaux de porte Eau chaude savonneuse Essuyez avec u...

Страница 182: ...savonneuse Essuyez avec un torchon Ne pas frotter Couvercle de porte en acier inoxydable Nettoyant pour acier inoxydable Respectez les instructions du fabricant N utilisez pas de produits d entretien...

Страница 183: ...a porte du four Laissez le four refroidir Tenez les enfants les personnes handicap es et les personnes g es ne pouvant pas s occuper d elles m mes l cart de l appareil Risque d atteinte la sant Le mod...

Страница 184: ...de nettoyage mais aussi de garantir la long vit des accessoires 2 Avant de lancer la fonction de nettoyage liminez manuellement les r sidus d aliments 3 Nettoyez l int rieur de la porte du four les b...

Страница 185: ...pause et de l arr t Apr s la fin du mode pyrolyse Une fois que le compartiment de cuisson a refroidi utilisez un chiffon humide pour essuyer les cendres restantes dans le compartiment de cuisson et au...

Страница 186: ...llage Lorsque les leviers de verrouillage des charni res sont ouverts la porte du four peut tre d mont e gr ce un mouvement angulaire Comme on peut le voir dans la vid o de d montage de la porte AVERT...

Страница 187: ...rte du four 1 Ouvrez compl tement la porte du four 2 Ouvrez les deux leviers de verrouillage gauche et droite 3 Tenez la porte avec les deux mains gauche et droite et tirez la vers le haut avec un mou...

Страница 188: ...s r sistance Si vous ressentez une r sistance v rifiez que les charni res sont correctement ins r es dans les trous 3 Ouvrez compl tement la porte du four En ouvrant la porte du four vous pouvez v rif...

Страница 189: ...e de mani re audible 4 Positionnez la porte du four et fermez la ATTENTION Le retrait du couvercle de la porte lib re les vitres int rieures de la porte du four qui peuvent facilement se d placer et c...

Страница 190: ...t les tapes suivantes doivent tre suivies 1 Tirer la partie avant des rails horizontalement vers l int rieur du four en suivant le sens de la fl che jusqu ce que l l ment sorte les rails peuvent alors...

Страница 191: ...glissi res t lescopiques horizontalement sur le rail ext rieur 2 Tournez les glissi res t lescopiques de 90 degr s dans le sens inverse des aiguilles d une montre pour le c t droit 3 Poussez les gliss...

Страница 192: ...INOXPAN S L Pando FR 52 PHB 861 PHTV 862 PHP 864...

Страница 193: ...res t lescopiques Prenez le c t gauche par exemple de m me pour le c t droit 1 Soulevez une extr mit des glissi res t lescopiques avec force 2 Soulevez toutes les glissi res t lescopiques et tirez le...

Страница 194: ...ment doit tre effectu par un interrupteur omnipolaire adapt au courant supporter et pr sentant une ouverture minimale entre les contacts de 3 mm pour la d connexion en cas d urgence de nettoyage ou de...

Страница 195: ...entilateur de refroidissement continue de fonctionner afin d viter les conditions de forte humidit dans la cavit et de refroidir le four pour votre confort Le ventilateur de refroidissement s teint au...

Страница 196: ...our du secteur ou coupez un autre disjoncteur dans la bo te fusibles RISQUE DE BRULURES Le four devient tr s chaud Ne touchez jamais les surfaces int rieures du four ou les l ments chauffants Laissez...

Страница 197: ...57 Ta pa de cristal Si le couvercle en verre de la lampe halog ne est endommag il doit tre remplac Un nouveau couvercle de verre peut tre obtenu aupr s du service apr s vente LAMPE D ANGLE LAMPE LAT...

Страница 198: ...Augmentez la temp rature de 10 C cela peut r duire le temps de cuisson La nourriture semble bonne mais l humidit l int rieur est trop lev e R glez la temp rature 10 C plus bas cela peut prolonger le t...

Страница 199: ...modifiez l g rement le temps Utilisez une sonde viande si possible pour d tecter la temp rature l int rieur de la viande Placez la t te de la sonde viande avec pr caution dans la viande en suivant les...

Страница 200: ...el 150 p m d t 11 00 t h 60 00 Cupcakes Plateau g teaux 1 Conventionnel 160 p d t 8h30 t h 30 00 Cupcakes Plateau g teaux 1 Conventionnel avec ventilateur 150 p d t 8h30 t h 30 00 Tarte aux pommes et...

Страница 201: ...el 160 p m d t 8h00 t h 10 00 Biscuits la vanille Plateau 2 4 Conventionnel avec ventilateur 150 p m d t 8h00 t h 14 00 PAN CONTAINER NIVEAU MODE T C TEMPS min Pain blanc 1 kg de farine Forme de bo te...

Страница 202: ...rt 20 cm 170 1 80 85 Non Tarte aux pommes Forme de ressort 20 cm 160 1 70 80 Non Pain 1 plateau 210 1 30 35 Oui Pain 1 plateau 190 1 30 35 Oui VIANDE CONTAINER NIVEAU MODE T C TEMPS min Aloyau de b uf...

Страница 203: ...l est n cessaire pour la mesure de fermer la porte comme la maison m me si le c ble perturbe la fonction d tanch it du joint pendant la mesure 6 Afin de s assurer que les donn es nerg tiques ne nuisen...

Страница 204: ...1 Convection 200 Pain croquant A02 Convection Biscuits A03 5 Convection 160 Viande r tie A04 Double gril ventilateur G teau A05 Conventionnel 175 35 Morue A06 8 Convection Millefeuille de pommes de te...

Страница 205: ...in PREHEAT Challah 1 bande ja 1 45 50 Non R ti de porc 1 plateau 200 1 80 85 Non Clafoutis aux cerises Forme ronde 200 1 55 60 Non R ti de b uf 1 3 kg 1 plateau 200 1 80 85 Non Brownies Grille et plaq...

Страница 206: ...issance lumineuse Lampe watt x unit s Halog ne Puissance d illumination W 25 x 2 Fonction la plus efficace Une fonction plus efficace ECO Indice d efficacit nerg tique IEE Indice d efficacit nerg tiqu...

Страница 207: ...ination W 2 x 2 led Fonction la plus efficace Une fonction plus efficace ECO Indice d efficacit nerg tique IEE Indice d efficacit nerg tique IEE Classe d efficacit nerg tique Classe d efficacit nerg t...

Страница 208: ...use Lampe watt x unit s Halog ne Puissance d illumination W 25 x 2 Fonction la plus efficace Une fonction plus efficace ECO Indice d efficacit nerg tique IEE Indice d efficacit nerg tique IEE 81 9 Cla...

Страница 209: ...phone du service apr s vente dans l espace ci dessous si n cessaire ATTENTION Ce four doit tre install conform ment la r glementation en vigueur et ne doit tre utilis que dans un espace bien ventil L...

Страница 210: ...ecommandations indiqu es dans les manuels de l appareil Pannes ou probl mes caus s par une installation inad quate ou par le fait de ne pas disposer des espaces libres n cessaires dans le mobilier et...

Страница 211: ...INOXPAN S L Pando EN 2...

Страница 212: ...land and built in Four types of installation that allow us to adapt to any type of kitchen according to the needs that arise We also show you our collection of essential appliances in any home Applian...

Страница 213: ...FURNACE 18 Display touch control PHB 861 18 OPERATION OF THE FURNACE 19 PHTV 862 touch control display 19 OPERATION OF THE FURNACE 20 Display touch control PHB 864 20 HEATING TYPES PHB 861 21 USE OF T...

Страница 214: ...w to clean your oven according to its surface 40 PYROLYTIC SELF CLEANING FUNCTION 42 Before starting pyrolytic mode 43 Pyrolytic self cleaning mode setting 43 Pyrolysis mode end signal 43 Oven door ca...

Страница 215: ...INOXPAN S L Pando EN 6 ENERGY EFFICIENCY EN 60350 1 62 COOKING IN ECO MODE 64 CUSTOMER SERVICE 68 PANDO WARRANTY CONDITIONS 69 EXCLUSIONS FROM THE PANDO WARRANTY 69...

Страница 216: ...he oven must only be used for the preparation of food and beverages The oven must be supervised during operation This oven can be used by children over 8 years of age and by persons with reduced physi...

Страница 217: ...the product This appliance is marked according to the European Directive 2012 19 EU on waste electrical and electronic equipment WEEE ENVIRONMENT AND WASTE TREATMENT DISPOSAL OF THE PACKAGING The pack...

Страница 218: ...ower cables must only be carried out by one of our qualified after sales technicians If the oven is defective disconnect it from the mains or switch off the circuit breaker in the fuse box Please cont...

Страница 219: ...d in the cavity may catch fire Never store combustible objects in the cavity Never open the door of the appliance if there is smoke inside Switch off the appliance and disconnect it from the mains or...

Страница 220: ...oid getting anything caught in the oven door Even if the door is left open only a crack the front of nearby furniture may be damaged over time Let the oven dry with the door open only if a lot of mois...

Страница 221: ...well as damage to your cooker Avoid condensation by opening the door or use the Defrost mode Do not force the door down Fig Point 6 Leave to cool with the door closed Note These are just a couple of...

Страница 222: ...PRODUCT DIMENSIONS The dimensions described are in mm PHP 864 Do NOT make openings N O fa a as aberturas DO NOT drill any holes NE PAS r aliser d overture PHB 861 PHTV 862 PHP 864 HOLES REQUIRED FOR...

Страница 223: ...or damage before installation and do not connect it if it is damaged Before switching on the oven remove all packaging material and adhesive film from the oven It is necessary to have the socket acces...

Страница 224: ...ould cause a fire hazard 5 Clean the smooth surfaces of the cavity and door with a soft damp cloth 6 To eliminate the smell of new food heat the oven when it is empty and the oven door is closed 7 Kee...

Страница 225: ...surfaces 3 Install the side grilles Setting the time Before using the oven the time must be set 1 After switching the oven on electrically touch the clock symbol and then you can set the time in hours...

Страница 226: ...s 3 Install the side grilles Setting the time Before using the oven the time must be set 1 After the oven has been electrically switched on touch the clock symbol and then you can set the time in hour...

Страница 227: ...t to preheat the oven more quickly 5 Programme selection Press this symbol to change the heating mode press and hold for 3 seconds to change it quickly 6 Slider Slide to change the setting values show...

Страница 228: ...hange the heating mode press and hold for 3s to change it quickly 4 Selection of automatic programmes See page 66 5 Steaming programmes See page 28 Steam section 6 Rapid preheating Use it to preheat t...

Страница 229: ...en more quickly 5 Programme selection Press this symbol to change the heating mode press and hold for 3 seconds to change it quickly 6 Slider Slide to change the setting values shown on the display 7...

Страница 230: ...e or several levels The fan distributes the heat evenly around the cavity Radiant heat 150 250 For grilling small quantities of food and for browning food Place the food in the central part under the...

Страница 231: ...performance Cooling fan The cooling fan is switched on and off as required Warm air is blown out above the door CAUTION Do not cover the ventilation slots Otherwise the oven may overheat In order for...

Страница 232: ...ange the cooking time during the cooking process touch and change it using the slider or the symbol After the change if there is no further action after 6 seconds the oven will operate at what you hav...

Страница 233: ...te the locking function when the oven is in operation or not You can activate and deactivate the locking function by long pressing the symbol for 3 seconds When the lock is activated the padlock symbo...

Страница 234: ...utes the heat evenly around the cavity Radiant heat 150 250 For grilling small quantities of food and for browning food Place the food in the central part under the grill radiator Double grill and fan...

Страница 235: ...t certain times during the heating process to ensure the best possible performance Cooling fan The cooling fan is switched on and off as required Warm air is blown out above the door CAUTION Do not co...

Страница 236: ...e way and switch on the oven by pressing Before you start make sure that everything is well prepared In this mode the icon is used to change the temperature of the meat probe And you can change the se...

Страница 237: ...oves when removing accessories or utensils from the cavity and allow the oven to cool down Keep children at a safe distance to avoid burns Timer You can use the timer function by touching When the tim...

Страница 238: ...x and pull it out Press the water box and pull it out Remove the sealing gasket and add water Remove the sealing gasket and add water Remove the cover and clean the box Fit the lid and sealing gasket...

Страница 239: ...results in cleaning and descaling the steamer we recommend using detergent with sodium citrate Follow the manufacturer s instructions indicated on the packaging It is suggested to use the descaling fu...

Страница 240: ...ing process stops before completion the entire programme must be restarted Remove the lid of the water box and add half a bag of citric acid Press the automatic programme selection button and select t...

Страница 241: ...venly around the cavity Radiant heat 150 250 For grilling small quantities of food and for browning food Place the food in the central part under the grill radiator Double grill and fan 50 250 For gri...

Страница 242: ...erformance Cooling fan The cooling fan is switched on and off as required Warm air is blown out above the door CAUTION Do not cover the ventilation slots Otherwise the oven may overheat In order for t...

Страница 243: ...the cooking time during the cooking process touch and change it using the slider or the symbol After the change if there is no further action after 6 seconds the oven will operate at what you have ch...

Страница 244: ...vate the locking function when the oven is in operation or not You can activate and deactivate the locking function by long pressing the symbol for 3 seconds When the lock is activated a will appear i...

Страница 245: ...e risk of them tipping over The accessories inserted into the shelves with the telescopic rails can be pulled out completely without the risk of them tipping over provided that the weight of the cooki...

Страница 246: ...ilting due to the gravity of the food and the accessories themselves while they are being removed The accessories must be inserted correctly into the cavity so that they are protected against tipping...

Страница 247: ...sary if necessary put the food in the oven immediately after reaching the selected temperature you know that the temperature has been reached because the light goes out automatically at the first igni...

Страница 248: ...tover sugary foods if possible while they are still hot 4 Use suitable grilling utensils e g a grill pan 5 Wash new sponges thoroughly before use Do not use 1 Strong or abrasive cleaning agents 2 Clea...

Страница 249: ...anel Hot soapy water Clean with a tea towel and then dry with a soft cloth Do not use glass cleaner or glass scrapers Door panels Hot soapy water Wipe with a tea towel and then dry with a soft cloth D...

Страница 250: ...remove Hot soapy water Wipe with a tea towel Do not rub Stainless steel door cover Stainless steel cleaner Observe the manufacturer s instructions Do not use stainless steel care products Remove the...

Страница 251: ...elderly people without self care capabilities away from the appliance Risk of damage to health The pyrolytic mode heats the cooking compartment to a very high temperature so that food residues are bu...

Страница 252: ...nt and the area around the gasket Do not rub or remove the gasket 4 While performing these operations make sure that the oven is switched off Setting the pyrolytic self cleaning mode 1 Switch on the o...

Страница 253: ...mp cloth to wipe off any ash left in the cooking compartment and around the door of the appliance NOTES During pyrolytic mode the frame inside the appliance may discolour This is normal and does not a...

Страница 254: ...clean and remove the door panels you can disassemble the oven door Each of the oven door hinges has a locking lever When the hinge lock levers are open the oven door can be dismantled by means of an a...

Страница 255: ...force Make sure that the locking levers are always fully closed Dismantling the oven door 1 Open the oven door fully 2 Open the two locking levers on the left and right 3 Hold the door with both hands...

Страница 256: ...and without resistance If you feel any resistance check that the hinges are correctly inserted into the holes 3 Open the oven door fully While opening the oven door you can recheck whether the hinges...

Страница 257: ...until it audibly clicks into place 4 Position the oven door and close it CAUTION Removing the door cover releases the inner glass panes of the oven door which can easily move and cause damage or inju...

Страница 258: ...oduct you should do so as follows 1 Pull the front part of the rails horizontally towards the inside of the oven following the direction of the arrow until the element comes out the rails can then be...

Страница 259: ...right side 1 Position points A and B of the telescopic slides horizontally on the outer rail 2 Turn the telescopic slides 90 degrees anticlockwise for the right hand side 3 Push the telescopic slides...

Страница 260: ...INOXPAN S L Pando EN 51 PHB 861 PHTV 862 PHP 864...

Страница 261: ...Removing the telescopic slides Take the left side for example the same for the right side 1 Lift up one end of the telescopic slides with force 2 Lift up all the telescopic slides and pull them back P...

Страница 262: ...The connection must be made through an omnipolar switch suitable for the current to be withstood and with a minimum opening between contacts of 3 mm for disconnection in cases of emergency cleaning or...

Страница 263: ...oling fan will turn off automatically The food has not been cooked sufficiently in the time indicated in the recipe A temperature different from the recipe temperature has been used Check the temperat...

Страница 264: ...oven or the heating elements Always allow the oven to cool down and keep children at a safe distance 1 Place a towel in the cold cavity to prevent damage 2 Turn the glass cover counterclockwise to re...

Страница 265: ...N S L Pando EN 56 Ta pa de cristal If the glass cover of the halogen lamp is damaged it must be replaced A new glass cover can be obtained from the after sales service CORNER LAMP SIDE LAMP PHB 861 PH...

Страница 266: ...the recipe The gilding is uneven Set the temperature 10 C lower this may extend the cooking time Use the Upper and lower heating mode on one level The cake is less golden on the bottom Choose a lower...

Страница 267: ...meat Place the meat probe head carefully into the meat following the manufacturer s instructions Ensure that the probe head is positioned in the centre of the largest part of the meat but not near a b...

Страница 268: ...Conventional 150 p m d t 11 00 t h 60 00 Cupcakes Cupcake tray 1 Conventional 160 p d t 8 30 a m t h 30 00 Cupcakes Cupcake tray 1 Conventional with fan 150 p d t 8 30 a m t h 30 00 Apple pie and yeas...

Страница 269: ...entional 160 p m d t 8 00 a m t h 10 00 Vanilla biscuits Tray 2 4 Conventional with fan 150 p m d t 8 00 a m t h 14 00 BREAD CONTAINER LEVEL MODE T C TIME min White bread 1 kg flour Box shape Box 1 Co...

Страница 270: ...20 cm 170 1 80 85 No Apple pie Spring form 20 cm 160 1 70 80 No Bread 1 tray 210 1 30 35 Yes Bread 1 tray 190 1 30 35 Yes MEAT CONTAINER LEVEL MODE T C TIME min Sirloin of beef 1 6 KG Tray 2 Double gr...

Страница 271: ...centre of the cabinet 5 It is necessary for the measurement to close the door as at home even if the cable disturbs the sealing function of the seal during the measurement 6 To ensure that the energy...

Страница 272: ...200 13 Croissant bread A02 4 Convection 180 11 Biscuits A03 5 Convection 160 15 Roast meat A04 6 Double grill fan 250 20 Cake A05 7 Conventional 175 35 Cod A06 8 Convection 250 17 Millefeuille of yell...

Страница 273: ...L TIME min PREHEAT Challah 1 band ja 180 1 45 50 No Roast pork 1 tray 200 1 80 85 No Cherry clafoutis Round shape 200 1 55 60 No Roast beef 1 3 kg 1 tray 200 1 80 85 No Brownies Grid and glass plate 1...

Страница 274: ...Rated maximum power W 2900 Light Power Lamp watt x units Halogen Illumination Power W 25 x 2 Most efficient function More efficient function ECO Energy Efficiency Index EEI Energy Efficiency Index EEI...

Страница 275: ...mination Power W 2 x 2 led Most efficient function More efficient function ECO Energy Efficiency Index EEI Energy Efficiency Index EEI 74 Energy Efficiency Class Energy Efficiency Class A ACCESSORIES...

Страница 276: ...W 3200 Light Power Lamp watt x units Halogen Illumination Power W 25 x 2 Most efficient function More efficient function ECO Energy Efficiency Index EEI Energy Efficiency Index EEI 81 9 Energy Effici...

Страница 277: ...in the space below if necessary ATTENTION This oven must be installed in accordance with current regulations and must only be used in a well ventilated space Read the instructions before installing or...

Страница 278: ...h the standards instructions and recommendations indicated in the appliance manuals Malfunctions or problems caused by an inadequate installation or by not having the required free spaces in the furni...

Страница 279: ...70 INOXPAN S L Pol Ind El Cros Av El Mol de les Mateves 11 Apdo Correos n 21 08310 ARGENTONA Barcelona Spain Tel 34 93 757 94 11 Fax 34 93 757 96 53 www pando es com pando pando es Export export pando...

Отзывы: