


2-1
Getting to Know the DP-C106
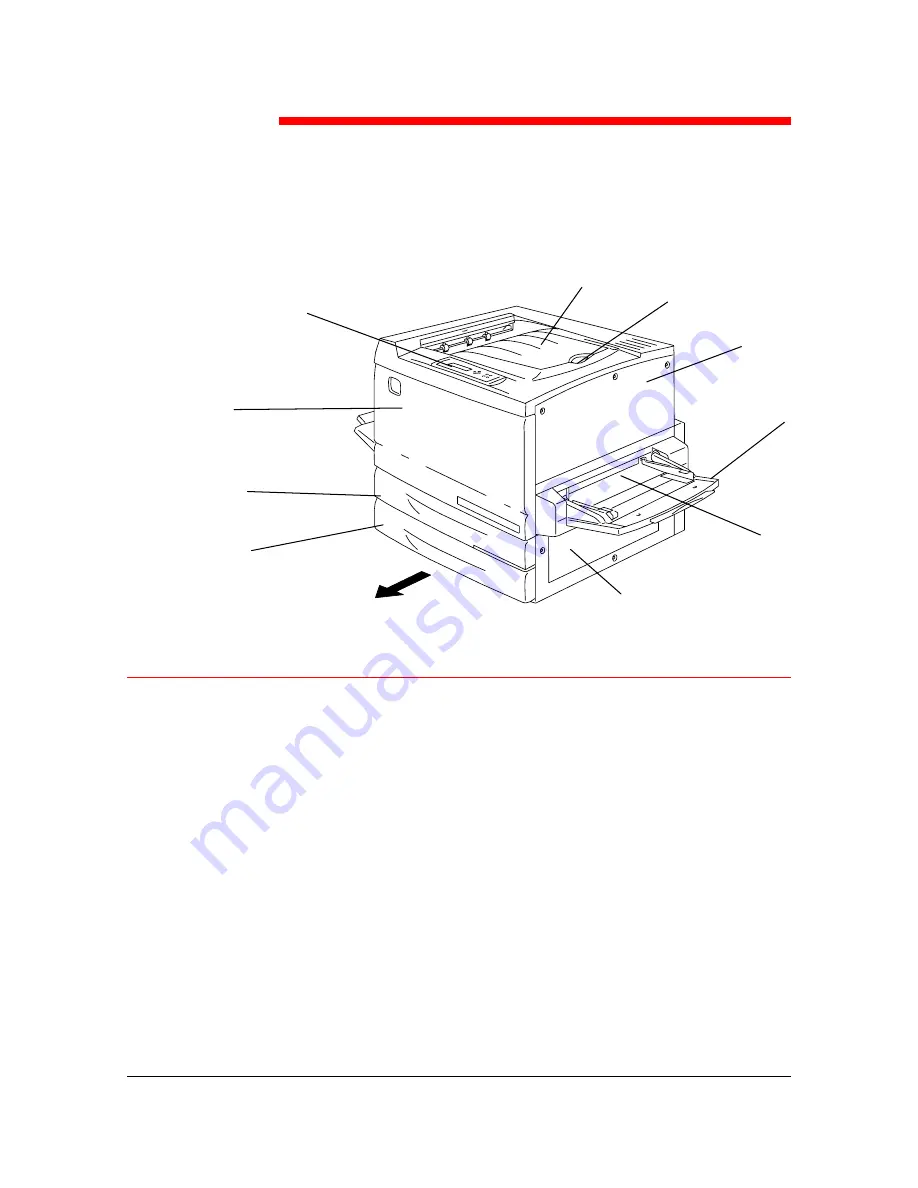
Printer, Front View
1.
Paper Tray 1
– place paper supply here
2.
Duplex Unit/Kit
– option that allows two-sided printing
3.
Front Cover
– open to access the Toner Cartridges and the Print/Copy
Cartridge
4.
Control Panel
– use to access the Printer menus and to view messages
5.
Printer Output Top Tray
– the prints are delivered here
6.
Paper Stop
– use to stop oversized prints from being pushed out of the
Output Tray. The Paper Stop is adjustable up to 17 x 11 inch (B4) paper
7.
Top Right-hand Cover
– open to add additional memory
8.
Bypass Tray
– use for transparencies, envelopes, postcards, or other
stock
9.
Bypass Transport
– open to access paper jams
10.
Paper Feed Area
– open to access paper jams
1
3
4
5
6
7
10
9
8
2
2
Содержание WORKIO DP-C106
Страница 29: ...Setting Up the DP C106 Installing the System Console 1 8 This page is intentionally left blank ...
Страница 39: ...Setting Up the DP C106 Unpacking the Printer 1 18 This page is intentionally left blank ...
Страница 59: ...Setting Up the DP C106 Loading Paper in the Paper Tray 1 38 This page is intentionally left blank ...
Страница 71: ...Setting Up the DP C106 Installing the Scanner with ADF 1 50 This page is intentionally left blank ...
Страница 84: ...Installing the 10 Bin Sorter Setting Up the DP C106 1 63 11 Slide the 10 Bin Sorter to the right into position ...


